Working with Thin Acrylic Sheets in Light Box Construction: Benefits, Challenges, and Installation Tips

When building cool and useful light boxes, thin acrylic sheets are amazing. They are light, so they’re simple to carry and set up, even for big projects. Also, they are strong and won’t break or chip easily. Did you know these sheets are so tough they’re even used in airplanes to make them better? That shows how dependable they are!
But let’s be honest, using thin acrylic sheets isn’t always easy. They can get scratched quickly, and cutting them needs care. Installing them can also be hard if you’re not paying attention. That’s why it’s super important to use the right methods. This helps your light box look great and work perfectly, just like you want it to.
Key Takeaways
Thin acrylic sheets are light and simple to use. They work well for many light box projects.
These sheets spread light evenly, so there are no bright spots.
Acrylic is tough and lasts longer than glass. It also resists UV damage.
Take care to avoid scratches or bending. Use the right tools and methods when installing.
Clean and maintain them often to keep them clear. This also stops dust from sticking due to static.
Benefits of Thin Acrylic Sheets
Lightweight and Easy to Install
Thin acrylic sheets are super light and simple to use. They come in sizes like 1/16" (1.5 mm) or 1/8" (3 mm). These thinner sheets are easy to carry and bend, making setup quick. Whether it’s a small craft or a big light box, you won’t need special tools to move them around.
Tip: Pick the right thickness for your project. Thin sheets work for light designs, while thicker ones are stronger.
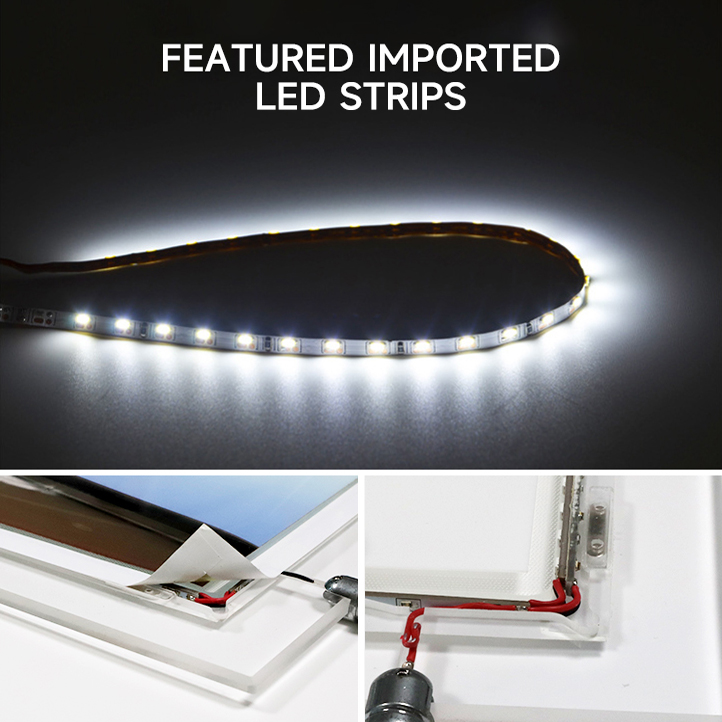
Great Light Diffusion for Even Glow
Thin acrylic sheets make light boxes glow evenly. They have special coatings or textures that spread light smoothly. This stops bright spots and uneven lighting. Instead, the light spreads out nicely, giving a clean and soft look.
Why they work so well:
High haze levels spread light evenly.
They let in lots of light and scatter it widely.
Fewer bulbs are needed since light covers more space.
If you want a modern, sleek design, these sheets are perfect.
Strong and Long-Lasting
Thin acrylic sheets are very strong and hard to break. They’re about 10 times tougher than glass, so they don’t shatter easily. They also resist UV rays, so they won’t turn yellow or wear out over time.
Material | Strength | Features |
|---|---|---|
Acrylic | 10x tougher than glass | Doesn’t shatter, light, and durable |
Glass | Normal strength | Breaks more easily under pressure |
These sheets last a long time, even in tough places. They can handle bumps but are still light enough to install easily.
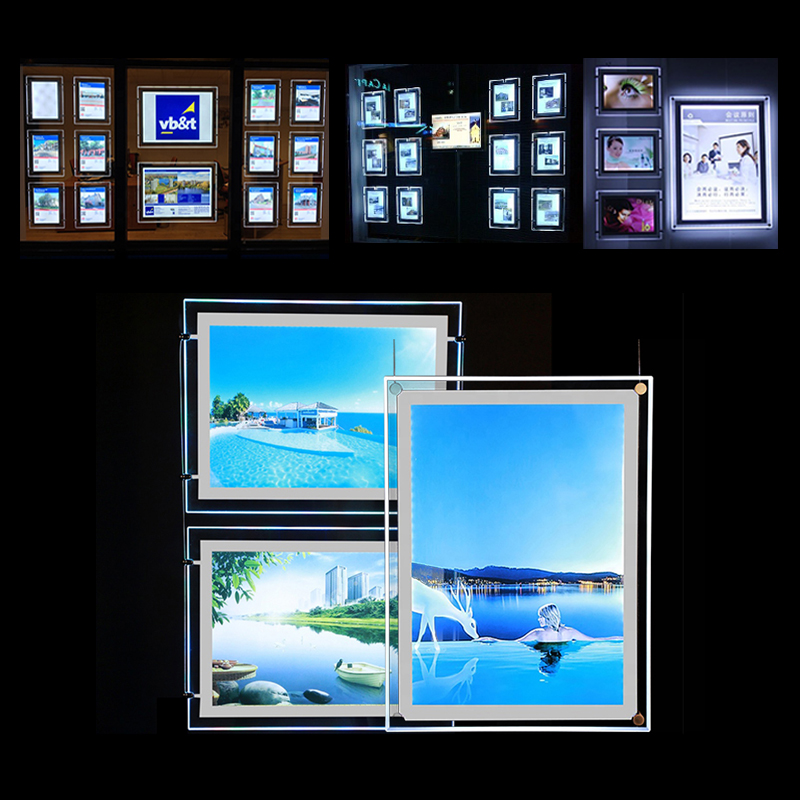
Versatility for Custom Designs
Thin acrylic sheets let you create many unique designs. You can bend or shape them into almost any style. This makes them great for modern or artistic light boxes. Their flexibility helps you try out different colors, patterns, and textures.
Here are some real-world examples:
Example Project | Details |
|---|---|
Color Indoor Ceiling Light Panels at Harlem Irving Plaza, Chicago | Shows thin acrylic sheets used in a custom light box system. |
LED Light Panels For New York Stock Exchange | Highlights thin acrylic sheets in professional custom light boxes. |
These projects prove how acrylic sheets can change spaces. They work well for both businesses and creative displays. You can get amazing results without spending too much.
Tip: Stack different acrylic sheets to add layers and depth to your design.
Cost-Effective Alternative to Glass
Thin acrylic sheets are a smart choice if you’re on a budget. They cost less than glass and are easier to handle. Plexiglass prices range from $10 to $30 per square foot. Tempered glass starts at $5.00 per square foot. Installing plexiglass costs $300 to $500, while tempered glass costs $150 to $200.
Even though glass seems cheaper at first, acrylic saves money over time. It’s light, so you don’t need heavy tools or extra help to install it. Plus, it lasts longer, so you won’t replace it often.
Note: Acrylic sheets are safer than glass. They don’t break easily, which lowers the chance of injuries during setup or use.
Challenges of Thin Acrylic Sheets
Prone to Scratches and Surface Damage
Thin acrylic sheets look great, but their surface can scratch easily. Even a small mistake, like dragging a tool across the sheet, can leave marks. Dust and dirt can also cause tiny scratches if you’re not careful during cleaning. To avoid this, always handle the sheets with clean hands or gloves. Use a soft, lint-free cloth when wiping them down.
Tip: Apply a protective film or coating to the surface before installation. This adds an extra layer of defense against scratches.
Risk of Warping Under Heat or Pressure
Heat can be a big problem for thin acrylic sheets. They’re sensitive to high temperatures, which can cause them to warp or even crack. The ideal temperature for bending acrylic is between 140°C and 160°C. If you go beyond this range, the material may bubble or lose its shape. Uneven heating is another issue. It creates weak spots that can snap when you try to bend the sheet.
To prevent warping, control the heat carefully. Use a heat gun or oven with adjustable settings. Avoid exposing the sheets to direct sunlight for long periods, as this can also lead to warping.
Key points to remember:
Overheating can cause bubbling or cracking.
Uneven heat weakens the material.
Proper ventilation helps manage heat buildup.
Cutting and Shaping Requires Precision Tools
Cutting thin acrylic sheets isn’t as simple as it looks. You need the right tools to get clean, accurate cuts. For sheets thinner than 1/4 inch, a sharp knife works well. For thicker sheets, tools like laser cutters or table saws are better. If you’re working on curved designs, a jigsaw or scroll saw is your best bet.
Tool Type | Application |
|---|---|
Knife | Suitable for cutting thin acrylic sheets < 1/4 inch |
Laser/Table Saws | Recommended for thicker acrylic sheets > 1/2 inch |
Jigsaw/Scroll Saw | Ideal for curvy cuts |
Laser Cutter | Provides high precision for detailed cuts |
Fine-toothed Blade | Best for straight cuts with table/circular saws |
Fretsaw | Designed for cutting curved parts |
Using the wrong tool can lead to cracks or jagged edges. Always test your tools on a scrap piece first to ensure they’re suitable for the job.
Note: Wear safety goggles and gloves when cutting to protect yourself from sharp edges and debris.
Potential for Cracking During Installation
Thin acrylic sheets can crack if you’re not careful during installation. This often happens when you apply too much pressure or use the wrong tools. For example, over-tightening screws can create stress points that lead to cracks. Even small mistakes, like drilling too close to the edge, can cause the material to split.
To avoid cracking, always handle the sheets gently. Use a drill bit designed for acrylic, and make sure to drill slowly. If you need to secure the sheet with screws, leave a little room for expansion. Tightening screws all the way might seem like a good idea, but it puts unnecessary strain on the material.
Tip: Place a soft cloth or foam under the sheet while working. This helps absorb pressure and reduces the risk of cracking.
Another thing to watch out for is uneven surfaces. If the sheet doesn’t sit flat, it can bend or crack when you try to secure it. Always check that your base is smooth and level before installation.
Static Electricity Attracting Dust
Static electricity is another challenge you’ll face with thin acrylic sheets. These sheets tend to build up static, especially in dry environments. This static attracts dust and small particles, making the surface look dirty even after cleaning.
To reduce static, you can use an anti-static cleaner or spray. These products help neutralize the charge and keep dust away. Wiping the sheet with a damp, lint-free cloth also works well. Avoid using dry cloths or paper towels, as they can increase static buildup.
Quick Tips to Manage Static:
Use anti-static sprays or cleaners.
Keep the environment humid to reduce static buildup.
Store the sheets in a dust-free area before installation.
Note: Regular maintenance is key. Clean the sheets gently and often to keep them looking their best.
By addressing these challenges, you can ensure your light box project turns out professional and polished.
Installation Tips for Thin Acrylic Sheets
Picking the Right Thickness for Your Project
Choosing the correct thickness is very important. Thin acrylic sheets come in different sizes for various uses. For light projects like photo frames, 1/16" (1.5 mm) is great. For DIY crafts or decorations, 1/8" (3 mm) is more flexible. Need something stronger? Use 1/4" (6 mm) for tables or big shelves.
Here’s a simple guide to help you:
Thickness (inches) | Best Use |
|---|---|
1/16" (1.5 mm) | Small, light items like photo frames. |
1/8" (3 mm) | Good for crafts and light decorations. |
1/4" (6 mm) | Works for tables and larger shelves. |
1/2" (12 mm) | Best for heavy-duty things like countertops. |
Tip: Match the thickness to your project’s weight and strength needs. This keeps your light box strong and steady.
Getting the Acrylic Sheet Ready
Before installing, prepare and clean the sheet properly. Sand or scuff the surface lightly to make it less slippery. If there’s dirt, clean it with a damp cloth or air blower.
For a clean surface:
Wipe dust with a soft cloth or vacuum.
Use isopropyl alcohol to remove grease.
Clean mold with a bleach solution if needed.
Note: Don’t use harsh cleaners. Gentle cleaning keeps the sheet looking nice.
Using Proper Tools for Cutting and Drilling
Cutting and drilling need the right tools. Wrong tools can crack or damage the sheet. For thin sheets under 1/4 inch, use a sharp knife. For thicker sheets, a laser cutter or table saw works better. Drill slowly and use oil to avoid cracks or melting.
Tool guide:
Knife: Great for thin sheets under 1/4 inch.
Laser Cutter: Perfect for detailed shapes.
Forstner Bits: Makes smooth holes but needs oil.
Tip: Test tools on scrap pieces first. This avoids mistakes on your main sheet.
Follow these steps to make installation easy and get great results.
Avoiding Over-Tightening During Installation
When installing thin acrylic sheets, it’s easy to think that tightening screws as much as possible will keep everything secure. But over-tightening can actually cause cracks or stress marks on the sheet. Acrylic is strong, but it needs a little flexibility to avoid damage.
Here’s how you can avoid over-tightening:
Use rubber washers or spacers: These create a cushion between the screw and the sheet, reducing pressure.
Don’t force the screws: Stop tightening as soon as the sheet feels secure.
Pre-drill holes slightly larger than the screws: This allows the sheet to expand or contract without cracking.
Tip: If you’re using clamps instead of screws, don’t overtighten them either. Apply just enough pressure to hold the sheet in place without bending it.
Cleaning and Maintaining the Surface Post-Installation
Once your light box is set up, keeping the acrylic clean is key to maintaining its sleek look. Thin acrylic sheets can attract dust and smudges, but with the right care, they’ll stay crystal clear.
For regular cleaning: Use a soft, damp cloth or a microfiber towel. Avoid paper towels, as they can leave scratches.
For tougher spots: Mix a small amount of mild dish soap with water. Gently wipe the surface, then dry it with a lint-free cloth.
What to avoid: Never use ammonia-based cleaners like glass cleaner. These can damage the acrylic and make it cloudy.
Note: Cleaning regularly not only keeps the sheet looking great but also prevents static buildup that attracts dust.
Ensuring Proper Ventilation to Prevent Heat Damage
Heat can be a silent enemy for thin acrylic sheets. Without proper ventilation, the heat from light bulbs or LEDs inside your light box can cause the sheets to warp or discolor over time.
Here’s how you can manage heat effectively:
Choose LED lights: They produce less heat compared to traditional bulbs.
Add ventilation holes: Drill small holes in the frame of your light box to allow heat to escape.
Use heat-resistant acrylic: Some sheets are specially designed to handle higher temperatures.
Pro Tip: Place a small fan near the light box if you’re using it in a warm environment. This helps keep the temperature down and protects the acrylic.
By following these tips, you’ll ensure your light box stays in great shape and performs beautifully for years to come.
Thin acrylic sheets are great for making light boxes. They are light, strong, and spread light evenly. This makes your projects useful and beautiful. But, they can scratch or crack if not handled carefully. Using the right tools and methods helps avoid problems. Follow these tips to make light boxes that look amazing and last a long time. Whether for home decoration or business use, these sheets let you create many cool designs. Try them out and see how awesome they are!
FAQ
What’s the best way to clean thin acrylic sheets?
Use a soft, damp microfiber cloth to wipe the surface. For tougher spots, mix mild dish soap with water. Avoid ammonia-based cleaners like glass cleaner—they can damage the acrylic.
Tip: Clean gently to prevent scratches and keep the sheet looking clear.
Can I cut thin acrylic sheets at home?
Yes, you can! Use a sharp utility knife for sheets under 1/4 inch. For thicker sheets, try a jigsaw or laser cutter. Always test your tools on a scrap piece first to avoid mistakes.
Safety Note: Wear goggles and gloves to protect yourself from debris.
How do I prevent acrylic sheets from cracking during installation?
Drill slowly and use a bit designed for acrylic. Pre-drill holes slightly larger than screws to allow for expansion. Avoid over-tightening screws—use rubber washers to reduce pressure.
Pro Tip: Place a soft cloth under the sheet while working to absorb stress.
Why does my acrylic sheet attract so much dust?
Acrylic builds up static electricity, especially in dry environments. This static attracts dust. Use an anti-static spray or cleaner to neutralize the charge. Keeping the area humid can also help reduce static buildup.
Quick Fix: Wipe the sheet with a damp, lint-free cloth to remove dust.
What thickness should I choose for my light box project?
It depends on your project. For small, lightweight designs, 1/16" (1.5 mm) works well. For larger or more durable projects, go for 1/8" (3 mm) or thicker.
Thickness | Best Use |
|---|---|
1/16" | Photo frames, small crafts |
1/8" | Light boxes, decorations |
1/4" | Heavy-duty or large projects |
Tip: Match the thickness to your project’s weight and durability needs.
See Also
Understanding Acrylic Sheets: Uses and Benefits for Light Boxes
Choosing the Right Acrylic Sheet for Your Light Box Needs
Key Specifications and Factors for Acrylic Light Box Panels
