Setting Up Your First LED Light Studio Box

Welcome! Are you ready to jump into studio photography and create stunning images at home? If you want to build your own led light studio box, you’re in the right place. You don’t need fancy tools or a big budget. You can set up a simple studio with just a few materials and a little creativity. Let’s get started and make your photos shine!
Key Takeaways
Begin with basic equipment like LED lights and modifiers. This helps you build a good studio setup.
Pick a clean and smooth background for your product photos. This makes your pictures look better and keeps them clear.
Place your lights in smart spots to get even lighting. This helps you avoid strong shadows in your photos.
Use a tripod to keep your camera steady and your images sharp. This is very helpful when you take close-up shots.
Try different setups and camera settings to get better at photography. Practice will help you improve your skills over time.
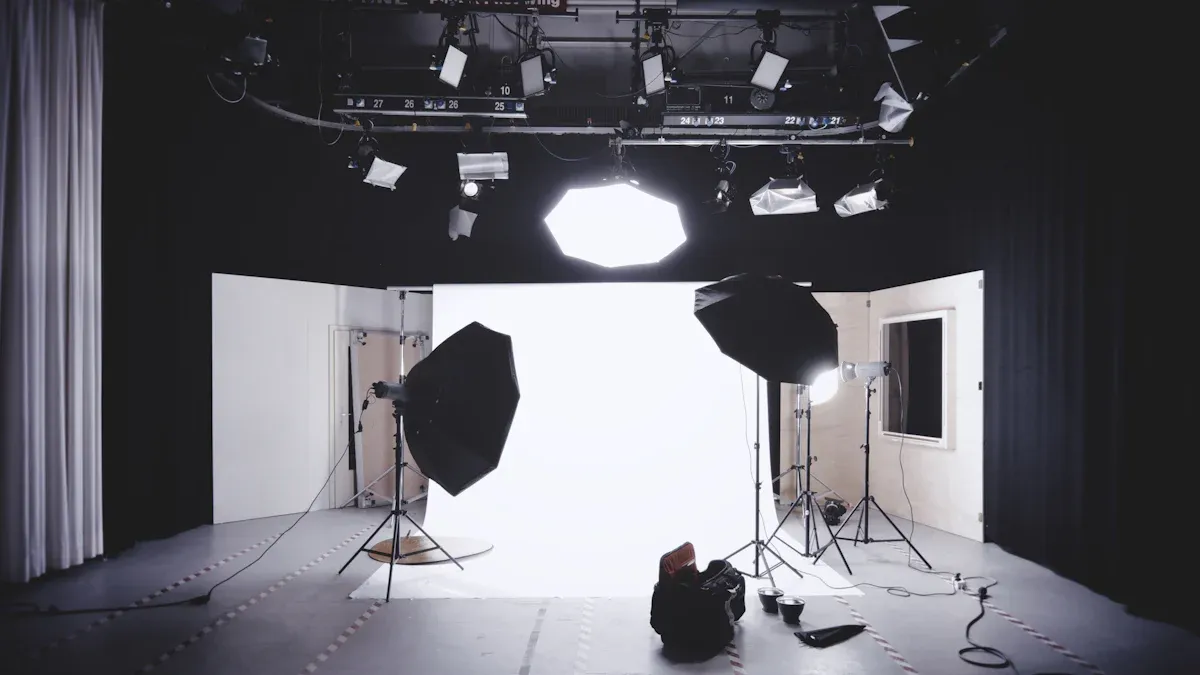
LED Light Studio Box Essentials
LED Light Box Equipment
You need good gear to start your led light studio box. Let’s check out some easy options for beginners. Here is a table to help you see the differences:
Product Name | Features | Pros | Cons |
|---|---|---|---|
60W or 100W COB light, battery base, magnetic highlight reflector set | Cheap, all-in-one kit, easy to carry, remote control | Needs extra batteries, not very strong | |
COLBOR CL60R | Full-spectrum color tuning, CRI over 97, Bowen’s mount compatibility | RGB light, can change brightness, portable, reacts to sound | Not strong for big studios, no extra parts |
COLBOR CL100X | CRI of 97+, bi-color range, compact portability | Colors look right, easy to control, has built-in effects | N/A |
You can also use the Neewer Kit. It has two 40W bi-color panels, stands, and power adapters. This kit gives soft light and costs less, but it is not very strong and colors may not look perfect.
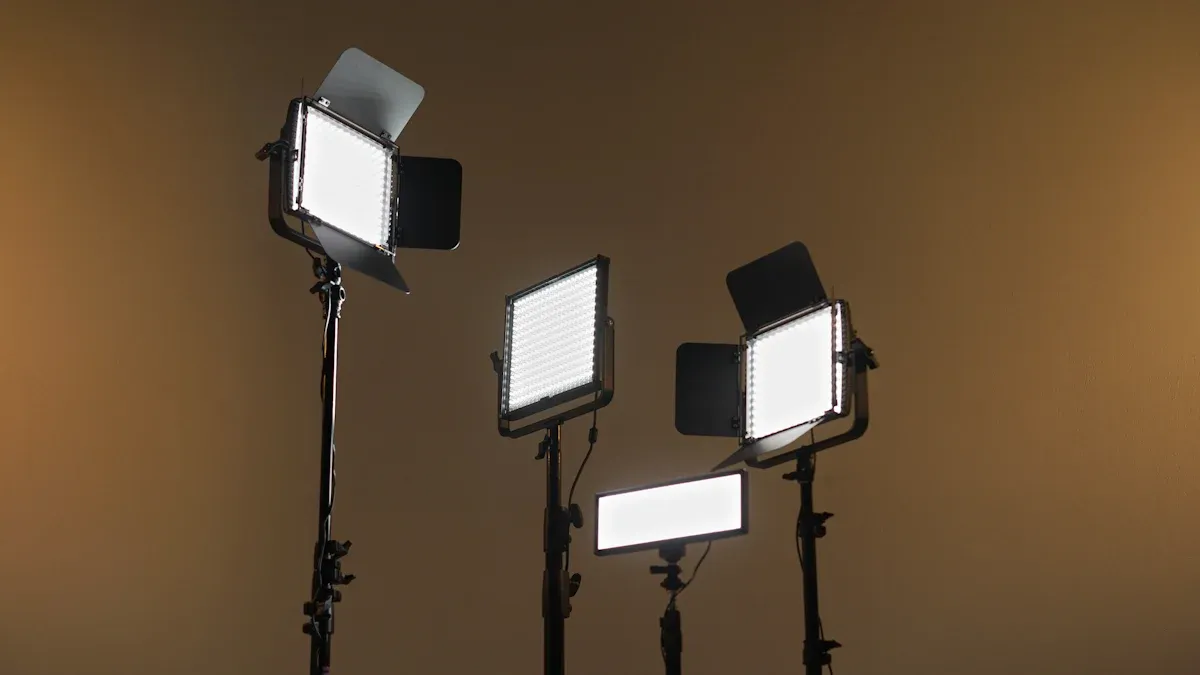
Studio Lighting Accessories
Accessories help you change the light and make your studio better. Here are some important ones:
Light stands hold your led lights steady and safe.
Modifiers like softboxes make the light softer and nicer.
Diffusion panels and reflectors help with shadows and bounce light.
You want your studio light to be soft and even. Using diffusion panels or soft cloth inside your led light box spreads the light and stops harsh shadows. This is very helpful if you take pictures of shiny things.
Choosing Backgrounds
A clean background makes your photos look pro. Here is a table to show what works best:
Feature | Description |
|---|---|
Strong, light ABS plastic with no wrinkles or lines. | |
Seamless Design | Lets you shoot from many angles and keeps things smooth. |
Cleaning and Durability | Easy to clean and tough, better than cloth or paper. |
Lighting Effectiveness | Bounces light well for great product photos. |
You can also use white foamcore or seamless white styrene for the background. These help you build a strong setup and keep things smooth. The background you pick changes how your light works. A white paper background bounces light onto your product. Sometimes this helps, but it can also make glare or uneven light.
Tip: Always keep your background clean and smooth. This makes your photos look sharp and pro.
LED Light Box Assembly Steps
Setting Up on a Sturdy Table
You want your led light studio box to sit on a strong, flat surface. A wobbly table can mess up your lighting set-up and make your photos blurry. Here are some good table sizes for your studio box:
16x16" |
20x20" |
24x24" |
28x28" |
Pick a table that fits your led light box and gives you space to work. Make sure the table doesn’t shake when you touch it. If you have a heavy box or lots of lighting accessories, go for a bigger size.
Tip: Place your table near a wall outlet. This makes it easy to plug in your led lights and keep your lighting set-up neat.
Assembling the Box Frame
Building the frame is the first big step. You need to measure, cut, and connect the pieces. Here’s what you’ll need:
Table saw
Miter or chop saw
Soldering iron and wire
Wire stripper and cutter
Ruler and pencil
Safety goggles
Ear protection
Push stick (for table saw)
Dust mask
A friend to help
Start by measuring the size you want for your led light studio box. Use your tape measure and pencil to mark the cuts. Cut the frame pieces with your saw. Connect the pieces with screws or strong glue. Make sure the frame feels sturdy and doesn’t wobble. Ask a friend to hold the pieces while you work. Safety comes first!
Installing LED Tape or Strips
Now it’s time to add the lighting. Good lighting makes your photos pop. Follow these steps for a smooth light set-up:
Measure and plan your layout. Use a tape measure, scissors, and cleaning wipes. Decide where you want the led strips to go for even lighting.
Clean the inside of the box so the adhesive sticks well.
Stick the led strips along the top and sides. Space them out so the lighting set-up covers the whole area.
If you want softer lighting, add a diffuser panel or a piece of frosted plastic. This spreads the light and stops harsh shadows.
Connect the led strips to the power supply. Double-check the voltage so you don’t burn out your lights.
Note: You can use mounting clips or a channel to hold the led strips in place. This keeps your lighting set-up looking clean and professional.
Organizing Cables Neatly
Messy cables can ruin your studio’s look and make it hard to work. You want your lighting set-up to be safe and tidy. Here’s how you can organize your cables:
Use zip ties or Velcro straps to bundle wires together.
Run cables along the edges of the box frame.
Tape down loose wires so you don’t trip or pull them by accident.
Label each cable if you have more than one led light set-up.
A neat lighting set-up helps you focus on your photos. You won’t waste time untangling wires or fixing problems.
Common Mistakes to Avoid
Here’s a quick table to help you dodge the most common mistakes when building your led light studio box:
Mistake | Example | Solution |
|---|---|---|
Wrong LED type | Using dim LEDs for photos | Check brightness and color before buying |
Wrong voltage | 12V strip on 24V power | Match power supply to your LEDs |
Bad connections | Loose wires | Use good connectors and double-check wiring |
Poor layout | Lights too far apart | Plan for even spacing |
Callout: Always test your lighting set-up before you start shooting. Fix any problems early so your led light box works perfectly.
You’ve finished the main assembly! Your led light studio box is ready for the next step. You can now move on to positioning your lighting and getting your camera set up for awesome photos.
Studio Lighting Positioning
Getting your studio lighting right makes a huge difference in your photos. You want your led light box to give you balanced, even lighting. Let’s walk through how you can place your lights, adjust their angles, and manage shadows and reflections for the best results.
Placing LED Lights for Even Lighting
Start by thinking about where you want your main light. Most people put the main light above the subject, pointing down. This gives you soft, natural shadows. You can add a second led light on the side or behind your subject. This helps fill in dark spots and makes your studio photos look more professional.
Here’s a simple way to set up your studio lighting:
Place your main light above and slightly in front of your subject.
Add a fill light on the opposite side to soften shadows.
Use a softbox or diffusion panel to spread the light and make it gentle.
Keep your led lights at the same height for even coverage.
Tip: If you see harsh shadows, move your lights closer together or add a diffusion panel. Soft lighting works best for most studio shots.
Adjusting Angles and Distances
You can change the look of your photos by moving your lights. Even small changes in angle or distance can make a big difference. Try moving your main light closer to your subject. This makes the light softer and reduces shadows. If you want to show off textures, move your led light to the side. This brings out details and makes your product pop.
Here are some things you can try:
Move your main light closer for softer shadows.
Angle your led lights to highlight shapes and textures.
Step back and look at your studio setup from different sides.
Adjust the distance between your lights and your subject to control reflections.
You might notice that changing the angle or distance of your lighting can help minimize glare, especially on shiny objects. You can use white polyester fabric to cover the front of your led light studio box. Let your camera lens peek through a small hole. This trick cuts down on reflections and gives you a cleaner shot. If you have a telephoto lens, try shooting from farther away. This also helps reduce glare. You can use close-up extension tubes for similar effects.
Small changes in light position can highlight features and reduce distracting glare.
Adjusting lighting to emphasize shape and texture can make your photos look more professional.
Changing the angle and distance of your lights can soften shadows and enhance textures.
You can minimize reflections on shiny products by moving your lights and using diffusers.
Callout: Don’t be afraid to experiment! Move your lights around and take test shots. You’ll see how each change affects your studio lighting.
Managing Shadows and Reflections
Shadows and reflections can be tricky in studio photography. You want to control them so your photos look clean and sharp. Here’s a table with some smart strategies:
Strategy | Description |
|---|---|
Soften | Use a softbox or diffusion paper to make the light gentle and reduce shadows. |
Fill | Add fill lights to brighten shadowed areas on your subject or background. |
Hide | Move your lights so shadows fall out of the camera’s view. |
Diffuse | Use reflectors and diffusion materials to create softer light and eliminate harsh shadows. |
Adjust | Change your camera settings to brighten shadows and improve your photos. |
If you’re shooting something shiny, reflections can ruin your shot. Try these tricks:
Cover the front of your led light box with white polyester fabric. Cut a small hole for your camera lens. This reduces reflections and gives you a smooth look.
Use a telephoto lens and shoot from farther away. This helps minimize glare.
Try close-up extension tubes if you want to get closer without adding reflections.
You can use reflectors to bounce light into shadowy areas. Place them opposite your main light. This fills in dark spots and makes your studio lighting more even. If you see unwanted reflections, move your lights or add more diffusion material.
Note: Always check your photos for shadows and reflections before you finish your shoot. Fixing these problems during your studio session saves you time later.
You’ve learned how to position your led lights, adjust angles and distances, and manage shadows and reflections. Your studio lighting setup is now ready for action!
Preparing Subject and Camera
Arranging the Subject
You want your subject to look its best inside your led light studio box. Start by placing your product in the center of your studio. Make sure it sits on a clean, smooth background. Try to leave a little space between your subject and the background. This helps your lighting create depth and keeps shadows soft.
Here are some tips for arranging your subject:
Position your main light above or slightly in front of your subject for natural shadows.
Add fill lights on the opposite side to soften dark areas.
Use accent lights behind or to the side to separate your subject from the background.
Keep all your led lights at the same color temperature. This avoids strange color casts in your studio photos.
Watch out for glare or hot spots. Move your lights or add a softbox or diffusion panel if you see reflections.
Tip: If you want a dramatic look, use smaller light sources or colored gels. For soft, even lighting, stick with large softboxes and diffusers.
Camera Settings for Studio Lighting
Getting sharp, bright photos in your studio starts with the right camera settings. You don’t need fancy gear, but you do need to know what works with led lighting.
Set your ISO low, like 100 or 200. This gives you clear images with lots of detail.
Pick your aperture based on what you want to show. Wide apertures blur the background, while narrow ones keep everything sharp.
Use a shutter speed of at least 1/125 second. If your subject moves, go faster.
Raise your ISO only if your studio lighting isn’t bright enough. Auto ISO can help, but set a limit so your photos don’t get grainy.
Note: Always check your exposure before you start shooting. Adjust your main light or fill lights if your photos look too dark or too bright.
Using a Tripod
A tripod makes your studio setup much easier. You get sharper photos because your camera stays steady. Place your tripod so you can easily reach your led light studio box. Adjust the height so your lens lines up with your subject.
Use a tripod for close-up shots or longer exposures.
Lock your camera in place before you start shooting.
Try using a remote or timer to avoid shaking the camera.
A tripod lets you focus on your lighting and subject without worrying about blurry photos. Your studio shots will look crisp and professional every time.
Optimizing Lighting Results
Troubleshooting Common Issues
You might run into a few problems with your studio lighting, but don’t worry. Most issues have simple fixes. Here’s a table to help you spot and solve the most common problems:
Lighting Issue | Description | Solution |
|---|---|---|
Uneven Lighting | Some parts of your subject look too dark or too bright. | Use more than one main light, adjust angles, and add softboxes or reflectors for even coverage. |
Harsh Shadows | Strong, dark shadows make your photos look unnatural. | Try using light modifiers, move your main light, or add a fill light to soften the effect. |
Overheating | Your LED lights feel hot or the studio box gets warm. | Make sure there’s good airflow, use lights with heat sinks, and avoid running them at full power for long periods. |
Tip: Always check your lighting before you start shooting. Take a test photo and look for shadows or bright spots. Small changes in your setup can make a big difference.
To keep your studio working well, follow a simple maintenance routine:
Use surge protectors and the right dimmers.
Turn off your studio box when you finish.
Clean the inside and check the cables every month.
Post-Processing Tips
After you finish shooting, you can make your photos look even better with a few editing tricks. Here are some easy ways to get pro results:
Use levels or curves to make the background pure white, but don’t lose details on your subject.
Try batch processing if you have lots of photos. This saves time and keeps your studio shots looking the same.
Use AI tools like Imagen to speed up editing and match your style.
Note: Always save your original files before you start editing. This way, you can go back if you need to.
If you keep your lighting even and your main light in the right spot, you’ll spend less time fixing problems later. A little post-processing can turn a good studio photo into a great one!
You’ve learned how to set up your first LED light studio box from start to finish. Try moving your lights and changing camera settings to see how each shot looks. Here are some benefits you’ll notice as you practice:
You get controlled lighting for consistent, professional photos.
Your setup is affordable and easy to move.
You can create high-quality images any time, no matter the weather.
The more you experiment, the better your studio skills become. Keep shooting and watch your photos improve!
FAQ
How big should my LED light studio box be?
You can pick a size that fits your needs. Most people start with 16x16" or 20x20". If you want to shoot bigger items, try 24x24" or 28x28". Make sure your table can hold the box.
Can I use regular LED strips from the hardware store?
Yes, you can use standard LED strips. Look for ones with high brightness and a color temperature around 5500K. This gives you natural-looking light for your photos. Always check the voltage before you buy.
What background works best for product photos?
A white, seamless background works great for most products. You can use foamcore, ABS plastic, or styrene. These materials bounce light well and keep your photos looking clean. Keep your background smooth and free of wrinkles.
How do I avoid reflections on shiny objects?
Try using a diffuser or softbox to soften the light. You can also cover the front of your box with white fabric and cut a hole for your lens. Move your lights around until you see fewer reflections.
See Also
Selecting The Ideal Wall Mount For Your LED Light Box
Key Components For Achieving High-Quality Acrylic Light Boxes
Creating The Perfect Light Box For Acrylic Art Displays
