Poster Lights Troubleshooting and Maintenance Tips

Have you ever switched on your poster lights only to find them flickering or not working at all? You want your favorite posters to shine with the best visibility, but sometimes common issues get in the way. When poster lights fail, your visibility drops and the display loses its charm. Don’t worry! Simple checks often restore both visibility and the look you love.
Key Takeaways
Check power, cables, and bulbs first when poster lights do not turn on or flicker to fix most common problems quickly.
Clean and inspect your poster lights every month to keep them bright and working well for a long time.
Handle posters gently and control the environment to prevent damage from dust, moisture, heat, and UV rays.
Use the right bulbs and replace faulty parts promptly to avoid bigger repairs and keep your display looking great.
Call a professional if you see sparks, persistent problems, or safety hazards to protect yourself and your poster lights.
Poster Lights Troubleshooting
When your poster lights act up, you want quick answers. Let’s walk through the most common problems and how you can fix them. You’ll find that most troubleshooting steps are simple and can save you time and money.
Not Turning On
If your poster lights won’t turn on, don’t panic. Start with these checks:
Make sure the power cord is plugged in and the switch is on.
Check if the outlet works by plugging in another device.
Inspect the power supply for any signs of damage or overheating.
Look at the cables and connectors. Loose or broken cables are a common reason for lights not working.
If you use LED poster lights, check the network cable and make sure the receiving card has power.
Try swapping out the DVI or HDMI cable if you use a digital display.
Double-check your graphics control panel settings. Sometimes, software can turn off the LED screen.
Here’s a table to help you spot the problem:
Symptom / Issue | Likely Causes | Troubleshooting Steps |
|---|---|---|
No Image / Black Screen | Power failure, signal loss, controller problem | Check power, cables, and controller |
One Section Not Working | Faulty card, bad cable | Replace card, inspect cables |
LED Row Not Lit | Defective module or card | Replace faulty parts |
Tip: Use a voltmeter to check if power is reaching the lights. If you see voltage but the lights stay off, the bulbs or LED modules might need replacing.
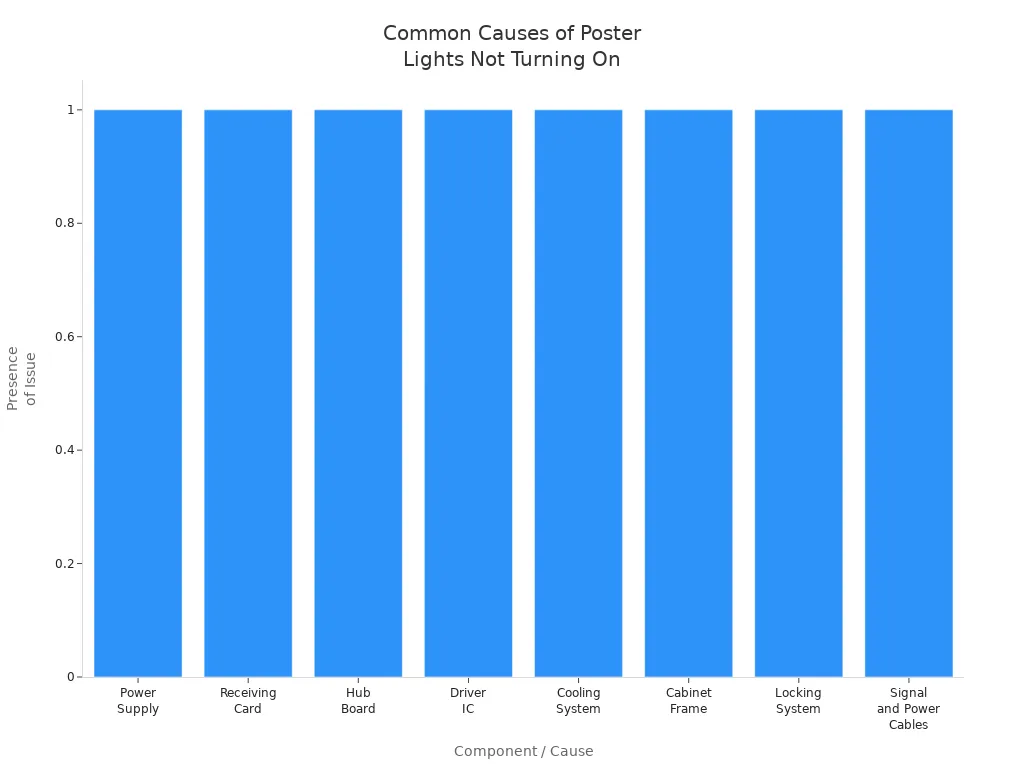
You can also look at this chart to see which hardware problems happen most often:
Flickering or Blinking
Flickering lights can be annoying. Here’s what you should check:
Power supply problems. If your home has big appliances turning on and off, they can cause your LED poster lights to flicker.
Loose connections. Wiggle the cables gently to see if the flicker stops or gets worse.
Try swapping bulbs between fixtures. If the flicker follows the bulb, the bulb is bad. If it stays in the same spot, the wiring or fixture is the problem.
LED driver issues. Sometimes, the driver that controls the LED can fail and cause blinking.
Outdated firmware or control systems can also make LED lights flicker.
Note: If you use an LED bulb and it flickers, try replacing it with an incandescent bulb. If the flicker goes away, the problem is with the LED bulb. If not, it’s likely a wiring or power issue.
Dim or Uneven Light
Dim or uneven lighting makes your poster look dull. Here’s what might be happening:
Edge-lit LED designs sometimes cause uneven light because the LEDs sit at the edges.
Direct-lit LED panels can get hot, which may lead to uneven brightness.
Faulty LEDs or loose wiring can also cause dark spots or dim areas.
Ambient light in the room can make some areas look dimmer than others.
To fix these issues, try these steps:
Inspect and replace any faulty LEDs.
Check all wiring and connections for looseness or corrosion.
Make sure the power supply and LED driver work properly.
Adjust the fixture so the light spreads evenly.
Use a multimeter to check voltage along the system.
Here’s a quick guide:
Issue Type | Causes | Solutions |
|---|---|---|
LED Spotlights | Damaged LEDs, wiring issues | Replace LEDs, secure wiring, check power supply |
Panel Lights | Bad drivers, uneven voltage | Inspect drivers, ensure even voltage, replace drivers |
Interference Stripes
Sometimes, you’ll see strange stripes or patterns on your LED poster lights. This is called the Moiré effect. It happens when patterns overlap, like the pixels on your screen and the design of your poster.
Common causes include:
Low screen resolution or pixel misalignment
Poor refresh rate or outdated drivers
Bad video cables or signal interference
To fix interference stripes:
Check if the stripes appear when you turn the poster lights on or off.
Try moving the monitor or adjusting the graphics card position.
Swap out video cables for higher quality ones.
Update your graphics drivers.
Tip: If you see stripes only when taking photos or videos, it’s usually not a problem with the lights themselves.
Physical Damage
Physical damage can stop your poster lights from working. Look for:
Cracked or broken LED panels
Bent frames or loose mounting hardware
Damaged cables or connectors
If you spot any damage, replace the broken parts right away. Keeping your poster lights in good shape helps prevent future issues.
Remember: Regular checks and gentle handling go a long way in keeping your LED poster lights bright and reliable.
Troubleshooting and Repair Steps
Power and Switches
When you start troubleshooting and repair for your poster lights, always check the power and switches first. Power issues are a common cause of lighting problems. Here’s a safe way to test and replace a faulty switch:
Turn off the power at the circuit breaker before you touch anything.
Learn the basics of light switch wiring. This helps you avoid electric shock.
Figure out if your switch uses power-through or end-line wiring.
Use a multimeter or continuity tester to check if the switch works. Flip the switch and see if you get a reading.
Look for loose wires, scorch marks, or any damage.
If the switch is bad, carefully disconnect the wires. Take a photo or make a note of how they connect.
Install a new switch. Make sure you wire it the same way as before.
Mark any white wires used as hot with black tape.
Turn the power back on and do a quick functionality test.
Tip: Always double-check your work before restoring power. Safety comes first!
Bulbs and LED Panels
LED poster lights last a long time—over 50,000 hours on average. You usually don’t need to replace them often. If you notice dimming or a section not lighting up, you might need a repair. Most LED panels are not designed for user replacement. If you suspect a faulty panel, call a qualified technician. For regular bulbs, swap them out with a new one and see if the problem goes away.
Data Cables and Connections
Loose or damaged data cables can cause flickering or loss of signal. You can use special testers to check cable integrity. Here’s a quick look at some tools:
Tester Type | Testing Capabilities | Key Features |
|---|---|---|
Continuity, in-line components, cable length | Pass/fail GUI, diagnostics GUI, customizable reports, real-time intermittent fault detection | |
CableEye High Voltage Testers (HVX Series) | All low voltage tests plus dielectric breakdown, insulation resistance/isolation, hipot testing up to 2100Vdc/1200Vac | 4-wire Kelvin resistance measurement, guided assembly options, automation scripting, large test point capacity |
CableEye Harness Testers | Continuity, in-line components, cable length | Same as low voltage testers with harness-specific configurations |
These testers help you spot shorts, opens, or miswires. Some even check for surface defects using cameras and image processing. This keeps your cables in top shape and your poster lights working smoothly.
Reset or Replace Parts
Sometimes, a simple reset can fix your poster lights. Hold the power button for 15 seconds until the LED flashes. This can solve connectivity issues and restore functionality. If you still have trouble, you may need to replace a part. LEDs last a long time, but if you need a repair, let a professional handle it. This keeps your system safe and working at its best.
Maintenance for Poster Lights
Keeping your poster lights in top shape means you need a good maintenance schedule. If you follow a few simple steps, you can make your lights last longer and keep your posters looking great. Let’s break down what you should do for daily maintenance and regular checkups.
Internal Inspection
Start with a visual inspection every month. Turn off and unplug your poster lights before you open anything. This keeps you safe and protects the device from damage. Look for dust, loose wires, or signs of wear inside the fixture. Use a flashlight to check the LED panels and power supply. If you see anything odd, like burnt spots or broken parts, add it to your maintenance schedule for a closer look.
Deep Cleaning
Deep cleaning helps your poster lights shine bright and work well. Here’s a step-by-step guide you can follow:
Always turn off and unplug the lights before you start cleaning.
Use a microfiber towel or a soft anti-static brush to wipe away dust from the inside.
For the LED modules, gently remove dust with compressed air. Don’t use any liquids on these parts.
Clean the frame with a damp microfiber cloth and a little mild soap. Dry it right away to stop water marks.
Use compressed air to clean fans and vents. This keeps air moving and stops the lights from overheating.
For ports and connectors, use a small electronic brush or compressed air. Never use liquids or metal objects here.
Wipe the back panel and power supply with a dry microfiber cloth or compressed air.
Tip: Never spray cleaning solutions directly onto any part of the fixture. Always dampen your cloth first.
If you add these cleaning tips to your maintenance schedule, you’ll help your poster lights last longer and work better.
Front and Back Maintenance
LED poster displays come in two main types: front maintenance and rear maintenance. Each type has its own steps and space needs. Here’s a quick table to help you understand the differences:
Aspect | Front Maintenance LED Poster Display | Rear Maintenance LED Poster Display |
|---|---|---|
Maintenance Process | You replace modules from the front using magnets. This makes repairs quick and easy. | You do maintenance from the back, so you need space behind the screen to reach everything. |
Space Requirement | Great for places with little space, like indoor walls or tight spots. No need to get behind the display. | Needs more room behind the display. Works best for outdoor or rooftop setups. |
Cost Consideration | Costs more to make, but you save money on repairs over time. | Cheaper to make at first, but repairs and setup can cost more because of the extra space needed. |
Suitability | Best for indoor areas, stores, or places where you need fast repairs. | Good for big outdoor screens where you have lots of space behind the display. |
If you know which type you have, you can plan your maintenance schedule better. For both types, check the LED panels and power supply during each inspection.
Preventing Dust and Dirt
Dust and dirt can make your poster lights look dull and cause problems inside the fixture. You can keep things clean with a few easy habits:
Dust the fixture every month with a feather duster.
Keep windows closed on windy days to stop dust from blowing in.
Use an air purifier in the room to catch dust before it lands on your lights.
Cover the fixture if you won’t use it for a while.
Clean the room often to cut down on dust.
If you add these steps to your daily maintenance, you’ll keep your lights and posters looking their best.
Replacing Bulbs
Most LED poster lights last a long time, but sometimes you need to do a replacement. If you notice a bulb is dim or not working, swap it out right away. Always use the right type of bulb for your fixture. Choose LED strips that do not produce heat. This keeps your posters safe from damage. Add bulb checks to your maintenance schedule so you never miss a problem.
Note: If you see any flickering or dim spots, check the bulbs and connections first. Quick action can save you from bigger repairs later.
A good maintenance schedule includes regular cleaning, inspections, and quick replacements. If you stick to these steps, your poster lights will stay bright and your posters will stay safe.
Preventative Maintenance Tips
Environmental Control
You want your poster lights to last a long time. Keeping your posters looking nice is important too. Start with controlling the environment around your poster lights. Try to keep the temperature the same every day. Do not let it get too hot or too cold. Use a hygrometer to check the humidity in the room. The best humidity is between 30% and 50%. This stops water from hurting your poster lights and keeps the electronics safe. If the air feels too wet or too dry, use a humidifier or dehumidifier. Make sure air can move around the room. Good airflow and ventilation help a lot. These steps protect both indoor and outdoor displays. You will have better visibility and an easy maintenance schedule.
Tip: Think about your poster lights like you would a car. Too much heat or water can break them quickly. Keeping things steady means less work and better visibility.
Poster Handling and Care
Be gentle when you touch your posters. Always wash your hands or wear cotton gloves first. Work in a clean area with no food or drinks nearby. Store posters in acid-free folders or mats when not using them. Use felt pads or soft things to stop scratches. These steps keep your posters safe and help your maintenance routine. For outdoor signs, use strong frames and check for damage often. This keeps your visibility good and your maintenance low.
Store posters flat or rolled, not folded.
Do not use paper clips, rubber bands, or glue.
Write notes with pencil, not ink.
Preventing Condensation
Condensation can ruin your poster and your poster lights. To stop this, seal the frames with butyl rubber. Put silica gel packs inside the frame to soak up water. Use glass instead of plastic to keep out moisture. Add spacers so the poster does not touch the glass. Try to keep the temperature and humidity the same. These steps help your maintenance plan and keep your visibility clear, even outside.
Quick Steps to Prevent Condensation: 1. Seal frames well. 2. Add packs that absorb water. 3. Use glass for glazing, not plastic. 4. Keep posters away from the glass.
UV and Heat Protection
UV rays and heat can make your posters fade and hurt your poster lights. Pick LED lights with UV filters for your displays. UV printing on acrylic or soft film helps outdoor signs last longer and keeps colors bright. LED UV curing does not get as hot, so your posters and lights stay safe. These steps help your maintenance and keep your visibility high. Check for fading or heat damage every few months.
Use UV-blocking frames and covers.
Pick LED lights that stay cool.
Try UV printing for outdoor signs to make them last longer.
If you follow these tips, your poster lights will last longer. Your visibility will be better, and your maintenance will be easier. Good habits now mean fewer repairs later!
When to Seek Professional Help
Sometimes, you just can’t fix your poster lights on your own. That’s when you need to call in the experts. Let’s look at the signs that tell you it’s time for professional help.
Electrical Issues
Electricity can be dangerous. If you notice sparks, burning smells, or the lights trip your circuit breaker, stop right away. Don’t try to fix wiring or power supplies by yourself. Complex repairs, especially those with electrical parts, need a trained technician. You want to keep your home safe and your poster lights working. Many people set up regular service contracts with professional maintenance companies. These experts check your system and make sure everything runs smoothly.
⚡ Tip: If you ever feel unsure about an electrical problem, always call a professional. Your safety comes first.
Persistent Problems
Do your poster lights keep flickering or dimming, even after you check the basics? Maybe you see system errors or the display just won’t work right. These are signs that something deeper is wrong. Sometimes, hardware wears out or the system malfunctions. If you keep fixing the same issue, you might waste time and money. A professional can spot hidden problems and restore full functionality. For outdoor signs, you may need more frequent help because of weather and dust.
Common Signs You Need Help:
Dimming screens or flickering images
System malfunctions that don’t go away
Hardware that looks worn or damaged
Safety Concerns
Your safety matters most. If you see exposed wires, broken panels, or water inside the frame, don’t touch anything. Emergency maintenance services can handle sudden failures and keep you safe. Professionals have the right tools and know-how to fix things without risk. For big displays or outdoor signs, you should plan for quick help to avoid downtime.
🛑 Note: Never risk your health or damage your poster by trying to fix dangerous problems alone.
You can keep your poster lights shining bright with just a few simple steps. Check your power, cables, and bulbs often. Clean your lights and inspect them every month. Swap out any parts that look worn. If you run into a tricky problem, call a pro for help.
Regular care means fewer headaches and longer-lasting displays. Keep up the good work, and your posters will always look their best! 🌟
FAQ
How often should you clean your poster lights?
You should clean your poster lights once a month. Dust and dirt can build up fast. Use a soft cloth or a feather duster. This keeps your lights bright and your posters looking great.
What is the average lifespan of LED poster lights?
Most LED poster lights last about 50,000 hours. That means you can use them for years before you need to replace them. If you notice dimming, it might be time for a new bulb.
Can you use any type of bulb in poster lights?
No, you should always use the bulb type recommended by the manufacturer. Using the wrong bulb can cause damage or make your poster lights overheat. Check your manual for the right kind.
What should you do if your poster lights keep flickering?
Try checking the power supply and all cables first. If the problem stays, swap the bulb or LED. If nothing works, you might need a new driver or professional help.
See Also
Key Technical Specs And Performance Insights For Acrylic Panels
Essential Tips For Achieving Professional Acrylic Light Box Quality
Understanding Uses Benefits And Choosing Acrylic Light Boxes
