Professional Photography Techniques Using an LED Studio Light Box

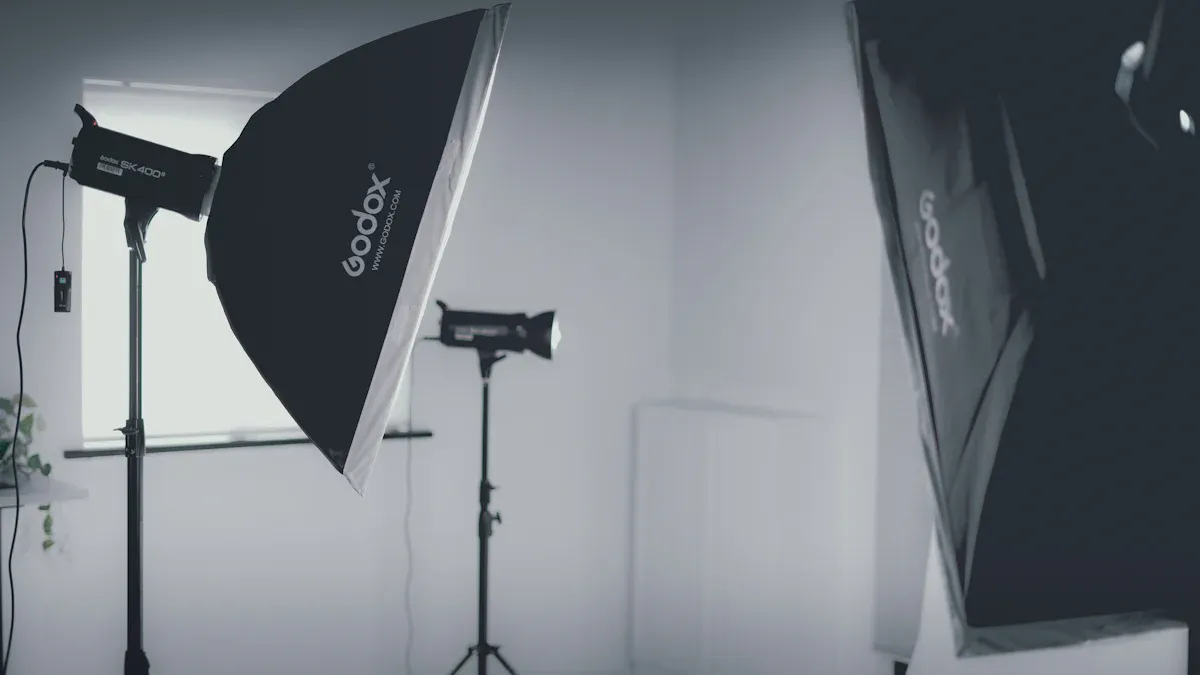
Lighting changes how every photo looks. When you use a lightbox, you can control shadows and highlights. This control lets you take pictures that are clear and bright. Many people use a lightbox to take photos of yarn, jewelry, or small things because the light stays even. If you look at a lightbox and other lights, you will see they are different in price and how the pictures turn out:
Aspect | LED Continuous Lights | Strobes |
|---|---|---|
Usually cheaper and saves energy | Gives more light for your money if you need a lot | |
Image Quality | Lets you see changes as you make them | Makes light very strong and stops motion in photos |
You should think about what you want before you take pictures. A lightbox is an easy way to make your photos better. If you want to try new Photography Techniques, a lightbox will help you make great photos every time you use it.
Key Takeaways
A lightbox gives even light. This helps stop strong shadows and bright spots. It makes your photos look clearer.
Picking the right size lightbox is very important. Big boxes let you use them for many things. Small boxes are best for tiny items like jewelry.
Using high-CRI LED bulbs shows colors the right way. This helps your products look real in photos.
Use diffusers and polarizing filters to control shiny spots. These tools make soft and even light for your product pictures.
Try different backgrounds and ways to set up your items. This helps your product get noticed and look professional.
Understanding Lightbox Photography
What Is a Light Box?
You may wonder how lightbox photography is different. A light box is a small box with lights inside. You put your product in the box. The lightbox lets you control all the lighting. This means you get the same lighting every time. It helps you show details and textures in your photos. The lightbox stops harsh shadows and bright spots. Your pictures look the same each time you use it.
Lightbox photography is special because you control the light. Regular studio lights do not move much. This can make pictures look flat and miss details. With a lightbox, you can move your product around. You can also change the lighting to show off features. You can take test photos and see what looks best. This helps you learn and get better at using a lightbox.
Tip: A lightbox helps you make great photos without spending a lot. It is easy to carry and set up. You can use it at home or in a studio for product photos.
Benefits for Product Photography
Lightbox photography has many good points for product photos. The lighting is even and makes products look bright and clean. The lightbox uses diffusion to make shadows soft. When light goes through frosted glass or cloth, it makes a soft glow. When light bounces off dull surfaces, it spreads out and cuts glare. These things help you make nice, balanced photos.
You can also try different angles with a lightbox. This lets you control shadows and show off textures. Moving lights and reflectors changes how the light hits your product. You can make features stand out and make your photos look 3D. Changing angles helps you show your product’s best side.
Lightbox photography helps you:
Get rid of harsh shadows
Make lighting even
Show off details
Make your photos look the same
Using a lightbox in your work makes your photos better. You can get people interested and sell more with good photos. The lightbox helps you make great images every time.
Choosing Your LED Studio Light Box
Size and Shape Options
You need to pick the right lightbox for your products. The size and shape of your lightbox matter a lot. If you want to shoot many types of products, a larger model gives you more space and flexibility. You will spend less time editing your photos because you can fit more items inside. Some lightboxes have built-in lights, which make them easy to use. Others let you add your own lights for more control.
For jewelry, a small lightbox works best. It gives soft light and helps you show off details like stones and metal.
For electronics, use a medium lightbox. Place softboxes on each side to avoid harsh reflections.
For apparel, choose a large lightbox. Use layered lighting to show the texture and color of the fabric.
Here are some common lightbox models and their price ranges:
Product Name | Price Range |
|---|---|
Advanced Super Bright LED Light Box | $99.99 - $259.99 |
Daylight Wafer LED Light Box | $133.81 - $270.54 |
Gagne Porta-Trace LED Light Boxes | $51.48 - $671.49 |
Artograph LightTracer Light Box | $64.99 - $99.99 |
Studio Designs Artograph LightPad Table | $549.99 |

High-CRI LED Bulbs
You want your photos to show true colors. High-CRI LED bulbs help you do this. CRI stands for Color Rendering Index. A CRI of 90 or higher is excellent for photography. Most studios use bulbs with a CRI between 90 and 97. This helps you capture colors that look real and bright. Many states, like California, require bulbs with a CRI above 90 for professional work.
Application | Recommended CRI |
|---|---|
Retail Spaces | 90+ |
Business Applications | 90-97 |
Photography | 90-97 |
High-CRI lighting is important for retail and studio work. It helps you show products as they really look.
Essential Accessories
You can make your lightbox even better with the right accessories. Try using diffusers to soften the light. Use backgrounds in different colors to match your product. Add support bars or stands to keep your items steady. Some lightboxes come with extra doors or windows for more shooting angles. These tools help you get the best results every time you use your lightbox.
Tip: Always check if your lightbox lets you add or change accessories. This gives you more ways to be creative and get the perfect shot.
Photography Techniques for Professional Results
Light Placement and Even Lighting
You can take great photos if you put your lights in the right spot inside your lightbox. Good lighting is very important for lightbox photography. You want to stop strong shadows and bright spots from showing up. There are different ways to set up your lights so your pictures look even and stand out.
Here is a table that shows how you can put your lights for the best results:
Technique | Description |
|---|---|
Key Light Positioning | Place a diffused LED light at a 45-degree angle to the right and 45 degrees up from your product. |
Fill Light | Use a large reflector on the opposite side to fill in shadows and brighten your images. |
Background Light | Set an LED panel with soft diffusion close to the background to create a soft halo effect. |
Dimmer Control | Adjust the background exposure with a dimmer or separate lights to match your subject. |
Importance of Diffusion | Always use diffusion when your product is close to the background to avoid multiple shadows. |
You can use these ways to control the light in your lightbox. Try moving your lights and reflectors until the lighting looks even. Check your camera’s histogram to see if your photo is bright enough. Push the histogram to the right, but do not let it touch the edge. This helps you get bright and clear photos without losing details.
Tip: Always look at your photos on your camera screen. If you see dark spots or bright areas, move your lights or add more diffusion. This will help you get good photos every time.
Using Diffusers and Multiple Openings
Diffusers are important tools for lightbox photography. You can use them to spread the light and make it softer. This stops strong shadows and makes your photos look smooth. Many lightboxes have openings on the top and sides. You can use these openings to add more lights or take pictures from different angles.
Diffusers help you spread the light evenly, which makes your product look better.
You can use more than one light to control how your lighting looks and cut down strong shadows.
Even lighting is important for good product photos.
You can try new ways by moving your diffusers or changing how many lights you use. You can also use the side or top openings to take pictures from above or the side. This gives you more ways to show your product and makes your photos more creative.
Note: If you want to make your photos better, try using different diffusers and openings. You will see your photos change with each setup.
Polarizing Filters for Reflection Control
Lots of products have shiny surfaces. These can make reflections in your photos. You can use polarizing filters to control reflections and make your photos look better. Polarizing filters are easy to use and can really help your photos look good.
Polarizing filters cut down glare and reflections from glass, water, or shiny things.
They help you see more color and detail by taking away unwanted reflections.
You can balance the bright and dark parts of your photos, which helps you show all the details.
You can put a polarizing filter on your camera lens before you start taking pictures. Turn the filter until you see the reflections go away. This is one of the best ways to make your photos better and get good pictures in your lightbox.
Tip: Always check your photos after you use a polarizing filter. You will see better colors and less glare. This simple tool can make your lightbox photos look much better.
When you use these ways, you can control every part of your lightbox photography. You will see better lighting, fewer reflections, and more details in your photos. Try these ideas and see how they help you make better photos and high-quality images.
Camera Settings for Lightbox Photography
Exposure and Histogram Control
You need to set your camera for the best results in lightbox photography. The right exposure makes your images look clean and bright. You can use your camera’s histogram to help you get the perfect exposure. The histogram shows how light and dark your photo is. You want to push the histogram to the right for a white background, but do not let it touch the edge. This keeps your highlights from getting too bright and losing detail.
Here is a table that shows how you can use your camera settings and histogram for better lightbox photography:
Technique | Description |
|---|---|
Aperture Mode | Set your camera to control the aperture. The camera will pick the shutter speed for you. |
Histogram Adjustment | Move the exposure so the histogram almost touches the right edge. This gives you a bright background. |
Avoid Clipping | Make sure the histogram does not go past the edge. This keeps details in your images. |
Black Background Adjustment | For black backgrounds, move the histogram to the left edge. |
Many photographers use Manual Mode for more control. You can set the aperture to f/16 and the shutter speed to 1/6th of a second. This helps you avoid clipping highlights. You can also use a raised platform in your lightbox. This stops bright spots on the bottom of your product and gives you better lighting control.
Tip: Always check your histogram after each shot. If you see the graph touching the right edge, lower your exposure a little. This will keep your images bright without losing important details.
ISO and White Balance
You want your images to look sharp and show true colors. ISO and white balance are two settings that help you do this in lightbox photography. Set your ISO as low as possible, like ISO 100 or 200. This keeps your images clear and free from noise. High ISO can make your photos look grainy.
White balance is very important for color accuracy. You can set your camera to match the lighting in your lightbox. If your lightbox uses LED lights, choose the “LED” or “Daylight” setting. You can also set a custom white balance for the best results. This makes sure your images show the real colors of your products.
White balance helps your images look true to life.
Changing white balance can make your colors look better, even if the lighting changes.
When you learn how to use white balance, you get more creative control over your images.
Note: Always check your images on your camera screen. If the colors look wrong, adjust the white balance until they look right.
RAW vs. JPEG Shooting
You can choose to shoot in RAW or JPEG format in lightbox photography. Each format has its own strengths. Many photographers shoot both RAW and JPEG at the same time. This gives you quick JPEGs to use right away and RAW files for editing later.
Shoot both RAW and JPEG. You get images you can use now and files you can edit for the best quality.
Use JPEG if you need to share your images quickly. JPEGs are small and easy to send.
Edit RAW files if you want the highest quality. RAW files keep all the details and let you fix exposure and white balance.
RAW files give you more freedom to edit. They keep all the data from your camera. You can change exposure and white balance without losing quality.
JPEG files are smaller and ready to use. Your camera makes them look good, but you lose some data.
RAW files take up more space and need editing before you can use them.
JPEG files are easy to share, but you cannot edit them as much.
JPEG files throw away some data to make the file smaller. This can make you lose details in bright or dark parts of your images. RAW files keep all the data, so you can fix mistakes and make your images look their best.
Tip: If you want the best results in lightbox photography, shoot in RAW. You can always make a JPEG later, but you cannot get back lost data from a JPEG.
You can get clean, bright images in lightbox photography by using the right camera settings. Try these tips and see how your images improve.
Creating Professional Product Images

Background Selection
Picking the right background makes your lightbox photos look better. The background helps your product stand out and look professional. It also shows off your brand. You can use this table to help you pick a background:
Criteria | Description |
|---|---|
Brand Alignment | Match the backdrop to your product and highlight its features. |
Simplicity | Pick a plain white or neutral background to keep the focus on the product. |
Texture and Materials | Choose backgrounds that complement the product’s texture or material for better appeal. |
Context | Show the item in a setting that reflects its use, helping people imagine it in their lives. |
Lighting | Make sure the background is evenly lit to avoid harsh shadows and create a polished look. |
Color Choices | Use white for a clean look or black for drama. Different colors can set different moods. |
A plain background is best for showing off your product. You can use colored paper, cloth, or boards with texture to make things interesting. Always check that the background does not take attention away from your product. Good backgrounds help people see details and make your photos look more professional.
Tip: Keep your background clean and smooth. This will help your lightbox photos look their best.
Composition and Styling
You can make your photos better by thinking about how you set things up. Put your product in the middle or use the rule of thirds to guide the eye. Add props that match your product and show how it is used. This makes your photos more interesting and helps people see your product clearly.
Use colors that look good together to make your product stand out.
Try colors that are close together for a calm look.
Add your brand colors to help people remember your brand.
Place props to show how people can use your product.
Try different setups and angles to see what looks best.
Soft light in your lightbox helps show off details. You can use shiny surfaces or white cards to add depth. Try using colorful cloth or small items to make your photo more fun. Styling is important for making your lightbox photos look professional.
Note: Trying new styles and smart setups can turn simple photos into great ones. Practice different ways to see what works best for your products.
Showcasing Lightbox Photography
Building a Portfolio
You can build a strong portfolio with lightbox photography. Start by preparing your lightbox. Cut large windows on three sides and cover them with fabric. This diffuses the light and gives you soft shadows. Line the inside with white poster board or paper. This creates a seamless background and reflects light evenly. Cover the windows with white fabric or tissue paper. This step helps you get even illumination.
Set up your LED lights around the lightbox. Move the lights to control shadows and highlights. Place your product in the center of the lightbox. Try different lighting setups to see what works best. Use colored papers or fabrics for different backgrounds. This adds variety to your photography. Use a tripod to keep your camera steady. Set a low ISO and a narrow aperture. Adjust the white balance for the best image quality.
Here is a simple checklist for building your portfolio with lightbox photography:
Prepare your lightbox with windows and fabric.
Line the interior with white poster board.
Cover the windows for soft light.
Place your product in the center.
Try different backgrounds.
Use a tripod and adjust camera settings.
You can show your best images in your portfolio. This helps you attract clients and show your skills in photography.
Sharing and Presenting Work
You want your lightbox photography to reach more people. Create a website with a consistent design. Place your contact information and portfolio links at the top of the page. This makes it easy for visitors to find what they need. Make sure your website works well on phones and computers. A mobile-friendly site helps everyone see your images.
Use photo galleries that show your work in the best way. Tools like Canva help you design custom pages and marketing materials. NextGEN Gallery lets you create responsive galleries and manage your portfolio. These tools make your lightbox photography stand out.
Tip: Always optimize your images for fast loading. High-quality images look great, but slow websites can turn visitors away.
Showcasing lightbox photography helps you build your brand and connect with clients. You can share your work online and present your skills in photography with confidence.
Common Mistakes and Troubleshooting
When you use a lightbox, you want your photos to look bright and clear. Sometimes, you might see problems like too much brightness, dark shadows, or colors that look wrong. You can fix these problems with a few easy steps.
Overexposure and Shadows
Overexposure means your photo is too bright and loses details. Shadows can make your product look uneven or hide parts you want to show. You can stop these problems by checking your lights and camera settings.
Change where your lights point to help your product stand out. Move your lights until the whole lightbox looks evenly bright.
Use softboxes or diffusers to spread out the light. This makes shadows softer and your photos look smoother.
Set your camera’s exposure for the product, not the background. This helps your photos show more details and better lighting.
Tip: Always look at your photos on your camera screen. If you see bright spots or dark shadows, move your lights or add more diffusion.
Color Consistency Issues
Color consistency is important in lightbox photography. Sometimes, your photos look different if you use more than one lightbox or change your LED lights. This happens because not all LED lights are the same.
Watch for color changes in one LED strip or between different lightboxes.
Pick high-quality LED modules for your lightbox. Brands like Xicato give you better color consistency.
Buy from trusted companies and ask lighting experts for help when you get a new lightbox.
You can also check how companies measure color consistency. They use SDCM or MacAdam steps. A 5-step SDCM is good for most uses, but a 3-step SDCM is even better. Fewer steps mean your photos will have more accurate colors.
Note: If you see color changes in your photos, try using the same kind of LED light in every lightbox. This helps your photos look professional and keeps the colors true.
If you follow these steps, you can fix common problems in lightbox photography. Your photos will have better lighting, true colors, and high quality every time.
You can take really good photos with an LED studio lightbox. The table below explains how a lightbox can help you make better pictures:
Benefit | Description |
|---|---|
Portability | You can carry your lightbox anywhere and set it up fast. |
Adjustable Brightness | You can change the light in your lightbox for each photo. |
High CRI | Your lightbox shows real colors and gives you clear images. |
Try out new ideas with your lightbox. You can test different color temperatures, spray fog for cool effects, and learn from your mistakes. Start with one light, move it around, and use reflectors to make your photos look better. Your pictures will improve as you keep practicing.
Keep trying new things with your lightbox. Every photo you take helps you learn and get more creative with studio photography.
FAQ
How does a lightbox improve product photography?
A lightbox makes the lighting even. You can change shadows and highlights. Your product looks bright and clear. You get better photos. You can show small details and textures in your pictures.
What size lightbox should you choose for your photography needs?
Choose a lightbox that matches your product size. Small lightboxes are good for jewelry. Medium ones work for electronics. Large lightboxes are best for clothes. Your photos look better when your product fits inside.
Can you use a lightbox for portfolio photography?
You can use a lightbox to make portfolio photos. It helps you get clean pictures. Your work has the same lighting every time. Your portfolio looks neat and professional. You can show clients high-quality pictures.
How do you avoid reflections in lightbox photography?
Use diffusers and polarizing filters in your lightbox. Move your lights to stop glare. Try new angles for your shots. You get fewer reflections in your photos. Your product looks nicer in your pictures.
What accessories help improve lightbox photography quality?
You can add backgrounds, diffusers, and stands to your lightbox. These tools help you style your photos. You get better results with your pictures. Your images look neat and finished. You can show off your product’s best parts.
See Also
Exploring Acrylic Light Box Photography Techniques and Tips
Essential Tips for Achieving Professional Acrylic Light Box Photography
Understanding Acrylic Light Boxes: Varieties, Advantages, and Uses
