Mastering Acrylic Light Box Details: Essential Elements for Professional-Quality Results

Mastering the details of an acrylic light box is crucial for achieving great results. A quality lightbox display ad can transform plain signs into eye-catching displays. It's best to use a neutral white color temperature ranging from 4000K to 6000K, as this enhances the brightness and vividness of colors. Utilizing frosted acrylic or polycarbonate sheets helps to distribute light evenly, eliminating bright spots and creating a smooth, glowing effect. These features significantly enhance the appearance of your display, making it look more polished and professional.
Key Takeaways
Pick a white light color between 4000K and 6000K for clear displays.
Use frosted acrylic sheets to spread light evenly and avoid glare.
Choose acrylic panels that are at least 20 mm thick for strength and brightness.
Place LED strips on the frame edges for even lighting and no harsh spots.
Clean your light box often with a soft cloth to keep it looking good and working well.
Understanding Acrylic Light Boxes
What Are Acrylic Light Boxes and Why Use Them?
An acrylic light box is a tool that lights up pictures, words, or designs. It uses LED lights and clear acrylic sheets to make bright, colorful displays. You often see these in places needing clear, bright signs. Their main job is to make things easier to see and grab attention. Whether for ads, directions, or decoration, they mix usefulness with good looks.
Why Acrylic Light Boxes Are Great for Signs
Acrylic light boxes have many perks that make them a top pick for signs.
They make signs easy to see in busy places like malls or stations. This helps more people notice your message.
You can design them to fit different businesses like stores, hospitals, or hotels. This makes them great for connecting with customers.
The acrylic spreads light evenly, making displays bright and smooth. There are no dark spots, so they look neat and professional.
These light boxes are light, strong, and can handle weather. You can use them inside or outside without worrying about damage.
With these features, acrylic light boxes help businesses stand out in crowded spaces.
Where Acrylic Light Boxes Are Used
Acrylic light boxes are used in many places because they work well and look great.
At airports or train stations, they help people find their way and show ads. Their bright lights make important info easy to see.
Stores use them to show sales, products, or brand messages. They’re great for changing ads quickly when needed.
In outdoor areas like parks or city streets, they add style and give space for ads.
These uses show how acrylic light boxes are both useful and nice to look at, making them a must-have for modern signs.
Designing Your Acrylic Light Box
Deciding Size and Layout
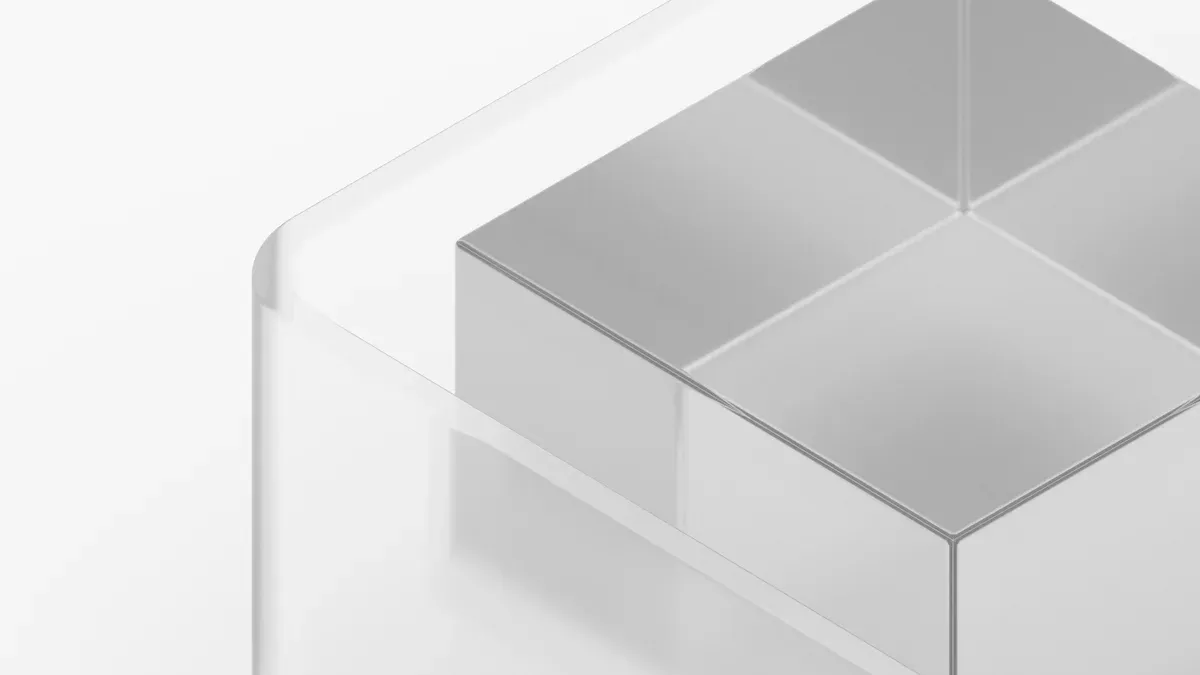
Start by picking the size and shape of your light box. Measure the space where it will go. Think about how far people will be when they see it. Bigger boxes are better for faraway views, while smaller ones work up close. The thickness of the acrylic panel is also important. Thicker panels make the light brighter. Experts suggest using panels at least 20 mm thick for good results.
The width of the box also affects brightness. Adding 5 cm to the width can make it 1.5 times brighter, especially in sunny spots. Use these tips to design a light box that is bright, strong, and the right size.
Key Points | Details |
|---|---|
Panel Thickness | At least 20 mm thick for better brightness. |
Width Adjustment | Adding 5 cm boosts brightness by 1.5 times. |
Long-lasting Panels | Acrylic panels can last up to 30 years. |
Picking Fonts, Colors, and Graphics
The look of your light box matters a lot. Pick fonts that are easy to read from far away. Simple fonts like Arial or Helvetica work well. Use bold colors that stand out against the background. For example, white letters on a dark background are easy to see.
Add pictures or graphics that match the text but don’t overdo it. Too many details can confuse people. Keep the design simple and clear. Try different font, color, and picture combinations to find the best look.
Making Sure Light Spreads Evenly
Even lighting makes your light box look professional. Uneven light can create bright spots that look bad. Use frosted acrylic or polycarbonate sheets to spread the light evenly. These materials help create a smooth and glowing effect.
Good light diffusion also makes the box easier to read and more attractive. Without it, bright spots can distract people and ruin the design. Always test your light box to make sure the light spreads evenly before finishing it.
Materials and Tools for Acrylic Light Boxes
Picking the Best Acrylic Sheets and Frames
Choosing good acrylic sheets and frames is very important. Acrylic panels are strong and resist damage from weather. They are light and don’t break easily like glass. Acrylic stays clear even after being in the sun for a long time. This keeps your light box looking bright and new.
For better lighting, use acrylic sheets at least 20 mm thick. Thicker sheets let more light through and look brighter. For example, a 20 mm acrylic sheet can reach 449.3 lux, much brighter than glass. Acrylic is also easy to install and works well indoors or outdoors.
Material | Light Transmission (lux) | Thickness (mm) | Notes |
|---|---|---|---|
Acrylic Panel | 449.3 | 20 | Brighter and better light than glass. |
Glass Sheet | 55.1 | Same width | Much less light passes through compared to acrylic. |
Choosing LEDs for Bright and Even Light
The right LEDs make your light box shine evenly and brightly. High-lumen LED strips are best for steady lighting. LEDs last a long time, about 50,000 to 70,000 hours. Keeping them cool is important so they work well and last longer.
Using frosted acrylic sheets with LEDs spreads the light evenly. This makes the light soft and smooth, without harsh spots. Many people say frosted acrylic improves both the look and function of light boxes.
Tools You Need for Building and Cutting
You need the right tools to build your light box. Use a laser cutter or saw to cut the acrylic panels neatly. Sandpaper or a polisher smooths the edges so they aren’t sharp. A strong glue made for acrylic helps stick parts together. A drill or screwdriver secures the frame, and a soldering iron or connectors help with wiring.
Having these tools makes building easier and gives better results. Being prepared with the right equipment helps you create a strong and good-looking light box.
Preparing the Components
Cutting Acrylic Sheets to Size
Cutting acrylic sheets correctly is an important first step. Choose good materials like PLEXIGLAS PMMA 0F00, which is clear and works well with laser cutters. Measure the size you need twice to avoid mistakes. A thickness of 6 mm is a good choice for strength and light passing through.
Use a steady hand or a laser cutter for smooth edges. If using a saw, make sure the blade is sharp to stop chipping. Keep cut angles below 45° to avoid light reflecting downward. Work on a soft surface to protect the acrylic from scratches.
Aspect | Details |
|---|---|
Material Selection | Use PLEXIGLAS PMMA 0F00 for clear and quality results. |
Thickness | 6 mm is strong and lets light through well. |
Panel Size | Adjust size based on your design needs. |
Angle of Cuts | Keep under 45° for better light spread. |
Smoothing and Polishing Edges
After cutting, check the edges for rough or sharp spots. Use sandpaper, starting with rough grit and moving to finer grit, to smooth them. For a shiny finish, try flame polishing. This uses heat to melt and smooth the edges, making them look like glass.
For bigger pieces, use a buffing wheel to save time while smoothing. After polishing, clean the edges to remove any leftover dust or dirt that could cause problems during assembly.
Aligning Components for Assembly
Aligning parts properly makes your Acrylic Light Box look neat and work well. Lay out all parts, like the frame, back panel, and acrylic sheets. Use clamps to hold everything steady while assembling. Aluminum frames can add strength and help cool the LEDs.
Before attaching parts, check measurements and make sure edges line up perfectly. Clean the acrylic sheets to remove dust or fingerprints. If adding designs, apply them carefully to avoid bubbles. Glue the parts together, starting with the bottom and working upward. Hold each piece until the glue dries.
Tip: Test the LED lights before sealing the box. This helps you fix any lighting problems early.
Assembling the Acrylic Light Box
Installing LED Lights for Optimal Illumination
Setting up LEDs correctly makes your Acrylic Light Box shine well. Pick high-lumen LED strips for bright and steady light. Place the LED strips along the edges of the frame. This helps spread light evenly across the acrylic panel. Use frosted acrylic as a diffuser to avoid bright spots. It smooths the light and gives a polished look.
Keep the LEDs cool to make them last longer. Overheating can shorten their lifespan. Add a dimmer or smart control to adjust brightness easily. Test the LEDs before moving on to check for even lighting.
Securing the Frame and Acrylic Panels
A strong frame keeps your light box sturdy and safe. Aluminum or steel frames work best because they are tough. Attach the acrylic sheets to the frame using glue or clear tape. This keeps the panels tight and in place.
Check that all parts line up correctly before finishing the assembly. Misaligned panels can ruin the light’s look and spread. Use clamps to hold bigger panels steady while working. After securing everything, inspect for gaps or loose pieces.
Wiring and Electrical Connections
Connecting wires properly makes your light box safe and functional. Know the wire colors: black for power, white or gray for neutral, and green for grounding. Follow the wiring diagram for your circuit type. For example:
L1 and N mean a 110V circuit.
L1 and L2 mean a 240V circuit.
L1, L2, and N mean a 110-240V circuit.
Tighten all wire connections to stop flickering or hazards. Use insulated connectors to protect the wires. Test the light box after wiring to ensure it works safely and well.
Tip: Turn off the power before touching wires to avoid accidents.
Final Adjustments and Installation
Checking Brightness and Light Spread
Check your light box for brightness and even lighting. Put it in a dim room to test how well it lights up. Use two light sensors to measure brightness levels. Place one sensor in the middle of the acrylic panel and the other at a corner. This helps find any uneven lighting or dim spots.
If the light isn’t even, move the LED strips around. Make sure they are spaced equally along the frame edges. Frosted acrylic sheets can also help spread the light smoothly. Always test again after making changes to see if it’s better.
Tip: Testing in a special room, like a daylighting chamber, gives more accurate results.
Fixing Shadows and Bright Spots
Shadows and bright spots can make your light box look bad. Turn on the LEDs and check the acrylic panel for uneven areas. Adjust the LED positions to spread the light better.
If bright spots remain, add a diffuser film to the panel. This film spreads the light and reduces glare. You can also use reflective tape inside the frame to brighten dim areas. These fixes will make your light box look more polished.
Setting Up the Light Box in Its Spot
Placing your light box in the right spot makes it stand out. Choose a location based on its purpose. For example, put it where people walk or drive by to grab attention. Use it near products to highlight features or at checkout areas to boost sales.
Marketing Zone | Purpose |
|---|---|
DRIVE-BY/WALK-BY ZONE | Catch attention of people passing by. |
PRODUCT DISPLAY POINT | Show product details to make them look special. |
POINT OF PURCHASE | Share upgrade ideas to add value to purchases. |
TRANSITION AND/OR NON-PRODUCT ZONES | Promote other products or services visitors might not know about. |
Attach the light box to a wall or stand using screws or brackets. Make sure it’s straight and secure. Test it in its final spot to ensure it works well and looks great.
Maintenance and Troubleshooting
Cleaning and Maintaining Acrylic Surfaces
Keeping your acrylic light box clean helps it look good and work well. Acrylic is strong, resists water, and works indoors or outdoors. Cleaning often stops dust from building up and keeps it shiny.
Follow these steps to clean safely:
Turn off and unplug the light box to stay safe.
Wipe off dust with a soft, dry cloth to avoid scratches.
Use a damp cloth with gentle cleaner; avoid harsh chemicals.
Dry the surface with a soft cloth to stop streaks.
For deeper cleaning, polish the acrylic to fix small scratches and make it clearer. Use fine sandpaper or polishing cream for manual work. For a shiny finish, try diamond edge polishing for a smooth, professional look.
Tip: Clean your light box often to keep it looking great and lasting longer.
Fixing Common Issues Like Flickering Lights
Flickering lights can ruin your display and distract people. Fixing this quickly keeps your light box looking its best.
Here are common reasons and fixes for flickering:
Loose LED Strips: Make sure LED strips are attached tightly to avoid uneven light.
Wrong Power Supply: Use the right power supply to match the LED wattage.
Poor Ventilation: Allow airflow to keep LEDs cool and working well.
Using frosted acrylic or polycarbonate helps spread light evenly and reduces glare. If flickering continues, check the wires and tighten any loose parts.
Note: Adding dimmers lets you control brightness and reduces strain on LEDs, helping stop flickering.
Tips for Prolonging the Lifespan of Your Light Box
Taking care of your light box helps it last longer and work better. Focus on using good materials, keeping it cool, and regular maintenance.
Frosted acrylic or polycarbonate removes bright spots and gives smooth light.
Make sure there’s enough airflow to cool the LEDs and avoid overheating.
Match the power supply to the LED wattage to protect the parts.
LEDs can last 50,000 to 70,000 hours. To protect them, use heat sinks like aluminum channels to spread heat and prevent damage. Acrylic’s strength and weather resistance also make it a great long-term choice.
Tip: Check your light box often for damage or wear. Fix problems early to save money on repairs.
Mastering the details of an acrylic light box leads to great results. Carefully designing and assembling it makes your display look amazing. Following these steps ensures even light, strength, and a clean finish.
Remember: A strong acrylic light box improves your signs and saves money. It lasts long and uses less energy, making it a smart choice for businesses.
Spend time making your light box perfect, and it will work well for years.
FAQ
What’s the best way to clean an acrylic light box?
Wipe it with a soft, damp cloth and gentle cleaner. Don’t use harsh chemicals or rough materials that might scratch it. Dry the surface with a microfiber cloth to avoid streaks. Cleaning often keeps your light box neat and shiny.
Tip: Clean your light box every week to keep it clear and bright.
How can I stop bright spots in my light box?
Use frosted acrylic sheets or diffuser films to spread light evenly. Place LED strips evenly along the edges of the frame. Test the lighting before sealing the box to make sure it glows smoothly.
Can I use any LED lights for my light box?
No, only use high-lumen LED strips made for signs. These LEDs are bright, last longer, and spread light evenly. Make sure they match your power supply and have good airflow to stay cool.
How long do acrylic light boxes usually last?
With good care, they can last up to 30 years. Clean them often and check for electrical problems to keep them working well. Using thick acrylic sheets and strong LEDs also helps them last longer.
Is it safe to use an acrylic light box outside?
Yes, they can handle outdoor weather like rain and sun. Use UV-resistant acrylic and waterproof LED strips for extra protection. Secure the frame tightly to keep it safe from wind and other conditions.
Note: Check outdoor light boxes often for damage from bad weather.
See Also
Exploring Acrylic Light Boxes: Uses, Advantages, and Choosing Wisely
Evaluating Acrylic Light Box Materials: Strength and Aesthetic Choices
Creating Stunning Acrylic Light Box Showcases for Maximum Appeal
Comprehensive Guide to Acrylic Light Box Signage for Brand Growth
The Advantages of Custom Acrylic Light Box Letters for Visibility
