Light Box Photography LED Setups: Optimal Configurations for Different Products

You want your product photos to look bright and clear. Light box photography helps you control shadows, bright spots, and colors. If you pick the right lightbox and LED setup for your product, your photos will look professional.
Good lighting can change how your product looks in a picture.
Good lighting shows colors, adds depth, and makes products look real and nice. LEDs save energy, do not get very hot, and let you change the color of the light. This helps you get great photos for every product, even if you are new to this.
Key Takeaways
Good lighting is very important for product photos. It makes colors and details stand out. This helps products look nice.
A lightbox lets you control shadows and reflections. This gives you clear and professional photos every time.
Pick a lightbox that fits your products well. The box should be at least 12 inches bigger than your biggest item.
Use high CRI LEDs to show colors correctly. Try to get a CRI of 90 or more for the best look.
Try different ways to set up your lights. One-point, two-point, and three-point lighting can make your photos look different.
Why Light Box Photography Matters
Benefits for Product Photography
You want your online pictures to look great. Light box photography gives you smooth lighting. This helps your products look bright and clear. You can show every detail, like the feel of fabric or the shine of jewelry. This makes your products look real and honest.
You get the same lighting in every photo.
Every picture matches your brand’s style.
You can show tiny details customers want to see.
Your store looks more professional.
Editing is easier because the background is simple.
You can try different angles and props for fun photos.
A lightbox lets you control shadows and reflections. You can show things like electronics or makeup without bright spots or color changes. This control helps you get good results, even if you are new.
Here is a quick look at how a lightbox helps your photos compared to regular lighting:
Benefit | Description |
|---|---|
Gets rid of harsh shadows | Soft lighting makes shadows lighter. You can see details on things like handbags or jewelry. |
Shows true colors | The light stays the same, so colors look real. You do not get weird colors from bad lighting. |
Makes work easier | The setup is always the same. Anyone can take good pictures, even without special skills. |
Common Lighting Challenges
You may have problems with lighting when taking product photos. Shadows can hide important parts. Reflections can bother people looking at your products. Color changes can make things look wrong.
A lightbox fixes these problems by giving you a controlled space. You get soft, even light that cuts down on shadows and glare. You can change the background and light for each product. This helps you take pictures of shiny things, like jewelry or electronics, without bad reflections. Every photo looks the same, so your store looks neat and professional.
Tip: Use a lightbox for small home decor, beauty items, or food. You will get better pictures and spend less time editing.
Choosing a Product Photography Lightbox
Selecting the Right Size
You need a product photography lightbox that fits your products with extra space. Always pick a box at least 12 inches larger than your biggest item. This gives you room to adjust angles and lighting. If you shoot jewelry, a 24 by 24 inch box works well. For larger items, go as big as your space and budget allow.
When you choose a lightbox, think about these points:
Make sure the box fits your current and future products.
Pick a box with a seamless, easy-to-clean background.
Look for a sturdy but lightweight frame for easy moving.
Choose a box with built-in lighting for simple setup.
High CRI and LED Quality
Color accuracy matters in product photos. High CRI (Color Rendering Index) LEDs show true colors and soft light. For product photography, use LEDs with a CRI of 90 or higher. This helps your photos look real and professional.
Application | Recommended CRI |
|---|---|
Retail Spaces | 90+ |
Business Applications | 90-97 |
Photography | 90-97 |
Integrated led light boxes with high CRI LEDs give you even, natural light. You avoid strange color shifts and harsh shadows.
Light Modifiers and Reflective Surfaces
You can improve your photos with light modifiers and reflective surfaces. Acrylic plates work well because they spread light evenly and add a polished look. They also make your products stand out by reducing shadows and reflections.
Advantage | Description |
|---|---|
Clarity | Acrylic makes displays look clear and professional. |
Light Distribution | Light spreads evenly, so your product looks its best. |
Mirror sheets create a sleek, modern, and polished look that instantly elevates a retail display. Their reflective nature adds depth and dimension, making spaces feel larger and more open.
You can use these tools in led light boxes to get better results. Try different setups to see what works best for your products.
Light for Product Photography: Setup Basics
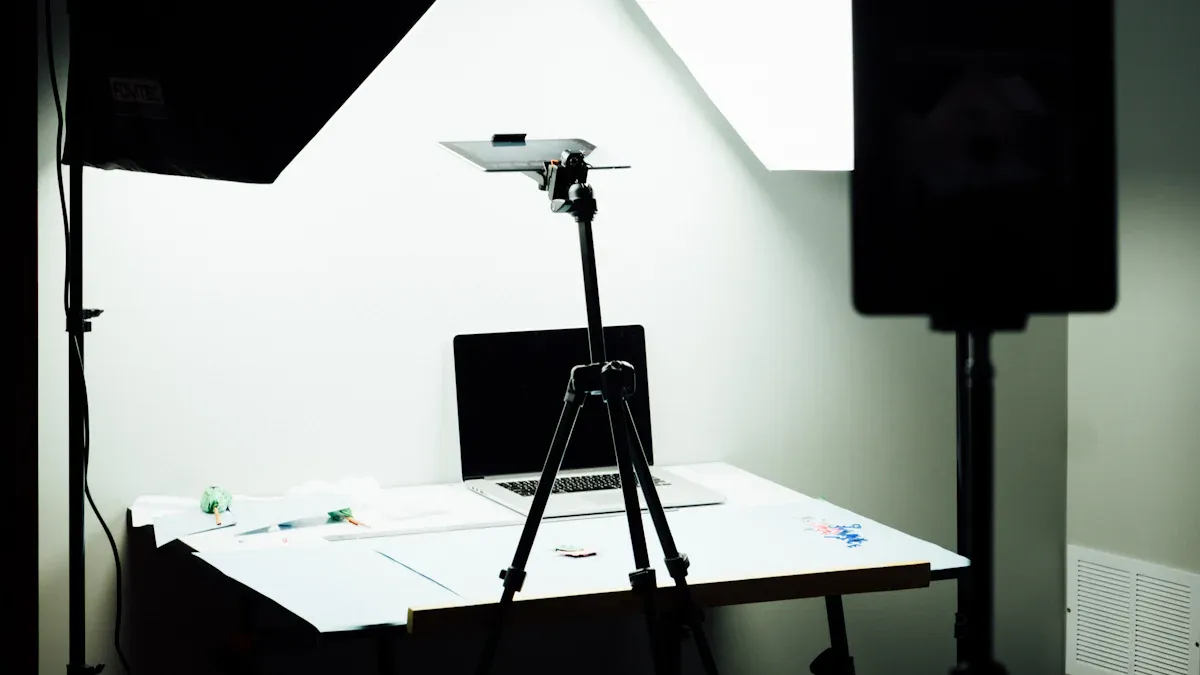
Assembling the Lightbox
You begin by putting together your lightbox. You need a camera, tripod, led lights, reflector, filter or diffuser, and a seamless background. Here are the steps to follow:
Get all your tools ready for lighting.
Build your lightbox and put it on a strong table.
Make sure the background is clean.
Wipe your product to get rid of dust.
Place your product in the middle of the lightbox, a few inches away from the background.
Set up led lights so the light hits your product from every side.
Put your camera on the tripod so it does not move.
This setup lets you use artificial light and natural light when you need it. You get better pictures with good studio lighting and a smart lighting setup.
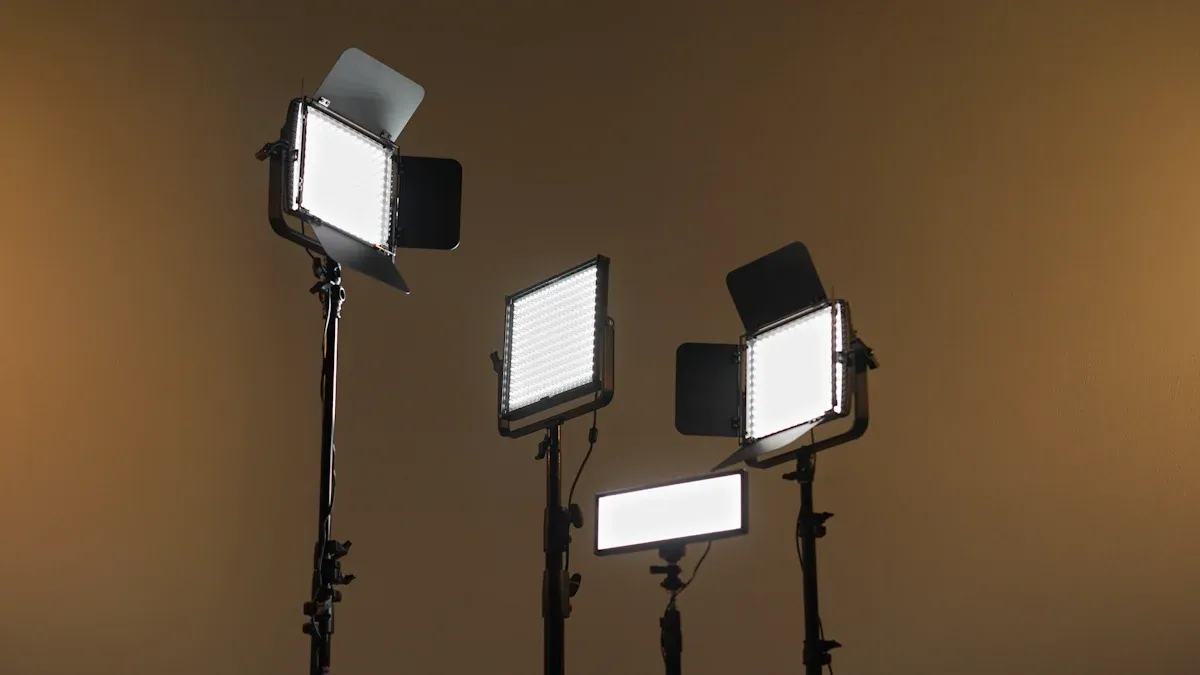
One, Two, and Three-Point Lighting
You can pick different ways to light your product. The table below shows how each lighting style changes your photos:
Lighting Setup | Description | Effect on Product Images |
|---|---|---|
One-Point | Uses one light and a reflector. | Adds depth and shape, good for beginners. |
Two-Point | Uses a main light and a fill light. | Makes shadows softer and shows more details. |
Three-Point | Adds a backlight to the main and fill lights. | Gives you the most control and makes your product stand out from the background. |
You can use studio lighting and led lights for each style. Try three-point lighting for jewelry or electronics. Use two-point lighting for makeup or small decorations. One-point lighting is good for simple pictures.
Adjusting Intensity and Color Temperature
You should change the brightness and color temperature of your led lights for the best results. Most light boxes use led lights with a color temperature of 5500K and a CRI index of 97 or higher. This helps your photos show real colors and look natural. You can make the lights brighter or dimmer so your product does not look too bright.
Feature | Details |
|---|---|
Color Temperature Range | 5500K |
CRI Index | ≥97 |
Changing these settings lets you use artificial light and studio lighting for a professional look. You can mix natural light with led lights for balanced lighting. These tips help you get clear and bright photos every time.
Tip: Always test your lights before you take pictures. Move your led lights and change how bright they are until your product looks great.
Optimal Lightbox Configurations by Product Type
Jewelry
You want your jewelry to shine in every photo. Light box photography helps you control the light. This lets you show small details and true colors. Light tents spread light evenly and make reflections softer. Your jewelry looks neat and professional.
Put your jewelry in the middle of the light tent.
Turn your lights and jewelry to stop bad reflections.
Use black or white foam boards to block reflections from other things.
Place a big piece of white paper in front of your jewelry. This bounces clean light onto it.
Pick soft, spread-out light to show sparkle without bright spots.
A lightbox gives you a space you can control. You do not need to worry about the weather or time. You get clear pictures with better color and detail. This matters for online shopping because people want to see everything before buying.
Tip: Move your jewelry and lights until you see the best shine and less reflections.
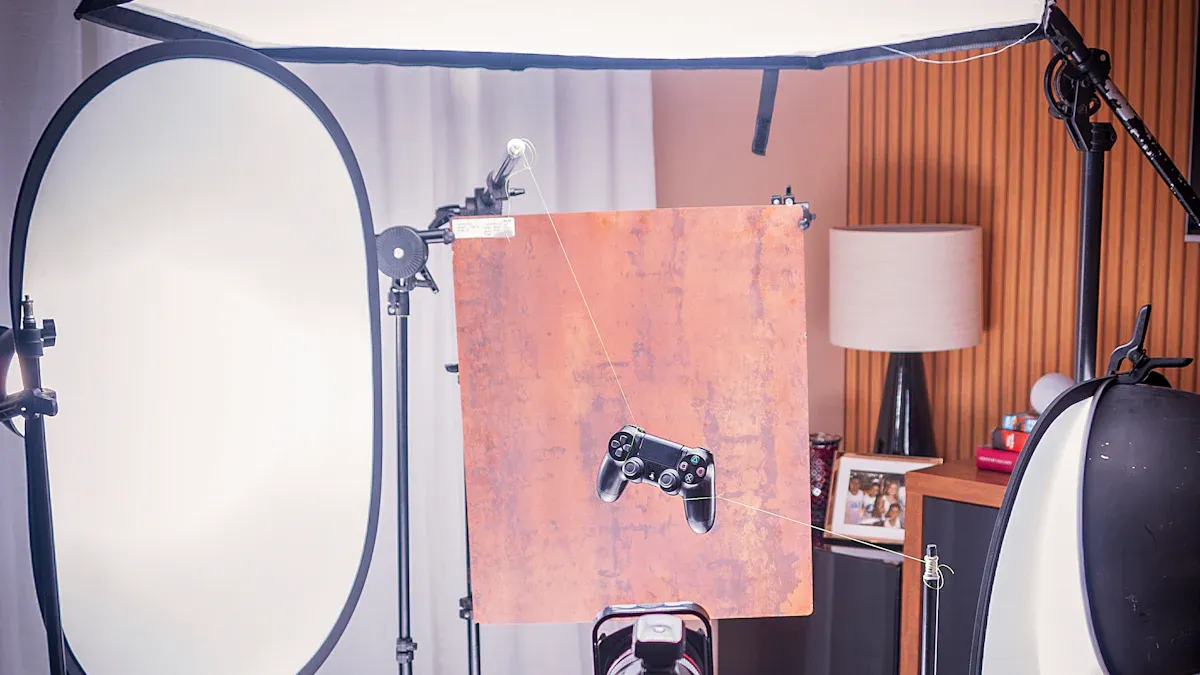
Electronics and Gadgets
You need to show every button and screen in your photos. The right lighting setup stops glare and dark spots. Light tents with frosted diffusers spread light over your gadgets.
The Photon Light Module System is good for electronics. You can change the lights with your phone and make different effects. This system uses more than 2,700 LEDs. It can look like many lamps at once. The frosted diffuser gives even light, so your photos look high-quality.
Light box photography helps you show screens, ports, and textures. This makes your online listings look better with great photos.
Note: Clean your gadgets before taking pictures. Dust and fingerprints show up easily with bright light.
Cosmetics and Beauty
Cosmetics need soft, even light to show real colors and smooth looks. Light tents help you avoid strong shadows and reflections on shiny packages. Put your products in the middle of the light tent. Use soft LED lights from both sides.
You can add a reflector in front of your products. This bounces light back and fills shadows. Your makeup looks fresh and nice. For online stores, good photos help people trust your brand and see the real colors.
Use soft LED lights on both sides.
Put a white reflector in front to fill shadows.
Change the angle of your lights to stop glare on shiny packages.
Try different backgrounds, like white or pastel, to match your brand.
Tip: Take a few test shots to check your lighting before you start.
Apparel and Accessories
You want to show the feel and color of clothes and accessories. Light tents with two mono lights give you choices. Put the first light at a 45-degree angle from your product. Place the second light as a fill, also at 45 degrees but closer. You can use a reflector instead of a second light to fill shadows.
Put the main light at a 45-degree angle.
Place the fill light or reflector on the other side, also at 45 degrees.
Let your lights recharge between flashes for steady results.
This setup helps you take clear photos that show fabric and colors. Your online store will look better with high-quality pictures.
Food and Beverages
Food photos need special light to make dishes look fresh and tasty. Light tents with LED lights work well because you can change the brightness and color. For close shots, ring lights give even light and show textures. Studio strobes freeze motion if you want to show pouring drinks or splashes.
Technique | Description |
|---|---|
Continuous LED lights | Give steady and changeable light, good for many setups. |
Ring lights | Great for close shots, give even light and show shiny surfaces. |
Studio strobes/flash | Give quick bursts of light, good for stopping motion in action shots. |
Tungsten lights | Give warm light, make things cozy, but get hot. |
Fluorescent lights | Save energy and work well, but may need color fixes. |
Softboxes | Make light softer and spread it out, good for food. |
Diffusers | Scatter light to make it less strong and stop hard shadows. |
Reflectors | Bounce light onto food, make lighting better. |
Backlighting | Lights food from behind, makes a glow and looks nice. |
A setup with panels and reflectors helps you control shadows and bright spots. You can use dark cards to add depth and make food look more real. Good photos bring more customers to your online store.
Tip: Use backlighting to make drinks and desserts glow. This gives your photos a professional look.
Small Home Decor Items
You want to show the shape and material of small decor pieces. Light tents with softboxes or LED panels with diffusers give soft, even light. This cuts down strong shadows and shows details in wood, glass, or ceramics.
Pick a camera with manual settings for control.
Use softboxes or LED panels with diffusers for even light.
Set up white or light gray paper for a clean background.
Use holders to keep items standing up.
Try making your own lightbox for soft, controlled light.
Use reflectors to bounce light onto your product.
Add diffusers to make strong light softer.
Move your lights to show the best parts of your decor.
"Controlling and shaping light means changing its direction, strength, and quality to show your product's details. You can use tools and tricks to control shadows and reflections."
Light box photography helps you make great photos for your online store. Using the best lighting for each product type gives you the best results and helps your products stand out.
Troubleshooting Lightbox Photography Issues
Reducing Shadows
Sometimes shadows show up in your product photos. Shadows can hide important details. They also make your pictures look less nice. A lightbox spreads light all around your product. This helps stop shadows from forming. You can use two lights from different sides. This fills in dark spots and makes your product pop. Put a thin sheet or paper in front of your lights. This softens the light and makes shadows less strong. Your photos will look cleaner and more professional.
Technique | Description |
|---|---|
Use a lightbox | Spreads light and gets rid of strong shadows. |
Softens light with a thin sheet or paper. | |
Utilize two light sources | Lights your product from both sides to cut down shadows. |
Fixing Color Casts
Color casts can make your product look strange. You might see blue or yellow colors in your photos. To fix this, set your camera’s white balance. White balance helps your camera show real colors. Use a white or gray card to help your camera pick the right color. If colors still look wrong, change them with editing software. You can fix color problems and make your product look real.
Set white balance before you take pictures.
Use a white or gray card for better color.
Change colors in editing if you need to.
Minimizing Reflections and Glare
Reflections and glare can take attention away from your product. Shiny things like glass or metal cause this problem. Move your lights to different spots to lower glare. Use black foam board to block extra light. Matte spray helps by making shiny things less reflective. If you see thin reflections, change your light angles until it looks better.
Block light with black foam board.
Use matte spray for shiny items.
Change light angles for fewer reflections.
Preventing Overexposure
Overexposure makes your product look too bright. You lose details when this happens. Lower your light brightness to fix this. Check your camera settings and use a lower ISO. If your photo is still too bright, fix it with editing tools. You can bring back lost details and make the exposure better.
Tip: Always check your photos before you finish. You can find problems early and fix them with editing.
Common Issues | Solutions |
|---|---|
Use soft lighting like softboxes or light tents to stop strong shadows. | |
Inconsistent Lighting | Try natural light and use reflectors or diffusers for better control. |
Limited Views | Take pictures from many angles and get close-up shots to show details. |
Lack of Detail | Show every version of your product so customers see all choices. |
You can fix most problems with good lighting and smart editing. Careful work during your shoot and editing helps you make great product photos every time.
Product Photography Lightbox Best Practices
Quick-Reference Table by Product Type
You can look at this table to find the best lighting for each product. This helps you get good pictures every time and keeps your photos looking the same.
Product Type | Lighting Setup | Tips for Best Results |
|---|---|---|
Jewelry | Three-point, soft diffused | Use reflectors to make jewelry shine |
Electronics | Two-point, frosted diffusers | Clean screens so there is no glare |
Cosmetics | Two-point, soft LED | Put a reflector in front for even light |
Apparel | Two mono lights, 45° angles | Use fill light or reflector for soft shadows |
Food & Beverages | Ring light or backlighting | Try backlighting for a fresh look |
Home Decor | Softboxes or LED panels | Use diffusers to make shadows softer |
Tip: Take pictures of similar products together. This keeps your lighting the same for all your items.
Setup Checklist
Follow this checklist to get your lightbox ready for taking product photos. This helps you avoid problems and get clear, high-quality pictures.
Decide what you want and what you need for your shoot.
Make a list of shots: hero, 45°, front, back, close-up, size, and lifestyle.
Clean your products and take off dust or stickers.
Bring tools like a lint roller, gloves, cloths, Blu-Tack, clamps, and tape.
Use a gray card to help your camera show real colors.
Change your camera settings: shoot in RAW, set ISO to 100, use manual white balance, and single-point autofocus.
Make sure your tripod is level and mark where your product goes.
Pick a background: white sweep or acrylic for shiny looks.
Plan your lighting: choose continuous or flash, add softboxes or panels, and test reflectors.
Check your batteries, memory cards, and cables so everything works.
Write down your lighting setup and camera settings for next time.
Use a light meter to check how bright your lights are and keep it the same.
Note: Mark where your lights go and write down your setup. This helps you do the same thing again for great results.
You can get great photos with light box photography if you follow some simple steps.
Put light bars in the center for even lighting. Change the angle of the beams to cover more space.
Check how deep your lightbox is. Use masking tape to test where lights go so you do not get bright spots.
Pick the best LED setup for each product. This helps your pictures look better.
Try out different setups and backgrounds. You will find what works best for your products.
Read guides about lighting and camera settings. This helps you get better at taking pictures.
FAQ
What is the best way to clean my lightbox?
You should use a soft, dry cloth to wipe the inside and outside. Avoid water or harsh cleaners. Dust and fingerprints can affect your photos. Keep your lightbox clean for the best results.
How do I avoid harsh shadows in product photos?
You can place your lights at different angles. Use diffusers or white paper to soften the light. Move your product until you see even lighting. This helps you get clear photos without strong shadows.
Can I use my phone for lightbox photography?
Yes, you can use your phone. Set your phone on a tripod for steady shots. Use the manual mode if possible. Adjust brightness and focus for sharp images. Good lighting helps your phone camera work well.
What background color works best for most products?
White backgrounds work for most products. They make colors look true and keep the focus on your item. You can try gray or black for shiny or light-colored products. Choose a background that matches your brand style.
Do I need special software to edit my product photos?
You do not need expensive software. Free apps like Snapseed or Lightroom Mobile work well. You can crop, adjust brightness, and fix colors. Editing helps your photos look more professional.
See Also
Creating The Perfect Light Box For Acrylic Art Displays
Photography Techniques For Acrylic Light Box Displays
Key Elements For Achieving Professional Acrylic Light Box Results
