How to Install LED Box Wall Lights

You can Install LED Box Lights safely and easily, even if you have never worked with lighting before. With a few simple steps, you will see that you do not need to feel nervous about this project. Always use the right tools and follow safety rules. That way, you can get the job done safely and easily. Many DIYers and homeowners enjoy the results and feel proud of their work.
Key Takeaways
Get the tools you need like screwdrivers, wire strippers, and a voltage tester before you start. This helps you work faster and keeps you safe.
Always turn off the power at the breaker box before you do any electrical work. This step is very important to stop electric shocks and keep you safe.
Pick the right materials for your LED box lights, especially if you put them outside. Find weatherproof fixtures and high IP-rated parts to make them last longer.
Use a step-by-step guide for installation. Prepare the wall, connect the wires, and mount the light fixture tightly. This way, your setup will work well.
Take care of your LED lights often by cleaning the fixtures and checking for loose wires. Doing this helps your lights last longer and stay bright.
Tools and Materials for Install LED Box Lights
Before you start to install led box lights, you need to gather the right tools and materials. Having everything ready makes the job smoother and helps you avoid mistakes. Let’s look at what you’ll need.
Essential Tools
You don’t need fancy equipment to install led box lights. Most of these tools might already be in your toolbox. Here’s a handy list:
Screwdriver (Phillips and flathead)
Wire stripper and cutter
Voltage tester
Drill with bits
Measuring tape
Pencil or marker
Level
Ladder (if you’re working up high)
Tip: Always check your voltage tester before you use it. This tool keeps you safe by making sure the power is off before you touch any wires.
Materials Needed
Choosing the right materials is just as important as having the right tools. When you install led box lights, you want them to last and stay safe. Here’s what you’ll need:
LED box wall light fixture
Electrical box (suitable for your wall type)
Mounting screws and anchors
Wire nuts or connectors
Electrical tape
For the best results, pick materials that match your environment. Here’s a quick guide to help you choose:
Material Type | Benefits |
|---|---|
IP65/IP66 Rated Covers | Suitable for routine weather conditions, prevents rust and short circuits. |
IP67/IP68 Rated Covers | Recommended for areas prone to flooding or high moisture. |
Stainless Steel Components | Corrosion-resistant, ideal for coastal areas. |
Aluminum with Protective Coatings | Helps prevent corrosion in humid environments. |
Specialized Polymer Materials | Effective in extreme weather conditions. |
If you plan to install led box lights outdoors or in a damp area, look for covers and parts with higher IP ratings. Stainless steel and coated aluminum work well if you live near the coast or in a humid place. These choices help your lights last longer and keep your home safe.
When you install led box lights, double-check that all your materials are rated for electrical use. This step helps prevent problems down the road. Now that you have your tools and materials, you’re ready to move on to the next step!
Safety Tips for Install LED Wall Lights
Safety is very important when you install LED box wall lights. You want to finish your project without getting hurt. You also want to enjoy your new lights. Let’s talk about the most important safety rules you should follow.
Power Off Procedures
Always turn off the power before you start. This keeps you safe from electrical shocks. Never skip this step. Here is a table that shows the official rules for turning off power:
Section | Description |
|---|---|
Controls | Tag controls that must be turned off during work. |
Equipment and circuits | Make sure equipment or circuits cannot be turned on. Tag them everywhere they can be powered. |
Tags | Tags must show which equipment or circuits you are working on. |
Go to the breaker box and turn off the power. Use a voltage tester to check that the power is off. Tag the circuit so others know you are working on it. This step helps you and your family stay safe.
Wiring Safety
Wiring can be hard, but you can do it safely. Always check your local rules before you start. You want your wiring to be correct. Here are some tips for wiring safety:
Turn off the power before touching wires.
Use tools with insulation for wiring.
Wire fixtures in parallel for even voltage.
Use the right wire connectors for safe wiring.
Do not cross wires.
Use wire splitters to stop overloading.
Check your wiring before you finish. Fix any loose wires right away. Good wiring safety means your LED box wall lights will work well for a long time.
If you feel unsure about wiring, ask an expert for help. It is safer to get help than make a mistake.
Protective Equipment
You need the right gear to stay safe while you work. Protective equipment helps you avoid getting hurt. Here is a table that shows what gear works best:
Protective Equipment | Purpose |
|---|---|
Safety Glasses | Keeps your eyes safe from dust and sparks. |
Hard Hats | Protects your head from things that might fall. |
Insulated Gloves | Stops electrical shock and helps you grip things. |
Arc Flash Suits | Protects you from burns and injuries near arc flash hazards. |
Rubber Insulating Blankets | Keeps you safe from touching live electrical wires. |
Flame-Resistant Clothing | Lowers burn risk in places with arc flash danger. |
Wear safety glasses and insulated gloves every time you work with wires. If you are in a busy place, wear a hard hat for extra safety. These safety steps help you finish your project without accidents.
If you follow these safety tips, you can install LED box wall lights safely. You keep your home safe, protect yourself, and enjoy your new lights with no worries.
Step-by-Step Guide to Install LED Box Lights
Ready to get started? This step-by-step guide will walk you through every part of the installation. You’ll learn how to prepare your wall, set up wiring connections, mount your wall-mounted lightbox, and test your new LED lights. Let’s dive in!
Prepare the Wall
First, you need to get your wall ready for the lightbox installation. Pick the spot where you want to install LED wall lights. Use a pencil to mark the exact location. Make sure the area is clean and dry. If you plan to install outdoor wall lights, check for any moisture or damage on the wall.
Next, choose the right electrical box for your lights. Here’s a quick table to help you decide:
Type of Electrical Box | Description |
|---|---|
Standard Plastic or Metal Boxes | Good for most LED lights, comes in different sizes and depths. |
Ceiling Fan Boxes | Best for heavy wall-mounted lightbox fixtures, includes extra support. |
Old Work Boxes | Perfect for adding lights to existing walls, uses tabs or wings for a tight fit. |
Weatherproof Boxes | Needed for install outdoor wall lights, keeps water out and protects wiring. |
If you need to add extra support, you can use wood blocking between wall studs. This gives your lightbox a sturdy base. For flexible mounting, try an extendable mounting bar. Always make sure your mounting box is strong and weather-resistant, especially for outdoor installations.
Now, turn off the power at the breaker box. Use a voltage tester to double-check that the power is off. Safety comes first!
Electrical Wiring Setup
Now it’s time to handle the wiring connections. You want your LED lights to work safely and last a long time. Here are some best practices for wiring:
Always use a voltage tester before you touch any wires.
Wear safety glasses and insulated gloves.
Follow your local electrical codes for every installation.
Pick the right wire connectors for your LED lights.
Never cross wires or overload circuits.
Plan for future access so you can maintain your lights easily.
If you install outdoor wall lights, use armored cable for extra protection. This keeps your wiring safe from weather and animals.
Remove the lamp cover before you start wiring. Most LED box wall lights use a 3/32 hex key to open the cover. Make sure the power is off before you do this step.
Connect the wires from your wall to the wires on your LED lightbox. Usually, you’ll see a green wire for ground and a red or black wire for power. Twist the wires together with wire nuts, then wrap them with electrical tape. Double-check that all wiring connections are tight and secure.
Tip: If you feel unsure about wiring, ask a licensed electrician for help. It’s better to be safe than sorry.
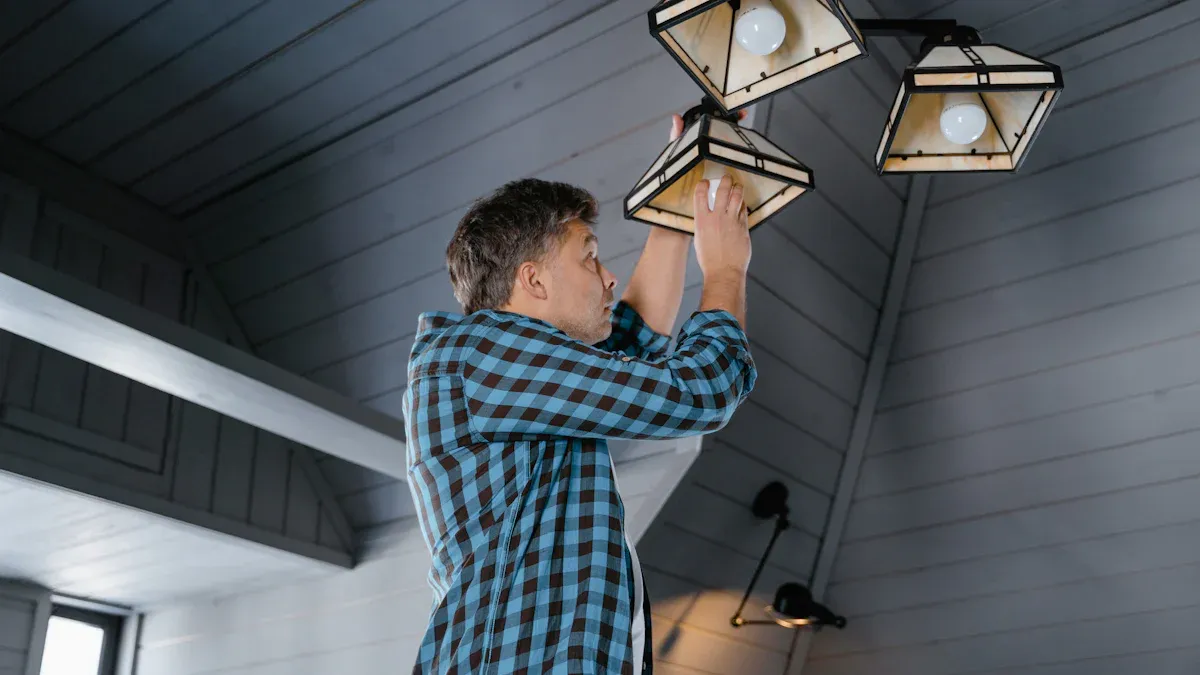
Mounting the Light Fixture
Now you’re ready to mount your wall-mounted lightbox. Here’s a simple way to do it:
Remove the lamp cover if you haven’t already.
Drill holes in the wall where you marked earlier.
Insert anchors if you’re mounting into drywall or masonry.
Hold the lightbox against the wall and line up the holes.
Use screws to secure the lightbox to the wall. Make sure it’s tight and level.
Connect the wiring connections as described above.
Put the lamp cover back on.
Here’s a table with common mounting methods:
Mounting Method | Description |
|---|---|
Nailing/Screwing to Studs | Attach the box directly to a stud for a strong hold. |
Extendable Mounting Bar | Slide the box along the bar for perfect placement. |
Wood Blocking | Add wood between studs for extra support, especially for heavy LED lights. |
Always check that your mounting box matches the weight and size of your LED lights. If you install outdoor wall lights, make sure the mounting is weatherproof and secure.
Note: Don’t add new lights to old poles or boxes without checking if they can handle the extra weight. This can cause safety problems and make your installation look messy.
Final Testing
You’re almost done! Now it’s time to test your new LED box wall lights. Here’s what you should do:
Turn the power back on at the breaker box.
Flip the light switch to see if your LED lights work.
Check that the lightbox is stable and straight.
Look for any flickering or dimming. If you see problems, turn off the power and check your wiring connections.
Clean up the area. Remove any dust, packaging, or tools.
Make sure the lamp cover is secure.
If your LED lights don’t turn on, check for loose wires or a tripped breaker. Sometimes, uneven mounting can make the lightbox look crooked. Adjust the screws if needed.
If you run into problems you can’t fix, call a professional. It’s better to get help than risk a bad installation.
You did it! You followed the step-by-step guide and finished your lightbox installation. Now you can enjoy bright, safe, and stylish LED lights in your home or outside.
Troubleshooting and Maintenance
Common Issues
You might run into a few problems after you install your LED box wall lights. Don’t worry—most issues have simple fixes. Here are the most common ones:
Inconsistent Lighting
You may notice flickering, dimming, or even lights that won’t turn on. Loose connections or using the wrong dimmer switch often cause these problems.Complete Fixture Failure
Sometimes, the light won’t work at all. This can happen if the bulb burns out, a fuse blows, or the driver inside the fixture stops working.Overheating
If your fixture feels hot, it could mean something isn’t installed right or a part is malfunctioning. Overheating can shorten the life of your LED light.
When you face these issues, try these steps:
Check the bulbs by testing them in another fixture.
Inspect your breaker or fuse box for tripped breakers or blown fuses.
Look for any damage to the fixture or driver.
Make sure you use high-quality bulbs that match your fixture.
Measure the voltage at the fixture to see if it’s correct.
Double-check that the fixture is in the right spot for good light.
Regularly inspect for loose wires and clean the fixture.
Upgrade drivers or dimmer switches if needed.
Tip: If you ever feel unsure, call a licensed electrician for help.
Maintenance Tips
You want your LED box wall lights to last as long as possible. Good maintenance makes a big difference. Here’s a table with the best ways to keep your lights shining bright:
Maintenance Practice | Description |
|---|---|
Proper Installation and Mounting | Secure mounting prevents damage and keeps your lights safe. |
Lighting Controls and Dimming | Using dimmers saves energy and helps your LEDs last longer. |
Stable Operating Temperatures | Keep the area cool to stop overheating and extend the life of your lights. |
Keep Fixtures Clean | Wipe your lights with a soft, damp cloth to remove dust and dirt. |
Manage Temperature Control | Make sure there’s good airflow around your lights. |
Check for Heat Dissipation | Good heat flow keeps your LEDs working well for years. |
You should also check your lights on a regular schedule:
Environment Type | Inspection Frequency |
|---|---|
Clean Office Environments | |
Dusty Areas (Kitchens, Workshops) | Every 3 months |
Here are a few more tips:
Clean your fixtures with a non-abrasive cloth and soapy water.
Use a soft brush for tough dirt.
Check for loose wires to stop flickering.
Watch for signs of overheating.
Keeping up with these simple steps will help your LED box wall lights stay bright and safe for years! 🛠️✨
You can install LED box wall lights easily by following these steps:
Read the manual for your light box.
Clean your workspace and gather tools.
Pick the best spot near a power outlet.
Turn off the power supply.
Mark and mount your junction box.
Route wires and seal the box.
If you follow these installation tips, you avoid common mistakes and keep your lights working safely. Regular maintenance helps your fixtures last longer and look great. If you ever feel unsure, ask a professional for help.
Keep your LED box wall lights shining easily with routine care and smart choices!
FAQ
How long does it take to install LED box wall lights?
Most people finish in about 30 to 60 minutes. If you have all your tools ready, you can work even faster. Take your time and check your work for safety.
Can I install LED box wall lights outdoors?
Yes, you can. Just pick weatherproof fixtures and use outdoor-rated electrical boxes. Make sure you seal all connections to keep water out.
Do I need an electrician to install LED box wall lights?
You can do it yourself if you feel comfortable with basic wiring. If you feel unsure or see old wiring, call a licensed electrician for help.
What should I do if my LED light flickers?
Check for loose wires or a bad connection. Try tightening the wire nuts. If the problem stays, you may need a new driver or bulb.
How do I clean LED box wall lights?
Use a soft, damp cloth to wipe the fixture. Avoid harsh cleaners. For tough spots, use a gentle brush. Always turn off the power before cleaning.
See Also
Exploring LED Light Box Wall Mounts: Types And Uses
Selecting The Ideal Display System For LED Light Boxes
Guide To Installing Wall Mounted Sign Holders Effectively
