How to Create Stunning Lighted Photos

If you want to create stunning lighted photos, focus on light first. Light transforms every photo and helps your subject pop. Many experts agree that lighting is the most crucial aspect of great photos. You may encounter challenges, such as strong sunlight or insufficient light. But do not worry—everyone faces these issues at the beginning. Try taking photos outside where the sun provides you with natural light. If you practice and remain curious, you can make any moment look stunning with lighted photos.
Common beginner challenges include:
Low light situations
Changing sunlight and unpredictable weather
So grab your camera and get ready to experiment with stunning lighted photos!
Key Takeaways
Light is the most important part of photography. Try using sunlight and lamps to make your photos better.
There are different kinds of light. Sunlight looks real, and lamps let you control light. Use both types to help your photos.
Learn how to use your camera settings. Change exposure, ISO, aperture, and shutter speed for different lights.
Notice where the light comes from. Light from the side makes things look deeper. Light from behind makes cool shadows and shapes.
Try using tools like reflectors and diffusers. These help you change shadows and make your subject look better.
Light Basics

Light shapes every photo you take. It sets the mood, brings out details, and helps your subject stand out. If you want to create stunning lighted photos, you need to understand how light works and how you can use it to your advantage.
Light Types
You will find two main sources of light in photography: natural and artificial. Natural light comes from the sun, while artificial light includes lamps, flashes, and studio lights. Each type has its own strengths. Natural light feels authentic and changes throughout the day. Artificial light gives you control, so you can adjust brightness and direction whenever you want.
Here’s a quick look at how different types of light affect your images:
Type of Light | Effect on Image Quality |
|---|---|
Natural Light | Influences shadows, texture, and mood; can create intense or soft shadows depending on conditions. |
Hard Light | Emphasizes angles and textures, making imperfections more visible. |
Soft Light | Smooths textures, creating a flattering look for people and objects. |
Front Light | Provides even illumination, but can look flat. |
Back Light | Creates silhouettes and drama, adding depth. |
Side Light | Highlights shapes and textures, giving dimension. |
Overcast Light | Produces soft, even light, reducing glare and harsh shadows. |
Tip: On sunny days, shadows look stronger and more dramatic. Overcast days give you softer, even light that’s great for portraits.
Light Quality
Light can be hard or soft. Hard light creates sharp shadows and strong contrast. You might use it for dramatic scenes or street photography. Soft light gives you gentle shadows and smooth skin tones, which works well for portraits and beauty shots.
Hard light makes details pop and adds intensity.
Soft light creates a calm, flattering atmosphere.
Hard light highlights textures and structure.
Soft light smooths over imperfections.
Light Direction
The direction of light changes how your photo looks. Side lighting adds depth and makes your subject appear more three-dimensional. It outlines shapes and reveals contours, so your photos feel more lifelike. Front lighting gives you even coverage, but sometimes looks flat. Back lighting creates silhouettes and can add a sense of mystery or drama.
When you pay attention to light direction, you control the mood and focus of your image. Shadows and highlights help guide the viewer’s eye and tell your story.
Camera Settings
Getting your camera settings right can make a huge difference in your photos. You don’t need fancy gear to start. You just need to know how to use the settings you already have.
Exposure
Exposure controls how bright or dark your photo looks. You can change exposure by adjusting three things: ISO, aperture, and shutter speed. These three settings make up the exposure triangle. Each one affects how much light hits your camera sensor.
ISO changes how sensitive your camera is to light. A higher ISO helps in low light but can add grain.
Aperture controls how wide your lens opens. A lower f-number (like f/1.8) lets in more light and blurs the background.
Shutter speed decides how long your camera’s sensor is exposed to light. A fast shutter freezes action, while a slow shutter lets in more light but can blur movement.
Here’s a quick guide for different lighting:
Lighting Condition | ISO | Aperture | Shutter Speed |
|---|---|---|---|
Direct Sunlight | 50 | F/2.0 | 1/1600 |
Shady Situations | 200 | F/1.8 | 1/1000 |
Indoor with Natural Light | 320 | F/2.2 | 1/640 |
Darker Indoor Situations | 500 | F/2.8 | 1/320 |
Tip: If you double your shutter speed, open your aperture by one stop or increase your ISO to keep your exposure balanced.
White Balance
White balance helps your camera show colors the way your eyes see them. If you get it wrong, your photos might look too blue or too orange. This can make skin tones look odd or ruin the mood of your shot.
Consequence | Description |
|---|---|
Unnatural Colour Casts | Incorrect white balance can lead to unnatural color casts, such as overly blue or warm images. |
Loss of Mood and Atmosphere | Failing to adjust white balance can dull the ambiance of a scene, losing its intended warmth. |
Inconsistent Colours | Variations in color accuracy can occur, especially in portraits, affecting skin tone representation. |
Try using your camera’s preset modes like “Daylight,” “Cloudy,” or “Tungsten.” You can also set it manually for more control.
Manual vs. Auto
You can shoot in auto mode or manual mode. Auto mode makes things easy and helps you avoid mistakes, especially when you’re just starting out. It’s great for quick shots and fast-moving scenes. But auto mode doesn’t always get the look you want.
Manual mode gives you full control. You can adjust every setting to match your creative vision. You can play with light, blur, and sharpness to make your stunning lighted photos stand out. Manual mode takes practice, but it lets you create photos that match your style.
Auto Mode:
Quick and consistent
Less creative control
Manual Mode:
Better for tricky lighting
Takes more time to learn
Don’t be afraid to try both modes. The more you practice, the better your photos will get!
Positioning and Composition
Subject Placement
You want your subject to stand out in every photo. Place your subject where the light hits them best. Try to make your subject brighter than the background. This draws the viewer’s eye right to what matters most.
Use a shallow depth of field to blur the background and keep the focus on your subject.
Shoot during golden hour for soft, glowing light that flatters faces and objects.
Move around and try different angles. Sometimes, a small change in where you stand makes a big difference.
The direction of light changes everything. Light from above looks natural and soft. Light from below can look spooky or dramatic. Always check how the light falls on your subject before you snap the photo.
Avoiding Shadows
Unwanted shadows can distract from your photo. You can control shadows with a few simple tricks:
Use a reflector, like a white foam board, to bounce light onto your subject and fill in dark spots.
Try a sheer curtain or thin paper to soften harsh light and make shadows less sharp.
Place your subject so the main light source is in front or slightly to the side.
If you have a lightbox, use it to create even, shadow-free lighting.
In editing, use dodge and burn tools to lighten or darken specific areas.
Tip: Professional reflectors come in silver, gold, or white. Each one changes the look of your light, so experiment to see what you like best.
Using Backgrounds
Backgrounds can make your photos pop. You can use them to add color, texture, or even special effects.
Try colored gels or objects to add fun patterns and hues behind your subject.
Use a studio light with barn doors to create strips of light on a plain wall.
Spray a little light behind your subject to make a glowing halo effect, perfect for portraits.
A creative background helps your stunning lighted photos stand out from the crowd. Play with different setups until you find what works for you.
Techniques for Stunning Lighted Photos

Natural Light
Natural light can make your photos look beautiful and real. You do not need fancy equipment to use it. You just need to know when and how to shoot. The sun changes throughout the day, so you get different effects at different times.
Here is a table to help you understand the best ways to use natural light:
Technique | Description |
|---|---|
Golden Hour | Shoot just after sunrise or before sunset. The light is soft and golden. |
Blue Hour | Try shooting before sunrise or after sunset. The sky turns a deep blue. |
Backlighting | Place your subject between you and the sun. This creates cool silhouettes. |
Fill Light | Use a reflector or white surface to bounce light and fill in shadows. |
You can also try these tips:
Look at the direction of the light. Move around your subject to see what looks best.
Find shade for soft, even light. Trees, buildings, or even a big hat can help.
Change your angle to balance light and shadow. Sometimes a small step makes a big difference.
Tip: Clouds act like giant diffusers. They soften sunlight and help you avoid harsh shadows.
Artificial Light
Artificial light gives you control. You can shoot any time, day or night. You can use lamps, LED panels, or flashes. Each one lets you shape the light to fit your style.
Here are some best practices:
Use lights with a high Color Rendering Index (CRI) of 90 or above. This keeps colors true and natural.
Pick lights with short recycle times. You can take more photos quickly without waiting.
Take a black frame before you start. This helps you see only the light from your setup.
Try light modifiers like softboxes or umbrellas. They spread and soften the light.
Secure your lights with stands or boom arms. This keeps your setup safe and steady.
You can start with just one light. Place it at an angle to your subject. Move it closer or farther to change the look. Try bouncing the light off a wall for a softer effect.
Note: For product photos, a high CRI is very important. It makes sure your colors look right.
Backlighting
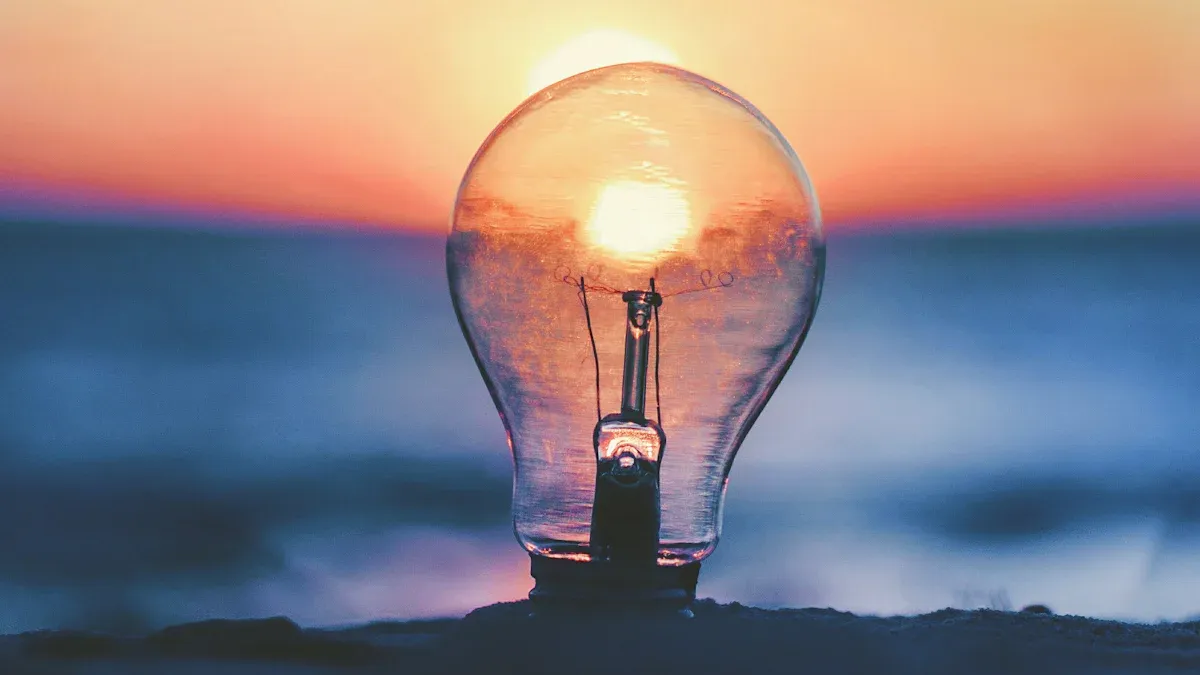
Backlighting can make your photos look magical. You put your subject between you and the light source. The light shines from behind, creating a glow or a silhouette.
Backlighting outlines your subject and makes them stand out.
You can get a soft, dreamy look with a halo around your subject.
This works well for portraits, nature shots, and even action photos.
Backlighting also adds emotion. It can make a photo feel romantic or adventurous. You will see details like hair or fabric glow in the light. Try this at sunrise or sunset for the best results.
Tip: Use natural diffusers like clouds or curtains to soften the backlight. This keeps your photo from looking too harsh.
Diffusers and Reflectors
Diffusers and reflectors help you control light. They are simple tools, but they make a big difference.
A diffuser spreads and softens light. You can use a sheer curtain, a white sheet, or a special diffuser panel.
A reflector bounces light back onto your subject. You can use a white board, a silver reflector, or even a piece of foil.
Here is how they help:
Diffusers make light look natural and smooth.
Reflectors fill in shadows and balance the light.
You can use a reflector instead of a second light. Just aim it at the dark side of your subject.
Try holding a white poster board below your subject’s face. You will see shadows disappear and skin look brighter.
Color and Contrast
Color and contrast can turn a good photo into a great one. You can use them to guide the viewer’s eye and set the mood.
Tonal contrast makes bright areas brighter and dark areas darker. This adds depth and helps your subject stand out.
Color contrast uses different colors to make your photo pop. Try putting your subject in front of a background with a different color.
Adjusting exposure, contrast, and color balance can make your photos look more vibrant.
Fixing light and color can bring out details you did not see before.
You can use patterns and textures to add interest. A colorful wall, a patterned scarf, or textured leaves can make your photo unique.
Note: Playing with color and contrast helps you tell a story with your photo. It can make people feel happy, calm, or excited.
With these techniques, you can create stunning lighted photos that grab attention and show your style. Try different setups and see what works best for you!
Post-Processing
Editing your photos can make a huge difference. You can turn a good shot into something amazing with just a few simple steps. Let’s look at how you can boost the lighting and polish your images.
Editing Light
You want your photo to look bright and clear. Start by opening your image in a photo editor. Most editors have an Exposure tool. You can use it to fix photos that look too dark or too bright. Adjust the brightness slider until your photo looks balanced. If you see areas that are too light or too dark, try the Shadows and Highlights sliders. These help you target specific parts of your photo. You can make dark spots brighter or add detail to bright areas.
Here are some basic steps you can follow:
Open your image in your favorite editor.
Adjust brightness and contrast.
Use Shadows and Highlights to fine-tune the light.
Tip: If your photo has a strange color cast, use the color correction tool to fix it. This helps your photo look natural.
Enhancing Contrast
Contrast makes your photo pop. You want the bright parts to stand out and the dark parts to look rich. Try using the contrast slider in your editor. If you want more control, use spot metering when you take the photo. This sets the exposure for the brightest part, keeping detail in those areas. You can also use a gray card to balance contrast in tricky lighting. Fill flash or a reflector helps tone down harsh contrast while keeping highlights and shadows clear.
Adjust exposure by underexposing a little to bring out dark areas.
Meter for midtones to even out contrast.
Use fill flash or reflectors for balanced light.
Filters and Presets
Filters and presets give your photos a unique style. You can use them to guide the mood and look of your image. Many professionals use presets for different genres, like portraits or landscapes. These tools help with tonal corrections and color grading. You can try different presets to see which one fits your photo best. Filters can also help you fix lighting problems or add creative effects.
Filters and presets help set the creative direction.
They enhance features and create a cohesive style.
Popular presets help with color and tone for different locations.
Note: Try a few presets and see how they change your photo. You might find a look you love!
You can make great photos by using light in new ways. Try different setups and learn from each picture you take. Mistakes are normal, so do not be afraid. Every photographer gets better by trying new things. Here are some tips that help:
Use different lighting techniques and find your favorite.
Talk to other photographers for advice and help.
Face challenges and accept that not everything is perfect.
Practice often to get better and feel more confident.
Keep taking pictures and keep learning. Your photos will get more creative every day!
FAQ
How do I avoid harsh shadows in my photos?
Try using a diffuser, like a sheer curtain or a white sheet, to soften the light. You can also move your subject into the shade or use a reflector to bounce light onto dark areas. This helps create even, gentle lighting.
What is the best time of day to take lighted photos?
Golden hour works best. This happens just after sunrise or before sunset. The sunlight looks soft and warm. Your photos will have a beautiful glow, and your subject will look great.
Can I get good results with my phone camera?
Yes! Most phone cameras work well with good lighting. Use natural light when possible. Tap on your subject to set focus and exposure. Try different angles and move closer for better detail.
Do I need expensive equipment to create stunning lighted photos?
No, you do not. You can use natural light, simple reflectors, or even household lamps. Focus on learning how to use light well. Practice often. Your skills matter more than your gear.
See Also
Top 10 Acrylic Light Boxes For Beautiful Photo Displays
Photography Techniques Using Acrylic Light Box Displays
Key Elements For Achieving Professional Acrylic Light Box Displays
Exploring Acrylic Light Boxes: Varieties, Advantages, And Uses

