Your Complete Guide to Double Sided Light Box Installation and Setup


You can put up a double sided light box if you follow steps. Always read the lightbox manual and look at your parts before you start. Make sure your lightbox and led sign follow local electrical rules. For each lightbox sign, hold the signage and sign tight. Your bright shop sign or backlit sign works for store signs or a cafe light box sign. Guides and manuals help you make great lightbox signs.
Key Takeaways
Always check your double sided light box for damage when it arrives. Tell the supplier right away if you find any problems. This helps make sure the installation goes well.
Collect all the tools and materials you need before you start. Being ready helps you avoid waiting and makes things easier.
Look at the mounting surface to see if it is strong and clean. A strong and clean surface keeps your lightbox safe and looking good.
Follow safety rules when you connect electrical parts. Always turn off the power first to stay safe.
Clean and check your lightbox often to keep it bright and working well. Taking care of it helps your sign last longer.
Unpacking Your Double Sided Light Box
When your double sided light box arrives, open the package slowly. Be gentle so you do not break any parts. Follow each step in this guide to help your light box work well and look nice.
Inspect for Damage
Check the box and everything inside for damage. Look for dents, scratches, or broken pieces on the frame and panels. If you see cracks in the aluminum frame or tears in the fabric, stop installing. Take pictures of any damage and tell the supplier right away. This helps you get new parts fast.
Tip: Keep the original packaging until you finish setting up. The cardboard box with a handle is good for moving or returning the light box.
Check Parts and Hardware
After you check for damage, put all the parts on a clean table. Make sure you have every part before you start building. Most double sided light boxes come with these parts:
Feature | Description |
|---|---|
Frame | Strong aluminum SEG frame, 5" wide, easy to put together |
Fabric | Aurora 8oz backlit fabric with bright colors |
Illumination | Edge-mounted LED lighting for even light |
Swivel Feet | Locking feet to keep the light box steady |
Carry Bag | Bag with wheels for easy carrying |
Graphics Options | Single or double-sided graphics |
Accessories | TV mount kit, shelf, or hanging rod |
You might also see these things in your box:
LED lights already attached to the frame
Push-fit fabric graphics with no seams
Swivel lock feet for more stability
Cardboard box with handle you can use again
Count every part and check with the instruction manual. If you see missing hardware like connectors or feet, call the supplier before you build. Checking now helps you avoid problems later.
Preparing for Lightbox Installation

Gather Tools and Materials
Before you start your lightbox installation, gather all the tools and materials you need. Having everything ready makes the process smoother and helps you avoid delays. Here is a list of common items you may need for assembling and installing a double sided light box:
Two 8ft. 1x4" poplar planks
Two 27x40" poster frames and one 27x40" aluminum poster frame
Two 3ft. 1-lamp T12 strip lights
Two 3ft. T12 fluorescent tube light-bulbs
Light switch and electric cord with a ground
At least 4ft. of 12-14 gauge electrical wire
Two 2" hinges and two latches or locks
Wire nuts and screws (1-1/2" & 3/4")
Pop rivets and paintable silicone caulk or sealant
Picture hanging wire or stainless steel wire
Eye-hooks or D-hooks
Thin nails or staples
Bright white high gloss enamel paint and black or colored enamel paint
You will also need some tools:
Power drill or screw gun with Phillips and flat head bits
Drill bit set (sizes 1/16-3/8")
Table saw or jigsaw
Adjustable square
Sanding or grinding bit
1 1/4" paddle bit
Phillips screwdriver
Caulk gun
Wire stripper
Pop rivet gun
Metal tapper
Tip: Double-check your guides and manual to see if your lightbox requires any special connectors or LED lights.
Assess Mounting Surface
You want your lightbox to stay secure and look great. Always check the surface where you plan to mount it. Use this table to help you decide if your wall or tabletop is ready:
Factor | Description |
|---|---|
Hardness and Durability | Choose a strong material. Aluminum with a 6063 specification gives better strength and resists scratches. |
Availability | Make sure you have all the parts and can get replacements quickly if needed. |
Customization | Check if you need special sizes or shapes for your space. |
Print Quality | Look for dye-sublimation printing for bright, long-lasting graphics. |
Sewing and Sizing | Make sure the fabric fits well. Loose or tight graphics can cause problems. |
Installation tips: Clean the mounting area before you begin. Remove dust and debris for a better fit.
Ensure Electrical Access
You need safe and easy access to power for your lightbox installation. Check for a nearby electrical outlet before you start. Make sure the outlet can handle the load of your lightbox. Use a grounded cord and the right gauge of wire for safety. Always follow local electrical codes to prevent hazards.
If you are not sure about wiring, ask a licensed electrician for help. This guide recommends checking all connections before you plug in your lightbox. Good guides always remind you to put safety first.
Note: Never overload an outlet. Use only approved extension cords and connectors.
Assembling Double-Sided Lightboxes
You can build a strong and bright double sided light box by following each step carefully. This part of the guides will help you make sure your sign looks professional and lasts a long time. You will use your manual to check each step as you go.
Secure Frame Corners
You want your sign frame to stay strong and square. Start by laying out all the frame pieces on a flat surface. Dry-fit the corners first. This means you put the pieces together without glue or screws to check for gaps. If you see any space, adjust the pieces until they fit tightly.
Follow these steps to secure the corners:
Cut the frame molding using a mitre box. This gives you clean, angled edges.
For hardwood frames, use splined corners for extra strength.
If you use screws, countersink them at the corners. Place them perpendicular to the mitred edge.
For narrow frames, attach by sinking a screw or nailing through the mitred ends at the top and bottom corners.
Fill any holes with a mix of sawdust and glue. This keeps the sign smooth and neat.
Apply a thin, even bead of wood glue to each mitered end.
Use a strap clamp to hold the frame together. Check for square by measuring the diagonals. Both should be the same length.
Reinforce each corner with nails or v-nails for extra support.
Tip: Take your time with this step. A strong frame keeps your lightbox sign safe and makes your illuminated shop sign look sharp.
Connect Extrusion Sections
Double-sided lightboxes use aluminum extrusions for the frame. These pieces fit together to make the shape of your sign. You need to connect them the right way for a sturdy build.
Choose the right joining method for your sign. Permanent joints work well for signs that will not move. Semi-permanent or non-permanent joints help if you need to take the sign apart later.
Modular designs let you join smaller extrusion profiles. This makes installation easier and helps you build large or custom shapes.
Make sure each extrusion fits tightly with the next. Loose connections can make your sign wobble or fall.
Use the hardware from your manual. Tighten all screws and connectors so the frame does not shift.
Check that the frame stays square as you connect each section.
You can use a table to check your options:
Joint Type | Use Case | Easy to Remove? |
|---|---|---|
Permanent | Fixed signs | No |
Semi-permanent | Some maintenance needed | Sometimes |
Non-permanent | Portable signs | Yes |
A strong frame helps your backlit sign shine bright and last longer.
Install LED Lights
You want your sign to glow evenly on both sides. Installing led lightboxes means you need the right led lights and careful placement.
Edge-lit led lights shine from the frame edges. These work well for slim double-sided lightboxes.
Back-lit led lights sit behind the graphic. They give a bright, even look for your lightbox sign.
Double-sided led lights show graphics on both sides. This gives your sign more visibility in busy places.
Most edge-lit led lightboxes use high-power led chips. These chips often come from brands like Cree, Osram, or Philips. They use ceramic bodies for better heat control. The led board attaches right to the aluminum frame. This helps heat move away from the led chips, so your sign stays cool and works longer.
You can expect your led sign to last over 30,000 hours. That means your signage will stay bright for years with little maintenance.
Note: Always follow your manual when installing led lights. Check each connection before you close the frame. This keeps your lightbox safe and your sign shining bright.
You have now finished the main assembly for your double sided light box. The next steps will cover mounting and powering your sign.
Mounting the Lightbox
Wall Installation Steps
You can put your double sided light box on a wall. Follow these steps to keep your display safe and easy to see.
First, mark where you want to put the brackets. Use tape or a ruler to help you measure.
Next, drill holes at the marks you made. Pick the right drill bit for your wall.
Attach the brackets to the wall. The kind of bracket depends on your lightbox model.
Use screws and dowels to hold the lightbox up. Make sure everything is tight and does not move.
Plug the power cable into a nearby outlet. If you are not sure, ask an electrician for help.
Tip: Check your measurements two times before you drill. This helps you avoid mistakes when you install your lightbox.
Tabletop Setup Steps
Tabletop mounting lets you move your lightbox around. You can put it in different places when you need to. Look at this table to see how wall and tabletop mounting are different:
Feature | Wall-Mounted Lightboxes | Tabletop Lightboxes |
|---|---|---|
Mounting Method | Needs drilling or hanging | Stands freely, no mounting needed |
Installation Flexibility | Limited by wall space | Highly flexible, place anywhere |
Accessories Needed | May need hooks or cords | No extra accessories needed |
Power Supply | May need extra wiring | Built-in cable and plug |
For tabletop use, put your lightbox on a flat surface. Make sure the feet or base are even. Plug the cord into a safe outlet.
Mark and Drill Mounting Points
Marking and drilling the right way makes mounting easier. Get these tools and materials before you start:
Tools/Measurements | Description/Size |
|---|---|
Drill | For making holes |
Ruler | For measuring distances |
2.7mm and 5mm drill bits | For different hole sizes |
Philips screwdriver | For assembling parts |
Sand paper (120 grit) | For smoothing edges |
Use a ruler to mark each spot for mounting. Drill slowly so you do not break the wall or frame. Use sandpaper to smooth rough edges. This helps your lightbox stay strong and look good.
Note: Always wear safety glasses when you drill or cut.
Electrical Setup for Double Sided Light Box
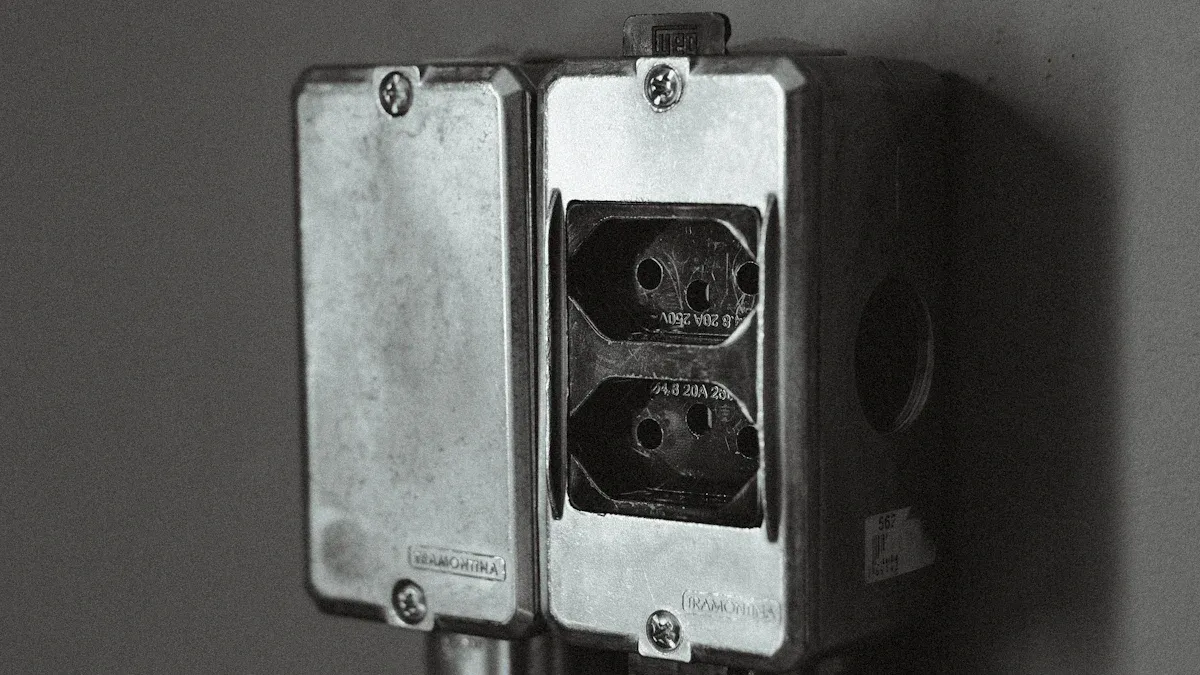
Wiring and Connections
You need to make sure your lightbox works safely and lights up both sides. Start by finding the power input on your lightbox. Most models have a clear spot for the electrical connection. Plug the main power cord into this spot. If your lightbox uses led strips, check that each led strip connects to the power supply. You may see small connectors that snap together. Push each connection until you hear a click.
Follow these steps for a safe electrical connection:
Turn off the main power before you start.
Match the wires from the power supply to the wires on your lightbox.
Use wire nuts to secure each connection.
Tug each wire gently to make sure the connection is tight.
Plug the power cord into a grounded outlet.
Tip: If you see loose wires or a broken connection, stop and fix it before you turn on the power.
Safety Checks
You want your lightbox to stay safe and bright for a long time. Always check your electrical connection before you finish. Look for any exposed wires or loose led connectors. Use this table to help you remember what to check:
Safety Step | What to Do |
|---|---|
Inspect wires | Look for cuts or damage |
Make sure each one is tight | |
Test power supply | Plug in and watch for sparks |
Feel for heat | Touch the frame for hot spots |
If you find a problem with your electrical connection, unplug the lightbox right away. Ask a licensed electrician for help if you do not know how to fix it. Never use your lightbox if you see smoke or smell burning plastic.
Note: Always follow the instructions in your manual for led and electrical connection steps. This keeps your sign safe and helps your lightbox last longer.
Testing and Adjusting Your Lightbox
Insert Graphics or Panels
You need to place your graphics or panels inside the lightbox. Start by sliding the Silicone Edge Graphics (SEG) into the frame. The silicone edge fits into the groove and holds the fabric tight. This method gives you a smooth, high-resolution look. Make sure the graphic sits flat with no wrinkles. If you see any bumps, pull the fabric gently until it looks even. Edge-to-edge printing helps your sign stand out with bright colors.
Tip: Wash your hands before you handle the graphics. Clean hands keep the fabric free from smudges.
Power On and Test Lighting
Plug your lightbox into a grounded outlet. Turn on the power switch. Watch as the LED lights glow on both sides. You want to see even brightness across the whole display. If you notice dark spots or flickering, check the LED connections. Testing the lightbox helps you find problems early. If the lights do not turn on, unplug the box and look at the wiring. Make sure each connector snaps in place.
Step | What to Check |
|---|---|
Power On | Lights glow evenly |
Testing for Flicker | No blinking or dim spots |
Connection Check | Wires and plugs secure |
Adjust for Best Display
You can make your lightbox look even better with a few adjustments. Use advanced LED technology for bright and energy-efficient lighting. Adjust the position of the graphics so they sit flat and show clear images. Try different graphic designs with edge-to-edge printing and color optimization. Move the lightbox to a spot with less glare. If you see shadows, shift the LEDs or graphics until the light spreads evenly.
Use SEG for seamless presentations.
Choose high-quality graphics for sharp colors.
Place the lightbox where people can see both sides.
Note: Small changes can make a big difference in how your sign looks. Keep testing until you get the best results.
Troubleshooting Double Sided Light Box Issues
When you put together a double sided lightbox sign, you might have some problems. This part helps you fix lights that flicker, power problems, and mounting troubles. You want your sign to be bright and stay in place.
Fix Flickering Lights
Flickering lights can make your sign look bad. You might see blinking or pulsing in your lightbox. This usually happens if the power is weak, the LED driver is wrong, or other electronics cause problems. Use the table below to find out what is wrong and how to fix it:
Problem | Causes | Solutions |
|---|---|---|
Flickering or Pulsing Lights | Inadequate power supply, incompatible LED drivers, or electromagnetic interference | 1. Stabilize power supply. 2. Upgrade to high-quality LED drivers. 3. Move or shield the lightbox to reduce interference. |
Check your power first. Make sure it gives steady power to your sign. If you use a dimmer, get one made for LEDs. Try moving your lightbox away from other electronics if it still flickers.
Resolve Power Problems
Power problems can stop your sign from working right. You might see dead LEDs, some parts too bright or dim, or a faint glow when off. The table below shows common problems and how to fix them:
Issue | Symptoms | Possible Causes | Quick Tips |
|---|---|---|---|
Flickering Lights | Lights blink or flash | Bad connections, wrong dimmer, unstable power, overloaded circuits | Use LED-rated dimmers, check connections |
Inconsistent Brightness | Some parts look brighter or dimmer | Voltage drops, old drivers, mismatched modules, overheating | Use same modules, check drivers, cool box |
Phantom Glow | Faint light when switched off | Residual current, wrong switches, driver standby | Use LED switches, check wiring |
Dead LEDs | Some LEDs do not light up | Failed modules, bad drivers, wiring mistakes, overcurrent | Replace modules, check wiring and drivers |
Overheating | Fixtures feel hot, LEDs fade or fail fast | Bad heat sinks, poor airflow, high temperatures | Add cooling, space modules, ventilate box |
Always check your wires and connections. Replace any broken modules or drivers. Make sure your sign uses the right parts for your lightbox.
Address Mounting Issues
Mounting problems can make your sign fall or tilt. You want your lightbox to stay put and look straight. Here are steps to fix mounting problems:
Check that all screws and brackets hold the sign tight.
Make sure the wall or table can hold your lightbox.
Use a level to keep your sign straight.
Tighten any loose hardware.
If your sign wobbles, add more support or adjust the feet.
Tip: Always check your mounting points after you move or fix your sign. This keeps your sign safe and looking good.
Maintaining Your Lightbox
Clean Safely
You want your sign to look bright and last a long time. Clean your lightbox sign with care. Use a microfiber cloth to wipe the surface gently. This keeps dust and fingerprints away from your sign. For vents and heat sinks, use compressed air to remove dirt. Do not use strong cleaners. These can damage the lens or graphics on your sign. If you need to clean electrical contacts, use a high-purity electronic contact cleaner. This helps protect your sign from corrosion and keeps the led connections working well. Rubbing alcohol works for outlets because it dries fast and does not leave water behind.
Tip: Clean the exterior of your sign every day. This keeps your lightbox sign shining and easy to read.
Replace Graphics or Bulbs
You need to keep your sign looking fresh. Change graphics or bulbs when they fade or stop working. Most led bulbs last a long time, but you should check them often. Use this table to help you remember when to replace parts:
Maintenance Frequency | Task Description |
|---|---|
Every 3–6 months | Clean diffuser panels using non-abrasive cleaners. |
As needed | Replace failed LEDs promptly to maintain uniform lighting. |
Monthly | Wipe down the exterior face with a damp microfibre cloth. |
When you change graphics, make sure the new sign fits tight in the frame. This helps your lightbox sign look neat and bright. Always turn off the power before you touch any led parts.
Regular Inspections
You should check your sign often to keep it safe and bright. Look for loose wires or connectors. Check for rust or corrosion on the mounting hardware. Test the power supply and driver boards to make sure your sign works well. Look at seals and lenses for cracks or dirt. Use this checklist for your sign:
Wipe the surface with a microfiber cloth.
Use compressed air for vents.
Check all mounting points for tightness.
Inspect led panels for damage.
Test the sign by turning it on and off.
Note: Do a full inspection every quarter. Replace any worn parts to keep your signage working well.
Using Your Lightbox for Photography
Camera Settings Tips
You can use your lightbox sign to create clear and bright photos. Start by setting your camera to manual mode. This gives you control over the exposure and focus. Choose a low ISO setting. This reduces grain and keeps your sign looking sharp. Set your white balance to match the color temperature of your led lights. This helps your sign show true colors. Use a tripod to keep your camera steady. A steady camera makes your sign images look crisp. Try different shutter speeds to see what works best for your sign. Shorter shutter speeds freeze motion. Longer shutter speeds can brighten your sign in low light.
Tip: Take a few test shots before you start your real photo session. This helps you find the best settings for your sign.
Achieve Optimal Image Quality
You want your sign to look its best in every photo. Use soft lighting to avoid harsh shadows and hot spots on your sign. Soft lighting spreads light evenly across your sign and makes your signage stand out. Place flexible backdrops behind your sign to create smooth transitions in your images. Flexible backdrops help your sign blend into the scene without sharp lines. Adjust your camera’s exposure settings. Slightly underexpose your images to keep more detail in your sign. This prevents bright areas from losing detail. Always check your sign for dust or fingerprints before you take pictures. Clean surfaces make your sign look professional.
Use soft lighting for even sign illumination.
Add flexible backdrops for seamless sign backgrounds.
Underexpose slightly to keep sign details clear.
A well-lit lightbox sign can make your photos look professional. You can use these tips for product photography, menu boards, or any sign display. Your sign will attract more attention and show off your message clearly.
You can put up your double sided light box if you follow this guide. Use the correct tools for each step. The table below shows what tools you need and why:
Tool Type | Purpose |
|---|---|
Measuring and Marking Tools | Helps you put your lightbox in the right spot |
Safety Equipment | Keeps you safe while you work |
Clean your sign every day to keep it bright. Check the wires often so your sign works well. You can use your lightbox on a wall or table. Fix problems fast and take care of your sign. This helps your lightbox last a long time.
FAQ
How do you clean your double sided light box?
Use a microfiber cloth to wipe the surface. Avoid strong cleaners. For vents, use compressed air. Always turn off the power before cleaning.
Tip: Clean your light box every week to keep it bright.
What tools do you need for installation?
You need a power drill, screwdriver, measuring tape, and wire stripper.
Drill bits
Level
Safety glasses
Check your manual for special tools.
Can you change the graphics easily?
Yes, you can swap graphics by removing the silicone edge and sliding in a new panel.
Note: Make sure the new graphic fits tightly for a smooth look.
Why do your lights flicker sometimes?
Flickering often means loose wires, a weak power supply, or the wrong LED driver.
Problem | Solution |
|---|---|
Loose wires | Tighten connections |
Weak power | Use stable supply |
Bad driver | Replace driver |
See Also
Comprehensive Walkthrough of Acrylic Signage for Light Boxes
Tailored Acrylic Light Boxes: Crafting, Components, and Setup
Creating the Perfect Light Box for Acrylic Art Displays
Exploring Acrylic LED Light Boxes: Varieties and Uses
Perfecting Acrylic Light Box Features for Top-Notch Outcomes
