Digital Signage Display Mounts Installation Guide for Optimal Positioning and Viewing Experience

You get the best view by using Digital Signage Display Mounts to position digital signs at the right height and angle. A good setup with the right mounts makes screens easy to see and keeps them secure. This helps people pay attention and stay safe. If you use a guide and follow steps for installing Digital Signage Display Mounts, you can achieve better results. People look at signs longer, interact more, and buy more. Many companies notice these positive changes after using properly mounted digital signs. Better sign setup with Digital Signage Display Mounts helps people enjoy the content and remember it.
People look at signs longer.
More people touch screens or scan QR codes.
More people buy things after good setup.
Studies show people have a better time and see products more.
Key Takeaways
Put digital signs where people can see them easily.
Tilt the screens so viewers can see them better.
Use strong mounts that fit the screens well.
Follow safety rules to stop screens from falling.
Pick places where lots of people walk by.
Make sure signs are easy for everyone to reach.
This helps more people see and use your signs.
Plan your setup with the right tools and parts.
Keep cables tidy so the area looks neat and safe.
Check your screens often to make sure they work.
Fix any problems quickly to keep people interested.
Good care helps your signs last longer and stay safe.
Key Factors for Digital Signage Display Mounts
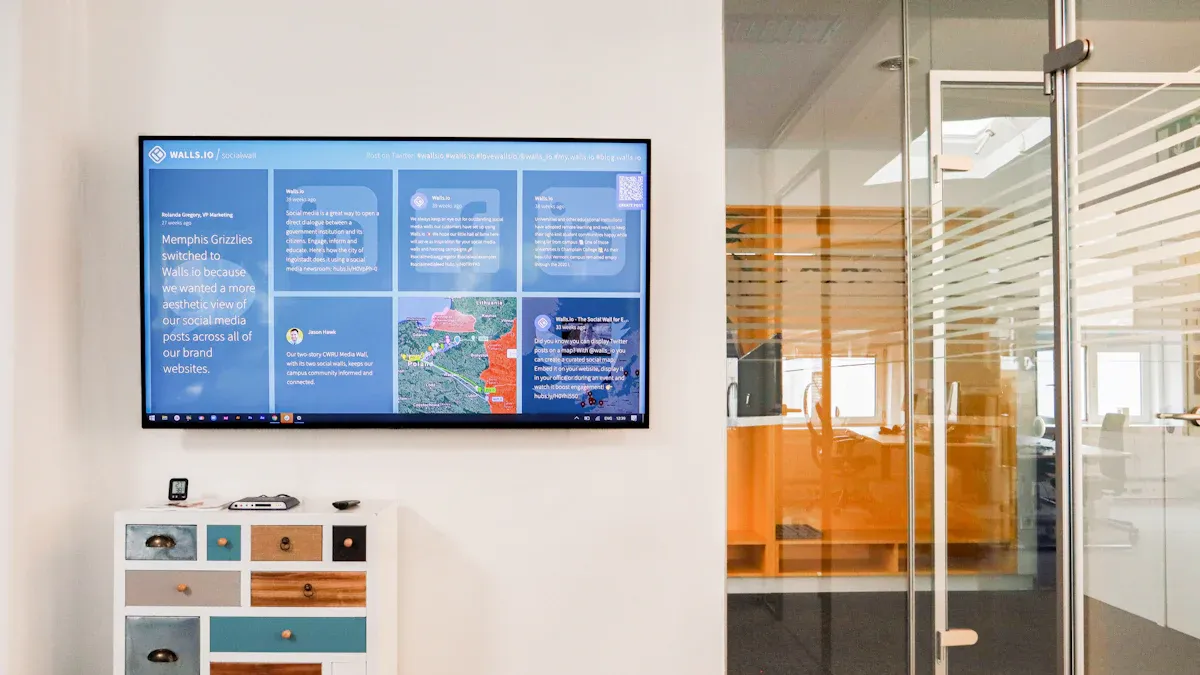
Visibility & Engagement
You want your screens to get noticed and keep people interested. Put screens at eye level so everyone can see them. The PowerBx blog says the right height and angle help people read and use the screen. Watch out for glare from lights or windows. Move or tilt the screen to stop bright spots and reflections. This makes it easier to look at.
Studies show good screen placement can raise sales by up to 540%. It can also make customers 5% happier. These numbers show why mounting is important. Use mounts you can adjust for height or angle. This lets you reach more people, no matter how tall they are. Put screens where lots of people walk and make sure nothing blocks them. This helps more people see and use your message.
Tip: Put your screen where most people can see it. Use mounts that let you change the angle or height.
Safety & Compliance
Always think about safety when putting up screens. A safe setup keeps people and screens safe. Tesla’s Gigafactory uses big screens to remind workers about safety rules. This shows screens can help people remember safety steps.
When you put up mounts, make sure they follow safety rules. Use strong parts and follow the directions. Good safety means screens will not fall or tip over. This keeps people from getting hurt. Always check your work and make sure the screen is tight. If you do this, you make the area safer for everyone.
Site Assessment & Planning
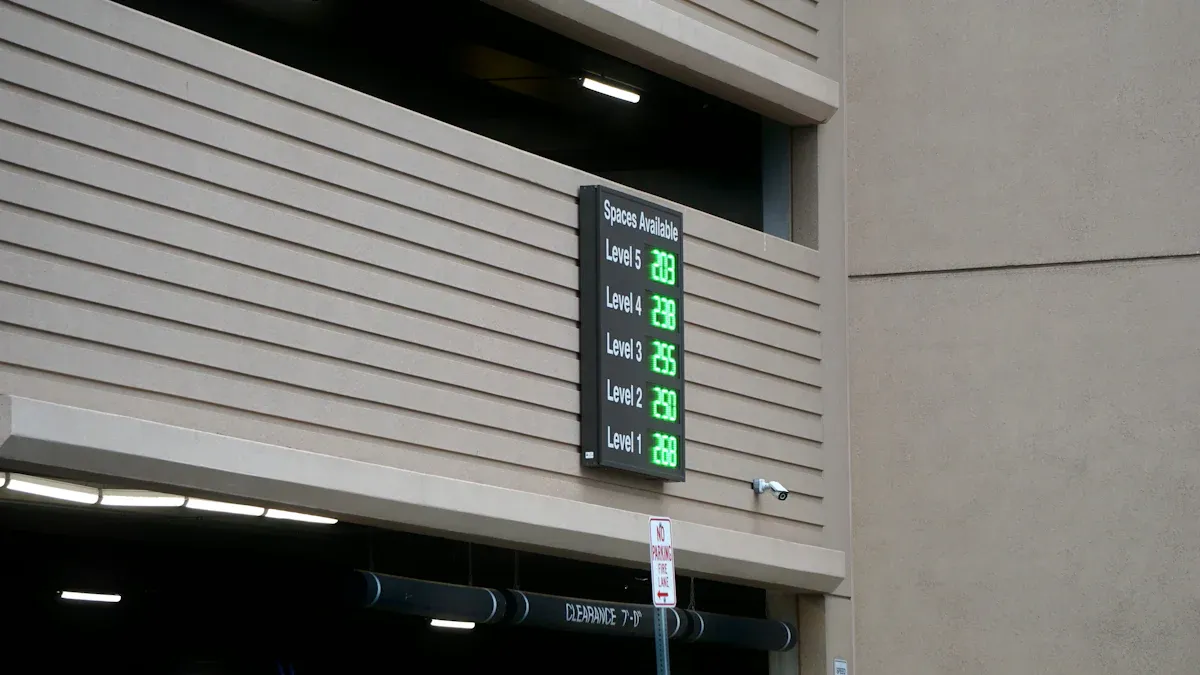
High-Traffic Areas
You want many people to see your digital signs. First, look for busy spots where people walk or wait. Good places are entrances, hallways, and checkouts. Putting signs here can make three times more people buy things. Signs at eye level get 35% more looks. Big companies use data to pick the best spots and times for screens. This helps their messages get noticed. Picking the right place makes your sign stand out and get more attention.
Evidence Aspect | Details |
|---|---|
Visibility in Busy Spots | Bright, moving signs help more people see your brand. |
Sales Impact | Stores can sell 30% more with digital signs. |
Consumer Behavior Influence | Digital signs bring in more people and make them want to buy. |
Eye Level & Viewing Angles
Measure the shortest person who will see your sign. Put the screen about 1.2 meters above that height. Most people see signs best 5 to 6 feet from the floor. Tilt the screen so it faces people straight on. This stops glare and makes words easy to read. If kids or people in wheelchairs will look, lower the screen for them. Good placement helps everyone see and use your sign.
Tip: Change the height and angle to fit your viewers. This helps your sign work better.
Space & Accessibility
Look at the space around your sign spot. Make sure people can walk, stand, or use a wheelchair there. Keep the screen 27 to 80 inches from the floor. Leave a clear area at least 30 by 48 inches in front. Put controls where people can reach, no higher than 48 inches. Use big buttons or voice controls for people with disabilities. Good planning keeps your sign safe and easy for all.
Note: Careful planning can stop delays and save time. Always check for power, internet, and strong walls before you start.
Choosing the Right Mounts
Mount Types
You have many options when selecting digital signage display mounts. Each type fits a different need.
Articulating mounts let you pull, tilt, swivel, or rotate your screen. You can change the angle or position any time. These mounts work best in places where you need to adjust the view often, like interactive kiosks or busy lobbies.
Static mounts, also called wall mounts, keep your screen in one fixed spot. You get a stable and simple setup. These mounts fit well for indoor spaces where you want the screen to stay in one place.
Mobile mounts, or mobile carts, help you move your screen from room to room. You can use them for events, meetings, or classrooms. Moving your display is easy with wheels and handles.
Tip: Choose the mount that matches your space and how you plan to use your screen.
VESA & Compatibility
You need to check if your screen and mount fit together. Most digital signage display mounts use VESA standards. VESA patterns are sets of holes on the back of your screen. Commercial screens use strong VESA patterns tested for heavy use. Consumer screens may not have these patterns or may use thin metal, which can make mounting unsafe.
If you skip VESA standards, your screen may twist, bend, or even break. This can shorten the life of your display and cause safety risks. Good mounting keeps your screen working for years. You also protect your brand and avoid costly repairs.
Note: Always match your screen’s VESA pattern with your mount for safe and long-lasting mounting.
Anti-Vibration & Stability
You want your screen to stay steady and clear. Some advanced mounting solutions use anti-vibration features. For example, special wedge washers can stop your screen from shaking. This keeps your image sharp and easy to read.
If you install video walls or use screens in busy places, anti-vibration mounting helps a lot. Your display will not move or blur, even if people walk by or touch the screen.
A stable mount means better performance and a safer space for everyone.
Remember: Stable mounting is key for video wall installation and for keeping your digital signage display mounts working well.
Tools & Materials
Essential Tools
You need the right tools to install digital signage display mounts. Start by looking at your site. Check if you need special equipment like lifts or cranes. Sometimes, you may need these for high walls or hard-to-reach spots. Experts say you should always do a site survey first. Look at sunlight, weather, and any obstacles. This helps you pick the best tools for the job. You also need to check if you have enough power and data lines. If you need to run new cables, bring drills and cable testers.
Here is a list of common tools you may need:
Drill with bits for wood, metal, or concrete
Stud finder
Level
Tape measure
Screwdrivers (flat and Phillips)
Wrenches or socket set
Cable testers
Ladders or lifts (for high places)
Tip: Always match your tools to the job site. A good plan saves time and keeps your project on track.
Hardware & Accessories
You need strong hardware to keep your display safe and steady. Use the right screws, bolts, and anchors for your wall type. If you mount on drywall, use heavy-duty anchors. For brick or concrete, use masonry bolts. Always check the weight rating of your hardware. Choose cable covers and ties to keep wires neat. You may also need surge protectors to guard against power spikes.
Hardware/Accessory | Purpose |
|---|---|
Mounting bolts | Secure the mount to the wall |
Anchors | Support in drywall or brick |
Cable ties | Organize cables |
Surge protector | Protect from power surges |
Safety Gear
You must protect yourself during installation. Wear gloves to avoid cuts. Use safety glasses to shield your eyes from dust or debris. Hard hats help if you work under heavy objects. Non-slip shoes keep you steady on ladders. Always follow installation safety rules. This keeps you and others safe while you work.
Remember: Good safety gear is just as important as your tools. Never skip these steps.
Installation Steps
Marking & Drilling
First, mark where your screen will go.
Use a tape measure to check the height.
A level helps you make straight lines.
Double-check your marks before drilling holes.
This stops mistakes and keeps things safe.
Draw on the wall or ceiling with a pencil.
Make sure your marks are easy to erase.
Use a stud finder to find strong spots.
Match your marks to the holes on your screen.
Drill small holes at each mark you made.
Pick the right drill bit for your wall type.
Clean out dust from the holes before moving on.
Careful marking and drilling keep your screen even.
Tip: Wear safety glasses and gloves when drilling.
This keeps your eyes and hands safe from dust.
Mounting Support
Pick the right screws and bolts for your wall.
Wall mounts are good if you want the screen to stay put.
Ceiling mounts let you hang screens higher.
Floor stands can move, but need weights to stay steady.
Use the right screws and anchors for your wall.
Tighten all bolts so the mount does not move.
Make sure the mount can hold your screen’s weight.
The mount should sit flat on the wall or ceiling.
Strong mounting keeps your screen safe from falling.
Always follow the directions from the maker.
If you use a floor stand, put it on a flat spot.
Add extra weights if needed for safety.
Note: Bad mounting can break walls or drop your screen.
Take your time and check your work often.
Cable Management
Plan where your cables will go before you finish.
Good cable management keeps things neat and safe.
Use strong cables that last a long time.
Pick cable covers from trusted brands like Legrand or Chief.
Hide cables in covers or raceways.
Use ties to keep wires together.
Keep power and data cables apart.
Add surge protectors to stop power spikes.
Messy cables can cause problems or even fires.
Tie down all wires so they do not wear out.
Some mounts have built-in cable holders for easy setup.
Tip: Plan your cable paths before you start.
This saves time and makes your work look better.
Placing the Display
After mounting, put your screen on the mount.
Lift the screen carefully and line it up.
Lock the screen in place with the right hardware.
Put screens where lots of people will see them.
Good spots are entrances, lobbies, or break rooms.
Place screens near stairs or elevators for more views.
Tilt the screen for the best view.
Check that the screen is level and does not shake.
Test the screen to see if it works well.
Good placement helps more people see your message.
Remember: Follow each step in order.
Careful work gives you the best results and keeps things safe.
Testing & Adjustment
Viewing Angles
You need to check the viewing angles after installation. Start by watching how people move around your space. Look at where they enter, exit, and pause. Place your screens where people make decisions, not in hidden corners. You can use tools like overhead cameras or motion sensors to create heatmaps. These show where most people walk or stop. Try different screen positions for a week and compare which spots get more attention. If a screen does not get enough views, move it to a better place. This process helps you find the best angle for your digital signage display.
Tip: Use staff feedback and watch how long people look at your screens. Adjust the angle if you see people turning their heads or missing the message.
Height & Tilt
Proper height and tilt make a big difference in user experience. If you set the screen too high or too low, people may feel eye strain or discomfort. Studies show that screens not placed directly in front of users can cause teary or itchy eyes. Glare from lights or windows can also make it hard to see. You should adjust the tilt so the screen faces viewers straight on. Use a level to check the angle. Make small changes and ask people if the screen feels comfortable to look at. Good height and tilt help everyone enjoy the content and avoid discomfort during long viewing.
Performance Monitoring
After installation, keep checking how your screens perform. Track how long people look at each screen and how many interact with it. You can use QR codes or touch data to measure engagement. Staff can also share what they notice about screen use. Try A/B testing by changing screen positions and comparing results over several days. If you see better results in one spot, keep the screen there. Watch for long-term trends and adjust your installation as needed. Regular monitoring helps you keep the viewing experience strong and your digital signage effective.
Note: Testing and adjustment are not one-time steps. Keep improving your installation to match how people use your space.
Common Mistakes & Troubleshooting
Alignment Issues
Sometimes your screen looks crooked or not centered.
This can happen if you do not use a level.
Not checking your marks before drilling can cause problems.
If the screen tilts, it is hard to read.
Always measure and use a level to keep it straight.
If you see gaps behind the mount, check your screws.
Loose screws or bumpy walls can make things uneven.
Fix these problems early so they do not get worse.
Tip: Have someone else look at the screen from far away.
They might see problems you missed.
Stability Problems
If your screen shakes or flickers, it is not stable.
This can happen if you use the wrong screws or skip steps.
Here are some real-life examples:
In one store, screens flickered and turned off.
The problem was a bad graphics card.
Replacing it made the screen work again.Another store had power problems.
The power supply was too weak for all the screens.
Getting a stronger power supply fixed it.A digital sign network was slow to update.
Too many devices used the same network.
Making a special network for signs helped a lot.
Pick the right parts, check your power, and keep your network clear.
Check your setup often to find problems early.
When to Call a Pro
Sometimes you cannot fix the problem yourself.
If your screen shakes, falls, or loses power, call an expert.
Professionals know how to fix hard problems and spot dangers.
If you see sparks, smell burning, or hear weird sounds, stop using it.
Safety is most important.
Experts can help with big setups like video walls or outdoor signs.
Getting help keeps your screens safe and working for a long time.
Best Practices for Digital Signage Installation
Maintenance
Take care of your digital signs to keep them working well.
Check your screens and mounts often for dust or dirt.
Wipe them clean so they look nice and clear.
Look at cables to make sure nothing is loose or broken.
Update your software to fix problems and get new features.
Set a schedule to check your signs every month.
Use special tools to see how your screens are doing.
This helps you find problems before they get worse.
Good care makes your signs last longer and work better.
Tip: Make a calendar for cleaning and updates.
This helps stop problems and keeps your screens bright.
Upgrades & Repositioning
Technology changes quickly, so plan for new upgrades.
Many places now use LED screens for sharper pictures.
Modular panels let you move or add screens easily.
Smart software can show the right message to each person.
Changing your screens and programs can get more people interested.
Asia-Pacific uses lots of big digital signs.
Europe cares about saving energy and being green.
In the Americas, companies use smart ads to sell more.
Upgrading helps you keep up with new ideas and customer needs.
Use modular screens for easy changes.
Try smart tools for better messages.
Look for new screen types and fast computers.
Ongoing Safety
Safety is always important for your digital signs.
Use strong mounts and keep cables neat to stop accidents.
Follow rules like ADA so everyone can use your screens.
Plan your power and internet so nothing shuts off.
Check mounts and wires often for any damage.
Good safety keeps your team and customers safe.
When you follow these steps, your space is safer and better for everyone.
Safety Checklist | Action Needed |
|---|---|
Mounts secure | Check every month |
Cables managed | Look for problems |
ADA compliance | Check screen spots |
Power/network setup | Test connections |
You get the best results when you follow every step.
Plan ahead, mount your screens carefully, and check them often.
This keeps your digital signs safe and working well.
Use a laser tool to line up your screen.
Attach mounts to strong walls so they do not fall.
Use special parts to stop your screen from shaking.
Follow safety rules and ADA laws for everyone.
Look at your space first to avoid problems.
If you need more help, ask a pro to set up your signs.
For more ideas, check out guides about upgrades and care for digital signs.
FAQ
How do I choose the right mount for my digital signage display?
You should check your screen size and weight. Look for mounts that match your display’s VESA pattern. For retail digital signage installation, use strong mounts that keep screens steady. Always follow the manufacturer’s guide for safe mounting.
What is the best height for digital menu board installation?
Place your digital menu board so most people see it at eye level. Measure from the floor to about 5 or 6 feet high. This height works well in restaurants and cafes. Good placement helps customers read menus easily.
Can I install an interactive product kiosk installation by myself?
You can install a kiosk if you follow the instructions and use the right tools. Make sure the area is safe and has power. For large or heavy kiosks, ask a professional for help. Safety comes first during installation.
Why is content scheduling important for digital signage?
Content scheduling lets you show the right message at the right time. You can plan ads, menus, or information for different hours or days. This helps you reach more people and keeps your screens fresh and useful.
What should I check after retail digital signage installation?
Check that your screen is level and secure. Test the power and network connections. Make sure the display works without flicker. Review your content scheduling to see if messages appear at the right times. Regular checks keep your signs working well.
See Also
Steps To Optimize Digital Signage Monitor Displays Effectively
Using Digital Signage To Present Information Clearly
Choosing Digital Signage Screens Based On Technical Details
