Custom Acrylic Light Boxes: Design, Materials, and Installation


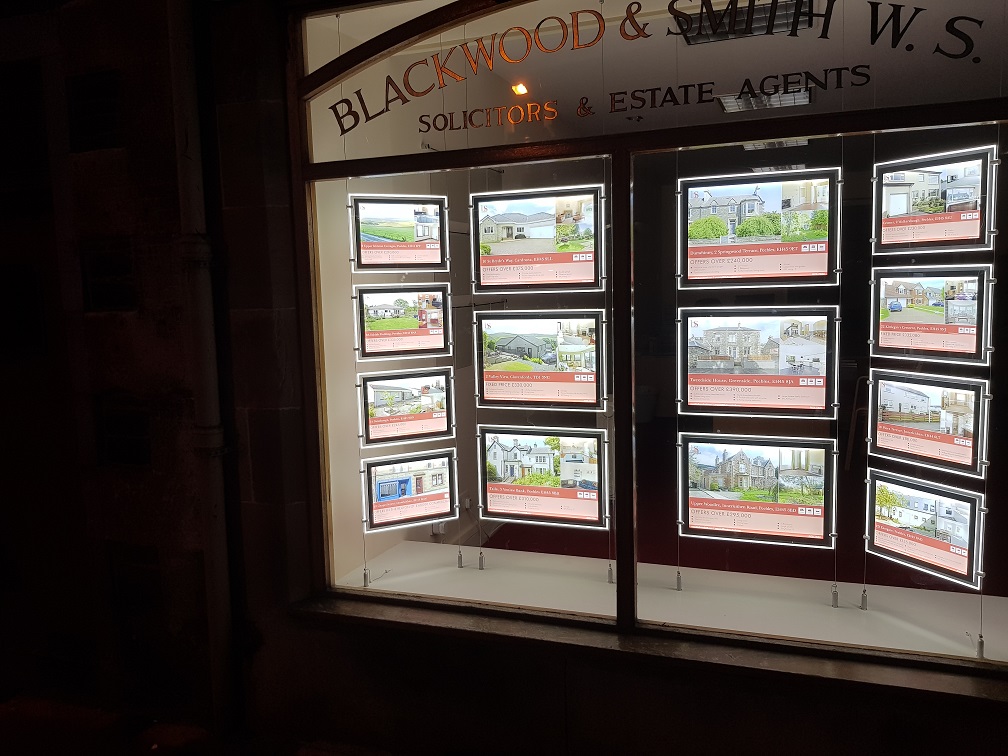
Custom Acrylic Light Boxes have revolutionized the way people utilize signs and decor. Their bright lights and bold pictures make them easy to notice, making them an excellent choice for a led light box display that grabs attention and enhances marketing efforts. These displays are effective both indoors and outdoors, and you can quickly change the pictures to keep your message fresh.
The advertising light box market is expanding rapidly, projected to grow from $2.8 billion in 2023 to $5.2 billion by 2032. This growth is driven by the increasing number of cities and stores being developed. These Custom Acrylic Light Boxes utilize LED lights that are energy-efficient and visually appealing. Choosing the right design, materials, and setup enhances their effectiveness even further.
Key Takeaways
Custom Acrylic Light Boxes stand out with bright lights and cool designs. They are great for advertising.
Picking the right size, shape, and materials makes the light box easier to see and saves energy.
Clear pictures and bright colors make the design better. This helps bring in more customers and makes your brand well-known.
LED lights are the best for light boxes. They are bright, save energy, and last a long time.
Cleaning and checking the LED lights often keeps your light box looking nice and working properly.
Designing Custom Acrylic Light Boxes
Picking Size and Shape
The size and shape of a lightbox are important. They affect how it looks and works. Think about where you’ll use it and its purpose. Big rectangular lightboxes are great for store windows. Small round ones work well indoors or as signs.
Thicker acrylic sheets spread light better and save energy. They make the lightbox shine evenly. Small lightboxes fit tight spaces, while big ones are easier to see from far away. Below is a table showing how size and thickness matter:
Feature | How It Helps |
|---|---|
Thickness | Spreads light evenly and saves energy |
Size | Affects how clear and useful the lightbox is |
Light Spread | Improves visibility and lowers energy use |
Strength | Makes it last longer and resist damage |
Safety | Keeps it safe for different uses |
Choosing the right size and shape makes your lightbox work better and fit your needs.
Picking Pictures and Design
Pictures and designs make a lightbox stand out. They help share your message clearly. Sharp images and bold letters look nice and are easy to read. Bright colors bounce light, making the design pop. Dark colors soak up light and can be harder to see.
Here are tips for a good design:
Use clear, high-quality pictures for a professional look.
Add logos and slogans to show your brand.
Pick colors that match your brand and reflect light well.
Good designs can attract more customers. Studies show businesses see 65% more customer interest and fewer product returns with great lightbox designs. This proves how important it is to focus on design.
Lighting and Placement
Lighting makes a lightbox shine. The type of light and where you put it matter. LED lights are bright, last long, and use less energy. They’re better than older lights like incandescent or fluorescent. Here’s a table comparing light types:
Light Type | Energy Use | Brightness | How Often Replaced |
|---|---|---|---|
LED | Low | Very bright and steady | Rarely |
Incandescent/Fluorescent | High | Okay but less efficient | Often |
Where you place the lightbox also matters. Wall-mounted ones need even lighting to avoid shadows. Freestanding ones work well with backlit or edge-lit setups. Plan lighting carefully to get the best results. Check the surface and how you’ll use the lightbox.
By using the right lights and placing them smartly, your lightbox will grab attention and work well.
Customizable Features for Branding
Custom features let you design lightboxes that match your brand. These features make your signs special and easy to remember. By designing them to fit your brand, you can impress your audience.
Unique Shapes and Designs
Special shapes and designs turn your lightbox into a branding tool. You can shape it like your product or logo. This grabs attention and links the display to your brand. For example, a coffee cup-shaped lightbox works for a café. A sneaker-shaped one fits a shoe store. These designs stand out in busy places.
Bright Colors and Graphics
Colors and pictures are key for branding. Bright colors catch attention and make your lightbox pop. Use your brand’s colors to show your identity. Clear pictures, like logos or product images, make it look better. When people see these, they remember your brand more easily.
Fun and Engaging Displays
Interactive features make your lightbox more exciting. Adding touch screens or motion sensors makes it fun to use. People can interact with the display, making it unforgettable. For example, a touch screen can show product info or deals. This fun experience makes customers happy and loyal.
Why Custom Features Help
Custom branding features bring many benefits to your business. The table below shows how they improve customer memory and brand awareness:
Benefit | How It Helps |
|---|---|
Eye-Catching Displays | Unique shapes grab attention and help people remember your product. |
Strong Brand Identity | Designs that match your product make your brand easier to recall. |
Interactive Fun | Hands-on displays create a fun experience, boosting customer happiness and loyalty. |
Using these features makes your lightbox look amazing and connect with your audience. A well-made, custom lightbox is a great tool for your brand.
Materials for Custom Acrylic Light Boxes
When making a custom lightbox, the materials you pick are very important. They affect how well it works and how long it lasts. From the type of acrylic to the lights, every part matters. Let’s look at the main materials you’ll need.
Types of Acrylic Sheets
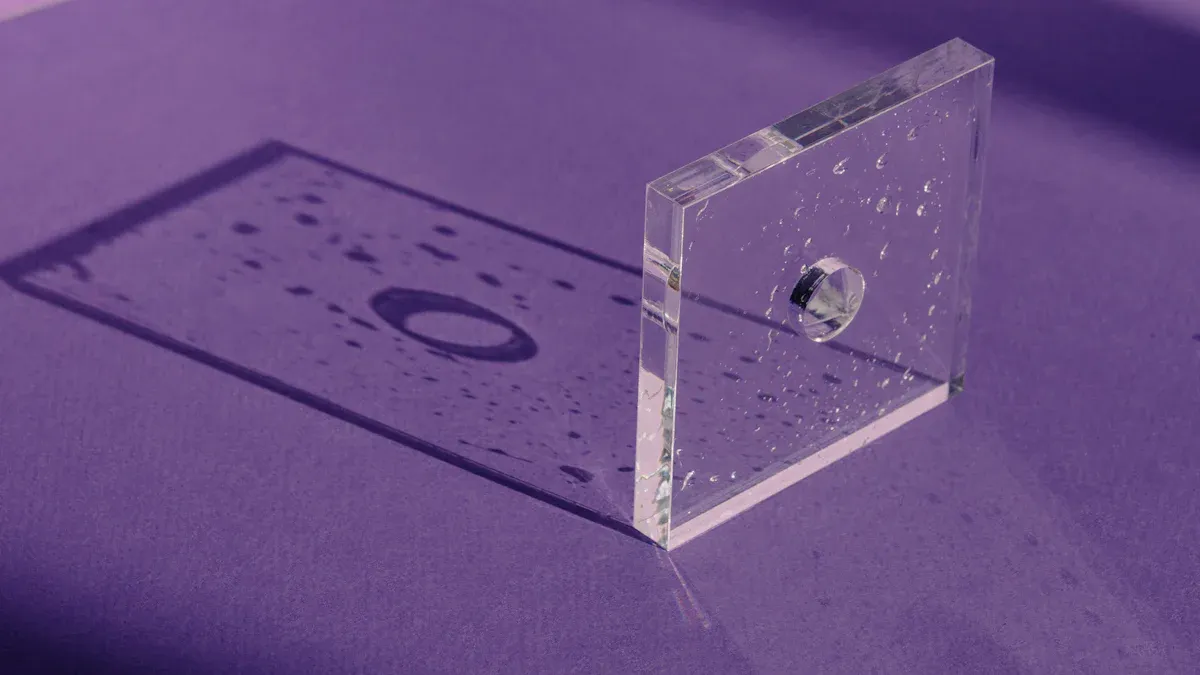
Acrylic sheets are the main part of a lightbox. They hold your design and spread light evenly. Compared to polycarbonate, acrylic lets more light through and looks clearer. This makes it great for glowing art boxes and signs.
Here’s a table to show why acrylic is a top choice:
Attribute | Acrylic Sheets | Polycarbonate Sheets |
|---|---|---|
Light Transmission | 92% | 88% |
Optical Properties | Spreads light well, hides LED spots | Similar optical quality |
UV Stability | UV-stable naturally | Needs extra treatment for UV stability |
Fabrication Cost | Easy and cheap to make | Costs about the same |
Heat Resistance | Can be improved for heat resistance | Naturally better with heat |
Acrylic sheets are light, simple to cut, and affordable. They also resist UV rays, so they stay bright outside. Thicker sheets work better for spreading light and lasting longer.
LED Lighting Options
The lights are the most important part of a lightbox. LED lights are the best choice today. They shine brightly, use little energy, and last a long time. Unlike old lights, LEDs don’t get very hot or have harmful chemicals like mercury.
Here’s a table comparing LED lights to older ones:
Aspect | LED Lighting | Traditional Lighting |
|---|---|---|
Longevity | Lasts a long time | Wears out faster |
Energy Efficiency | Saves more energy | Uses more energy |
Safety | Stays cool, no mercury | Gets hotter, may have mercury |
Cost-Effectiveness | Costs more upfront, saves later | Cheaper first, costs more over time |
LED lights are great for bright displays that stand out. They last longer and save money on energy. Whether for a small sign or a big glowing box, LEDs give steady, clear light.
Essential Components for Assembly
To build a good-looking and strong lightbox, you need several parts. Each one helps make the lightbox work well.
Prepare Parts: Cut the frame and back panel to the right size. Measure carefully for a neat finish.
Build the Frame: Use strong materials for the frame. Cut them precisely for a tight fit.
Handle Acrylic Sheets: Cut the acrylic sheet to match the frame. Be gentle to avoid scratches and clean it before use.
Add Design: Put letters, pictures, or art on the acrylic sheet. Line them up neatly for a clear look.
Install Lights: Attach LED strips inside the frame securely. Spread them evenly to avoid shadows.
Final Touches: Test the lights to make sure they work. Secure the power system and adjust for long-term use.
By focusing on these steps, you can make a lightbox that looks amazing and works well. Every part plays a role in its success.
Factors to Think About When Picking Materials
Choosing the right materials for your custom acrylic light box is very important. The materials you pick affect how long it lasts, how it looks, and how well it works. To make a good choice, think about these key points.
1. Light Transmission and Clarity
A light box’s job is to light up your design. Acrylic sheets with high light transmission make your graphics bright and clear. Pick materials that let at least 90% of light through. This helps avoid dark spots or shadows.
Tip: Use clear or frosted acrylic sheets for better light spread. Frosted sheets give a soft, even glow.
2. Durability and Weather Resistance
If your light box will be outside, it needs to be strong. Acrylic sheets don’t crack or turn yellow easily. They also handle UV rays better than other plastics. For tough weather, use reinforced acrylic or polycarbonate sheets.
Material | Strength | Weather Protection |
|---|---|---|
Standard Acrylic | Strong | Okay |
UV-Stable Acrylic | Very Strong | Great |
Polycarbonate | Super Strong | Excellent |
3. Weight and Easy Handling
Acrylic is light, so it’s easier to move and set up. This is helpful for big light boxes. Heavier materials need extra support, which costs more and makes setup harder.
Note: Lightweight materials lower shipping costs and make wall setups easier.
4. Cost-Effectiveness
Your budget matters when picking materials. Acrylic sheets are affordable and good quality. But special options like UV-stable or thicker sheets cost more. Match your budget with what you need.
5. Looks and Style
The material you choose changes how your light box looks. Clear acrylic gives a modern, clean style. Frosted or colored acrylic adds a unique look. Pick materials that match your brand’s vibe.
6. Eco-Friendly Choices
Caring for the planet is important. Some acrylic sheets can be recycled, making them better for the environment. Look for eco-friendly options if you want to reduce waste.
Did You Know? Acrylic is greener than glass because it uses less energy to make and ship.
7. Works Well with LED Lights
Not all materials work great with LED lights. Acrylic sheets made for LEDs make the light brighter and save energy. They also stop hotspots, so your design looks smooth and perfect.
By thinking about these points, you can pick materials that fit your needs and make a great light box. Always focus on quality and how well it works to get the best results.
Installation of a Customizable Light Box
Getting Parts Ready for Assembly
Before building your lightbox, gather all the needed parts. These include acrylic sheets, LED lights, frame pieces, and tools. Check that everything is in good shape. Broken or faulty parts can ruin the final product.
Clean the acrylic sheets to remove dust or smudges. Use a soft cloth to avoid scratches. Measure and cut the frame pieces to fit your lightbox size. Double-check measurements for accuracy. Keep all parts together to make assembly easier.
Tip: If making more than one lightbox, label each part. This helps save time and avoids mix-ups during assembly.
Easy Steps to Build Your Lightbox
Make the Frame: Put the frame together first. Use screws or glue to hold corners tightly. A strong frame keeps the lightbox sturdy.
Add LED Lights: Stick the LED strips inside the frame. Spread them evenly to avoid dark areas. Use clips or adhesive to secure them.
Fit the Acrylic Sheet: Place the acrylic sheet on the frame. Make sure it lines up with the edges.
Apply the Design: Add your artwork or graphics to the acrylic sheet. Use decals or overlays for a neat finish.
Attach the Back Panel: Secure the back panel to the frame. This protects the lights and holds everything in place.
Test the Lightbox: Plug it in and check the lights. Adjust the LED strips if needed.
Follow these steps to make a lightbox that looks great and works well.
Ways to Mount Your Lightbox
After building your lightbox, choose how to display it. The mounting method depends on where you’ll use it.
Wall Mounting: Attach the lightbox to a wall with screws or brackets. This works well for stores or indoor spaces.
Freestanding Mounting: Put the lightbox on a stand or base. This is great for events or places without walls.
Hanging Mounting: Hang the lightbox from the ceiling with chains or cables. This is perfect for busy spots like malls or airports.
Note: Always make sure the mounting is secure. A poorly mounted lightbox can be dangerous.
Picking the right mounting option helps your lightbox stand out and stay safe.
Safety Tips for Installing Light Boxes
Setting up a customizable light box needs careful safety steps. Being cautious prevents accidents and helps your light box work well. Whether you hire a pro or do it yourself, knowing the risks and benefits of each choice is important.
Professional vs. DIY Setup
How you install your light box affects safety. Hiring a professional ensures rules are followed and reduces risks. They also offer warranties and help if something goes wrong. But, it costs more and might take longer to schedule. Doing it yourself saves money and lets you customize. However, it needs electrical skills and has higher risks if mistakes happen. The table below shows the good and bad of both methods:
Installation Type | Pros | Cons |
|---|---|---|
Professional | - Follows safety rules and reduces risks. | - Costs more due to labor. |
DIY | - Cheaper and allows customization. | - Needs electrical skills. |
Important Safety Steps
Check Electrical Parts: Look for damage in wires or connections. Broken parts can cause fires or shocks.
Use the Right Tools: Only use tools made for electrical work. Avoid unsafe shortcuts.
Secure the Light Box: Make sure it’s mounted tightly so it won’t fall. Use strong brackets or anchors.
Follow Instructions: Read and follow the manufacturer’s directions. These are made to keep you safe.
Turn Off Electricity: Always cut the power before working with wires to avoid shocks.
By focusing on safety, you can set up a strong and reliable light box. Whether you hire someone or do it yourself, these tips will help you avoid problems and succeed.
Maintenance for Custom Acrylic Light Boxes
Cleaning Without Damaging the Surface
Keeping your acrylic light box clean helps it look nice and work well. Dust and smudges can make it look dull over time. Use a soft microfiber cloth to gently wipe the surface. This avoids scratches while removing dirt. For deeper cleaning, mix warm water with a little dish soap. Dip the cloth in the soapy water, squeeze it out, and clean the acrylic with smooth strokes. Rinse the cloth often to stop spreading dirt or making static that attracts dust.
Do not use strong cleaners like ammonia-based ones. These can harm the acrylic and make it less clear. Always dry the surface with a clean, soft cloth to avoid water spots. Cleaning regularly keeps your light box bright and makes it stand out in your space.
Replacing LED Lights
LED lights in your light box last a long time but may need replacing someday. First, unplug the light box to stay safe. Carefully open the back panel to reach the LED strips. Take out the old lights by removing them from their clips or sticky backing.
When adding new LED lights, pick ones with the same type as the old ones. Place them evenly inside the frame to keep the brightness even. Attach the strips securely and reconnect the power. Test the light box to check if the new lights work well. Checking the lights often helps you find problems early and keeps your display looking great.
Preventing Scratches and Wear
Acrylic panels can get small scratches, even if handled carefully. To avoid this, clean the surface often with a microfiber cloth. This stops dust and dirt from building up and causing scratches. Use light pressure when cleaning and stay away from rough materials.
For extra protection, use cast acrylic sheets with a scratch-resistant layer. These are stronger and stay smooth longer. If your light box is in a busy area, place it where people won’t touch or bump it often. Regular care and smart placement keep your light box in great shape, helping it grab attention for a long time.
Keeping Your Light Box Working Well
To make sure your custom acrylic light box lasts, take care of it. Regular checks and smart use can help it stay in good shape.
Check Often: Look at your light box regularly for damage. See if the acrylic has scratches or cracks. Make sure all the LED lights are working. Fix small problems early to avoid bigger ones later.
Let It Breathe: Keep your light box in a place with good airflow. LEDs can get warm, and air helps cool them down. This keeps the lights from overheating and makes them last longer.
Stay Out of the Sun: Don’t put your light box in direct sunlight. UV rays can make the acrylic turn yellow. If it’s outside, use UV-stable acrylic sheets. These are made to handle sunlight better.
Use Good Materials: Start with high-quality parts. Cheap materials might break faster. Strong LEDs and acrylic sheets work better and last longer.
Tip: Write down when you clean or fix your light box. Keeping a record helps you know when to do maintenance again.
By following these tips, your light box will stay bright and work well for a long time. Taking care of it now saves trouble later.
Custom acrylic light boxes mix usefulness with style. By designing them well, using strong materials, and installing them correctly, you can make a sign that looks great and lasts long. These lightboxes help people see your message better and make your brand more memorable. For example, checking things like sales growth or website visits can show how well your lightbox is working.
Buying a good lightbox costs less than digital signs. You can set one up for under $500, and it’s easy to maintain. Whether you need a small sign for indoors or a big one for outside, custom acrylic light boxes can fit your needs. Try these creative options today to make your brand stand out!
FAQ
Why are acrylic light boxes better than regular signs?
Acrylic light boxes are brighter, stronger, and save energy. They can be customized for branding. Unlike regular signs, they use LED lights that last longer and cost less to run.
Can acrylic light boxes be used outside?
Yes, they work outdoors. Use UV-protected acrylic and weatherproof materials to keep them strong. Seal and mount them well to protect against bad weather.
How can I clean my acrylic light box safely?
Use a soft cloth with warm, soapy water. Don’t use harsh cleaners or rough tools. Wipe gently and dry with a clean cloth to keep it shiny.
How long do LED lights in light boxes last?
LED lights can last 50,000 to 100,000 hours. Cleaning and good airflow help them last longer.
Can I change the pictures in my light box?
Yes, you can swap out the pictures easily. Many light boxes let you slide out the old picture and put in a new one. This makes them great for updates or new promotions.
See Also
Exploring Different Types And Uses Of Acrylic LED Boxes
Understanding The Uses And Advantages Of Acrylic Light Boxes
Creating Stunning Displays With Acrylic Light Boxes
