How to Design and Create Custom 3D Printed LED Light Boxes

You want to create something unique with your diy skills. Custom 3D Printed LED Light Boxes give you a cool way to show off your style. Try online tools like lightbox generators or use SVG conversion for your favorite design. You can use easy programs like Tinkercad or Canva. Add your own graphics or even turn a photo into a 3d lithophane. Don’t be afraid to experiment and have fun!
Key Takeaways
Define the purpose of your light box before starting. Consider if it will be for decor, marketing, or events.
Choose the right materials for durability and light diffusion. PLA is a good choice for beginners.
Use online tools to convert images into SVG files for easy 3D modeling. This keeps your designs sharp and clear.
Test your designs with small prints first. This helps you see how the light looks and make adjustments.
Join maker communities for support and inspiration. Sharing ideas can enhance your DIY skills.
Planning Your DIY Project
Define Purpose & Dimensions
Before you start your diy project, think about why you want a 3d printed light box. You might want to show off your favorite logo, decorate your room, or make a sign for your business. People use these light boxes for many reasons:
Retail promotions
Personal decor
Venue signage
Custom event displays
Launch parties
Once you know your purpose, pick the right size. Here’s a quick guide to common dimensions:
Size Category | Dimensions (m) | Depth (cm) |
|---|---|---|
Small | 1 x 1 | 10 or more |
Medium | 1 x 2 | 10 or more |
Large | 2 x 2 to 3 x 2.5 | 10 or more |
Choose Design Features
You get to decide how your light box looks and works. Some features make your diy project stand out:
Design Feature | Description |
|---|---|
Size and Shape | Plan to fit your space, whether you want something small or big. |
Functionality | Use it to show art, advertise, or light up a room. |
Branding | Add colors, logos, or graphics that match your style or business. |
Customization Options | Pick unique shapes or sizes to show your creativity. |
Innovative Features | Try touch screens or moving lights for extra fun. |
Material Selection | Choose strong materials for clear, bright light and long life. |
Integration with Marketing | Make your box part of your brand or event for more impact. |
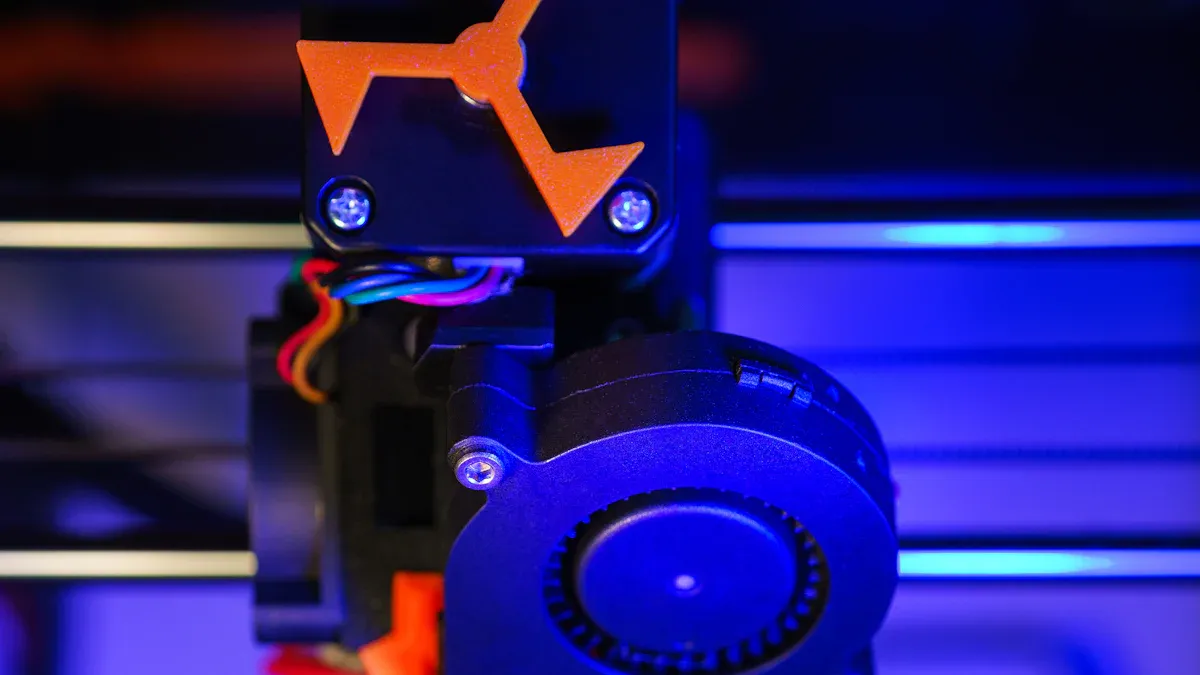
Select Materials & Tools
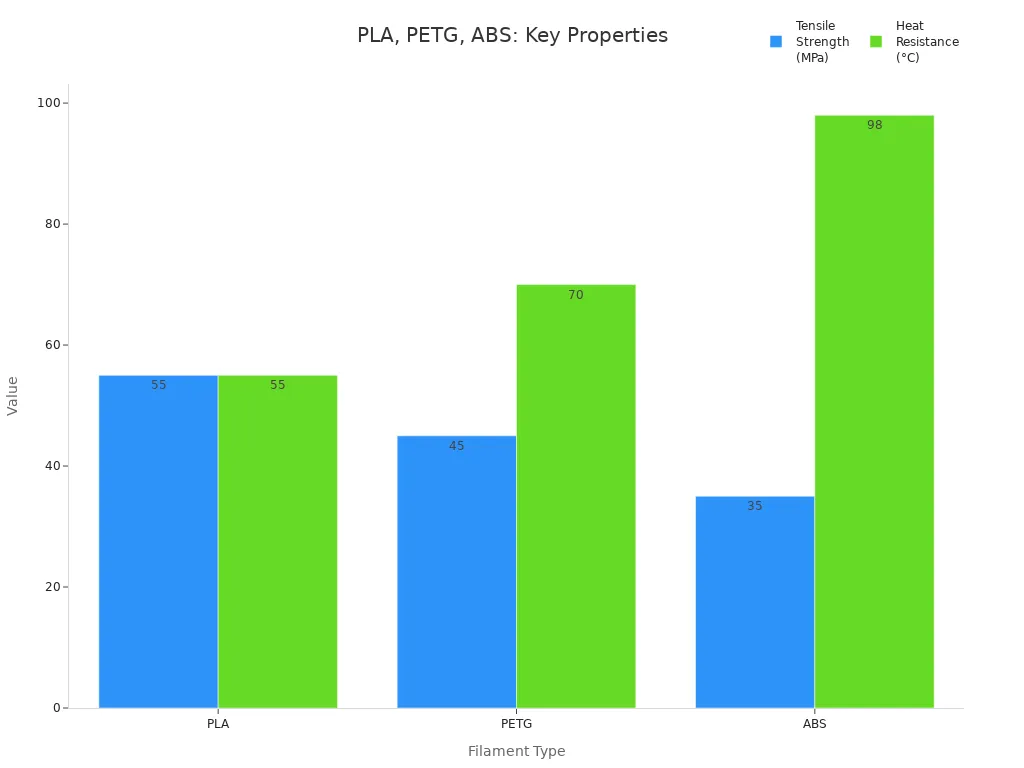
Picking the right materials helps your 3d light box last longer and look better. Here’s a quick look at popular filaments:
Property | PLA | PETG | ABS |
|---|---|---|---|
Tensile Strength | 40-50 MPa | 34-36 MPa | |
Impact Resistance | Lower than ABS | Between PLA and ABS | Strongest |
Heat Resistance | 55°C | 70°C | 98°C |
Layer Adhesion | Moderate | Strongest | Good |
Flexibility | Rigid | Best balance | Relatively flexible |
Chemical Resistance | Poor | Good | Good |
You also need some basic tools to build your led light box:
Scissors
Hacksaw
Drill
Clamps
Tape measure
You can add a glue gun, aluminum tape, or a waterwing iron for extra help. These tools make your diy project easier and help you get a clean finish.
Designing Custom 3D Printed LED Light Boxes
Graphics & SVG Conversion
You want your custom 3d printed led light boxes to look amazing. The first step is to get your graphics ready. Maybe you have a logo, a favorite photo, or a cool drawing. You need to turn these images into a format that works for 3d modeling. SVG files are perfect for this because they keep lines sharp and clear.
Here’s how you can convert your image into SVG:
Start with a clear image file, like a JPEG or PNG.
Use an online converter such as Convertio.
Upload your image to the converter.
Pick SVG as the output format and hit convert.
Download your new SVG file.
You can use this SVG as a template in your 3d modeling software. This makes it easy to trace or extrude your design for your diy project.
Tip: If you want to add text or simple shapes, try Canva or Inkscape. Both let you create SVGs from scratch.
3D Modeling Software Options
Now you have your SVG, you need to build your 3d model. You have lots of choices, even if you’re new to 3d design.
Tinkercad: This tool is great for beginners. You can drag and drop shapes, import your SVG, and build your light box step by step.
Fusion 360: If you want more control, try Fusion 360. You can make detailed models, add grooves for led strips, and check how everything fits.
Inkscape: This program helps you edit SVGs before you bring them into your 3d software. You can clean up lines or add details.
Canva: Canva works well for simple graphics. You can export your design as SVG and use it as a base for your 3d model.
You can also try making a lithophane. Lithophanes turn your photo into a 3d panel that glows when you add light. Thinner parts let more light through, so bright spots show up. Thicker parts block light, making shadows. This trick gives your custom 3d printed led light boxes a cool 3d effect.
Note: When you design a lithophane, check that your model has no holes or thin spots. This helps your print come out strong and clear.
Design for LED Integration
You want your custom 3d printed led light boxes to shine bright and look even. Good design makes this easy. Think about how you will add the lights and how the box will spread the glow.
Here’s a table to help you plan:
Design Consideration | Description |
|---|---|
Material Choices | Use filaments that balance translucency, color vibrancy, and printability. |
Structural Designs | Create curved frames for even light diffusion and depth in displays. |
Methods for Embedding | Incorporate rechargeable LEDs and RGB strips directly into the prints. |
Lithophanes | Convert 2D images into 3D layers for backlit detail. |
Modular Panels | Design snap-fit sections for easy assembly and integration of LED strips. |
You can use led strips for easy setup and smooth light. Try a USB-powered strip for simple power. Print a diffuser from clear PETG to spread the light and avoid bright spots.
Use curved shapes to help the light fill the box.
Snap-fit panels make it easy to put your box together and add or change led strips.
If you want to get creative, add RGB strips or rechargeable lights right into your print.
Tip: Test your design with a small print first. You can check how the light looks and fix any problems before you print the whole box.
Custom 3d printed led light boxes let you mix art, tech, and light. You can use a template or make your own style. Try different tools and see what works best for your diy project.
Printing & Assembly
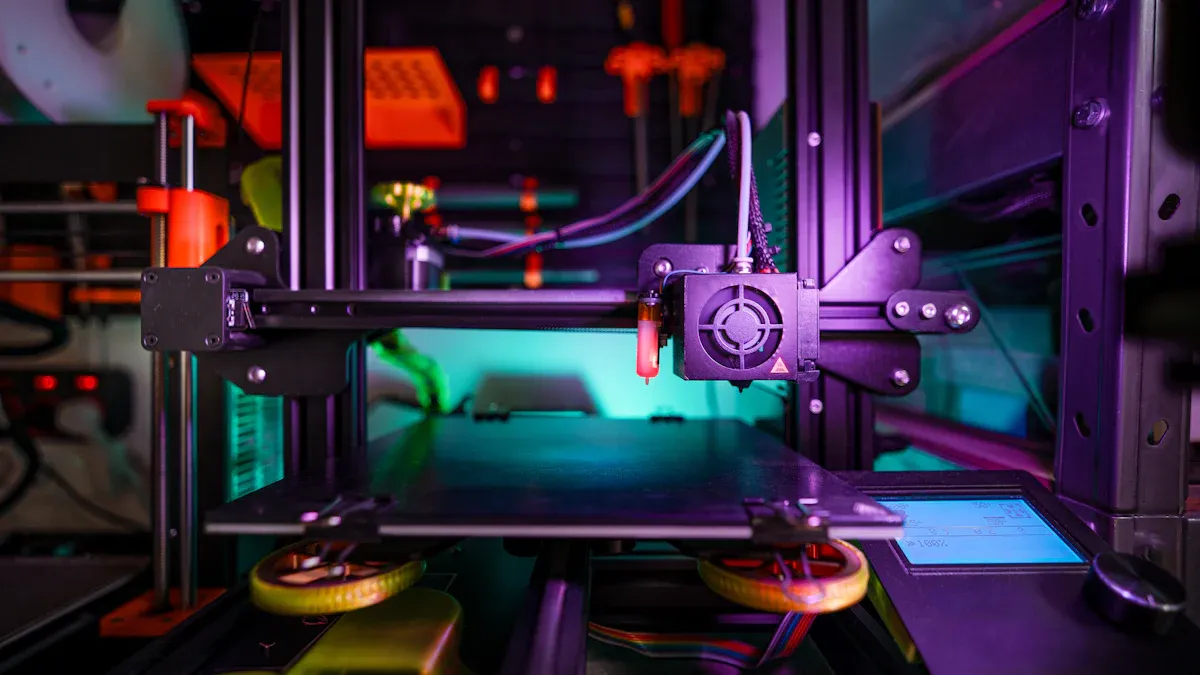
Export & Slice Files
You have your 3d model ready. Now, you need to export it for printing. Most people use STL files because they work with almost every 3d printer. If you want more details, try 3MF files. These can hold color and texture information, which helps with advanced prints.
File Format | Description |
|---|---|
STL | |
3MF | Holds color, texture, and unit data. |
Parasolid® | Accurate geometries, needs special software. |
ACIS® | Accurate geometries, needs special software. |
VTK® | Stores numerical results for other programs. |
Open your file in a slicer like Cura or PrusaSlicer. Use your template to check the size and fit before you print.
Print Settings & Filament Choice
You want your diy project to shine bright and look smooth. Use translucent filament for better light diffusion. Regular PLA works well, but make the front panel thin—about 0.8mm. This lets the light pass through. Thicker layers give more strength, while thinner layers can help you use fewer strip lights. Dark colors absorb light, so pick lighter shades for the best glow.
High-quality PLA gives your light box a clean finish. It feels strong but stays lightweight, so you can move your project easily.
Tip: Print a small test piece first. You can see how the light shines through before you print the whole box.
Post-Processing Techniques
After printing, you may see lines or rough spots. Sanding helps smooth the surface. Start with rough sandpaper, then use finer grits. For a matte look, try bead blasting. If you want a shiny finish, polish the surface. Painting also boosts the look and helps spread the light. Use thin, even coats for the best results.
Assemble LED Components
Now, put some lights in the box! Place your strip along the inside edges. Try rgb led strip lights for cool color effects. You can use light pipes or acrylic rods to spread the glow. Snap the panels together and check that the strip sits flat.
Note: A depth of about 120mm helps the strip give even light. This stops bright spots and shadows.
Wiring & Power
Connect your rgb led strip lights to a power source. Make sure you match the wire colors to avoid short circuits. Use shrink-wrap to cover connections. If you want advanced features, add a custom PCB. This lets you control patterns and animations. Always check your wiring before you turn on the power.
Stay safe! Only splice wires for non-essential parts and double-check your work.
Finishing & Troubleshooting
Final Assembly Steps
You are almost done with your diy light box. Start by making sure all the panels fit together. Snap or glue the sides in place. If you used a template, check that every part matches up. Secure the back panel last. This keeps everything tight. Double-check that you put some lights in the box and that the wires are not pinched. If you want, add rubber feet or hangers so you can display your project anywhere.
Test & Customize
Now, plug in your light box and see how it glows. Look for even light across the front. If you see dark spots, move the LED strips or adjust the diffuser. Try different colors or patterns if you used RGB lights. You can add stickers, paint, or even a nameplate to make it yours. Want to change things later? Snap-fit panels make it easy to swap out graphics or update the design.
Tip: Keep your light box clean by wiping it with a soft cloth. Dust can block the light and make your box look dull.
Common Issues & Solutions
Sometimes, things do not go as planned. Here are some quick fixes:
Make sure your graphics are installed straight and lined up inside the box.
Check the light diffuser for cracks or if it is not sitting right. The diffuser spreads the light and helps it look even.
If the lights do not turn on, check all the wire connections. Loose wires can stop the power.
If you see flickering, try a different power source or check for damaged wires.
For uneven light, move the LED strips or add more diffusing material.
Stay patient and keep testing. Small changes can make a big difference in how your light box shines.
You just learned how to make your own diy light box. Try new design ideas like a 3d paper cut light box or a lithophane. These techniques let you create cool gifts and home decor. Check out the table below to see why experimenting with these styles is fun:
Advantage | Description |
|---|---|
Precision and accuracy | You get sharp details and smooth layers. |
Easy customization | You can turn any image into a model. |
Versatility | Make shapes from flat to complex forms. |
Rapid prototyping | Test new versions quickly. |
Improved printing tech | High quality and fast results. |
Join online maker communities for help and inspiration. The Bambu Lab Community Forum has tips for wiring, printing, and troubleshooting. You can share your 3d paper cut light box ideas and learn from others. Try new tools, swap designs, and keep building your skills. Your next project could be even better!
FAQ
How do I make my diy studio light look professional?
You can use clean graphics and smooth finishes. Try sanding your box and using a good diffuser. Place your diy studio light in a spot with little clutter. Good wiring helps your diy studio light shine bright and even.
What is the best filament for a diy studio light?
PLA works well for most diy studio light projects. It prints easily and gives a smooth look. PETG is great if you want more strength. Both let your diy studio light glow nicely.
Can I use any LED strip for my diy studio light?
Most LED strips work for a diy studio light. Choose a strip that fits your box size. USB-powered strips are easy to use. RGB strips let you change colors. Always check the power needs for your diy studio light.
How do I fix dark spots in my diy studio light?
Move the LED strip or add more diffusing material. Try a clear PETG panel for better light spread. Test your diy studio light before final assembly. You can also add more LEDs if needed.
Is a diy studio light safe for kids to use?
Yes, a diy studio light is safe if you cover wires and use low-voltage LEDs. Always check for sharp edges. Show kids how to use the diy studio light. Supervise younger children during setup.
See Also
Creating Stunning Acrylic Light Box Displays For Any Space
Personalized Acrylic Light Boxes: Crafting, Components, And Setup
Crafting The Perfect Light Box For Acrylic Art Displays
