10 Creative Ways to Use a Photo LED Light Box Beyond Product Photography

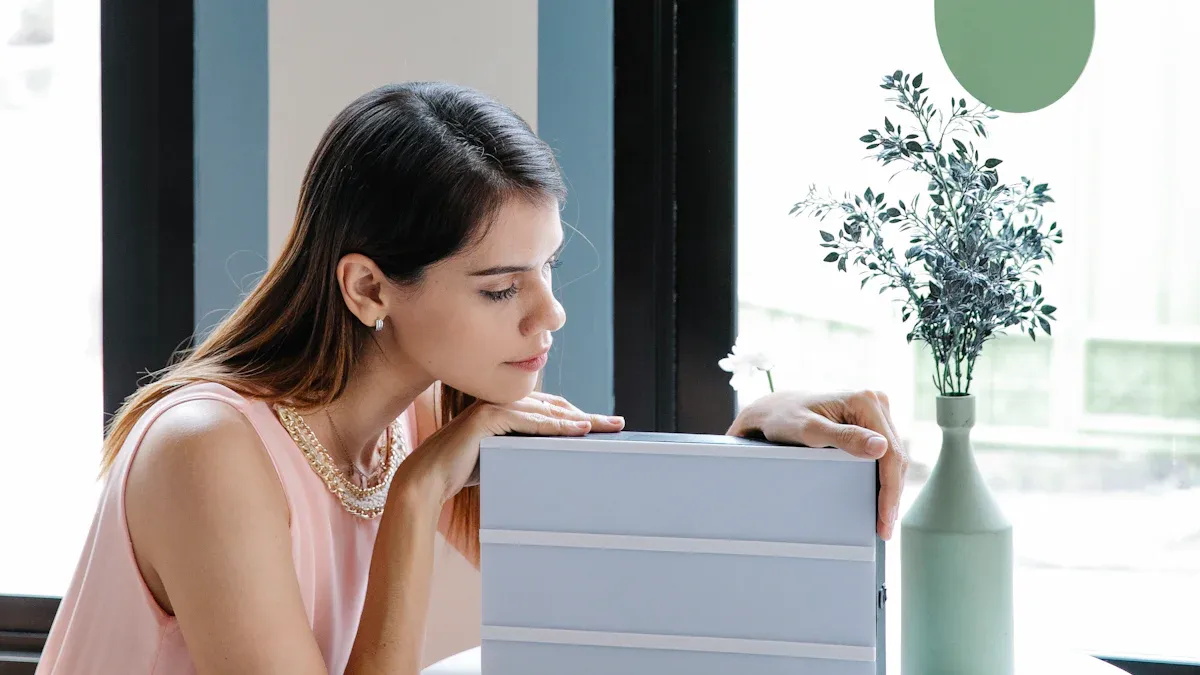
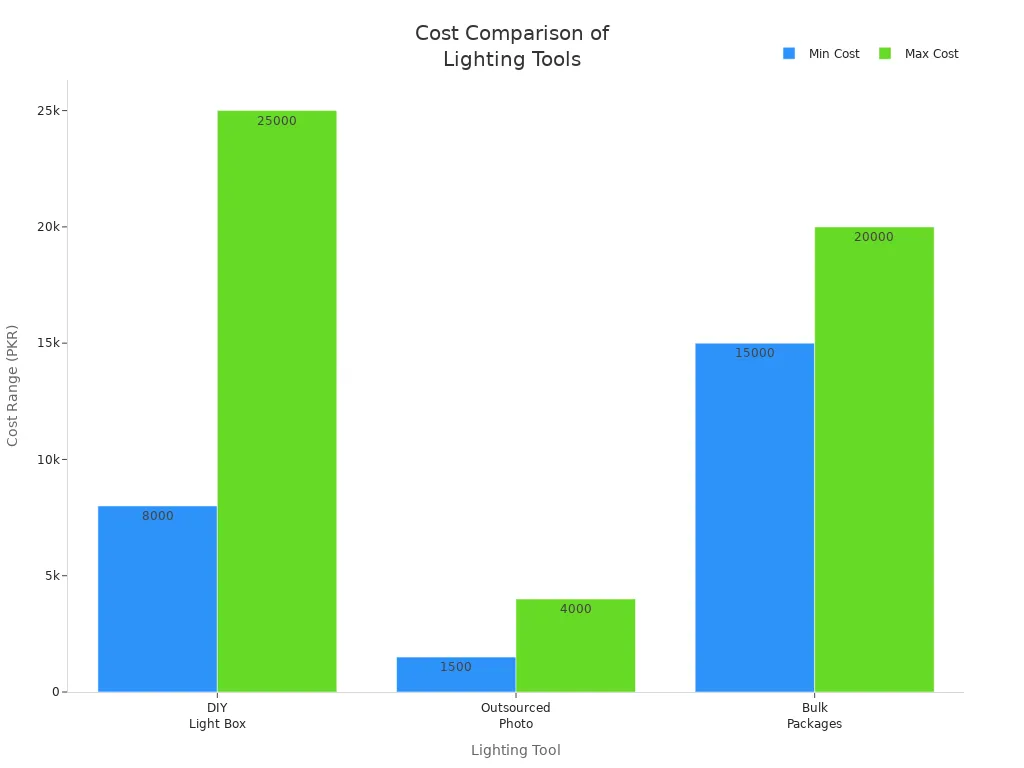
Ever think about the creative ways you can use a photo LED light box? You can utilize it to make your art stand out in unique ways. Additionally, it can enhance the brightness of a science project. Check out how affordable these light boxes are when you compare them to other lighting tools:
Lighting Tool | Cost Range (PKR) | Notes |
|---|---|---|
DIY Light Box Photography | You pay once to set it up. You do not pay for each picture. | |
Outsourced Professional Photography | 1,500 – 4,000 per product | You pay more every time you need a new picture. |
Bulk Packages for Professional Photography | 15,000+ | You pay a lot if you need many pictures. |
Key Takeaways
A photo LED light box helps you be creative in art, photography, and crafts. It gives you steady light that you can change.
You can use a light box for tracing and sketching. This helps you be more accurate. It also makes your hand less tired. Art becomes more fun to make.
Try using different materials and backgrounds in your light box. This makes colors stand out. It also adds more detail to your projects.
Creative Ways to Use a Lightbox
Flat Lay Art Ideas
You can explore many creative ways to use a lightbox for flat lay art. Try arranging your objects in different patterns. Move items around until you find a style that feels right. The lightbox gives you adjustable and steady lighting. This helps you avoid harsh shadows and keeps your colors true. You will notice that the reflective sides of the lightbox bounce light back onto your art. This makes every detail pop and gives your photos a professional look.
Want to add more creative ways to your setup? Use seamless backgrounds for a clean look. You can also stick window gel stickers on the surface. These add fun shapes and colors to your flat lay art. Many artists and photographers use a lightbox for tracing and displaying their work. You can join them and find your own creative ways to make art stand out.
Tip: Try layering different textures and materials. This adds depth and interest to your flat lay photos.
Overhead Photography Tips
Overhead shots look amazing when you use a lightbox. Start by placing your subject in the center of the lightbox. Pick the best angle for your photo. You can shoot from above, at eye level, or from a side angle. Move your camera closer or farther away to see what works best. Take several shots from different angles. This helps you find creative ways to show off your subject.
Here are some quick tips for overhead photography with a lightbox:
Try different camera heights for new creative ways to capture details.
Use props or backgrounds to add style.
Snap close-ups and wide shots to highlight quality.
You can use a lightbox for more than just product photos. Many designers use it for ambient lighting and decor. Keep experimenting with creative ways to use your lightbox. You might discover a new favorite style!
LED Lightbox for Tracing
Drawing and Sketching
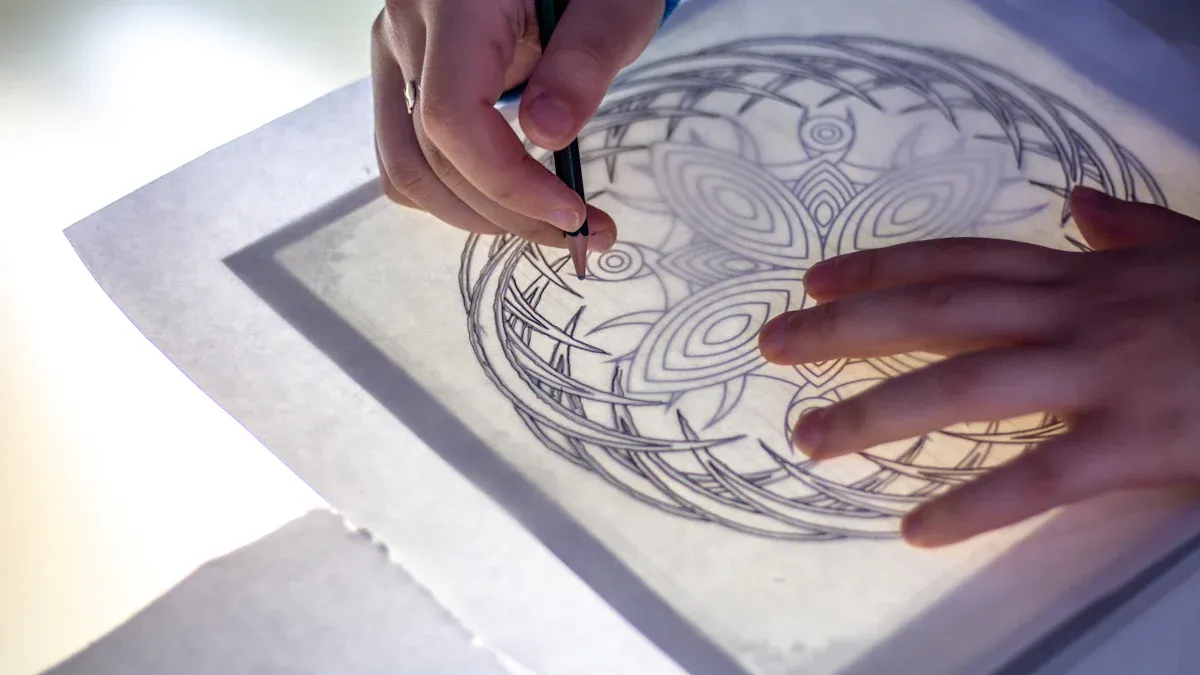
You want your drawings to look clean and accurate. A lightbox helps you trace outlines and shapes with ease. Place your reference image on the surface, then put your drawing paper on top. The bright, even light shines through both layers. You see every detail. You can work on your art any time you want. You do not need to wait for sunlight or use a window.
The main plus of tracing lightboxes is that you don't depend on the time of the day to trace the pattern – you can do it in the evening or in the night. Also, the pattern is lying horizontally on the surface of the lightbox as you trace it so your hand will not tire as quickly as with the window.
You will notice your hand feels less tired. The flat surface of the lightbox supports your wrist. You can focus on your lines and enjoy the process. Many artists use a lightbox to practice sketching, cartooning, or even calligraphy. You can try new styles and improve your skills.
Best Materials for Tracing
You might wonder what materials work best with a lightbox. Most people use regular printer paper, but you can also use tracing paper, vellum, or thin sketchbook sheets. These let the light pass through easily. If you want to trace on thicker paper, just turn up the brightness on your lightbox.
Light boxes provide improved visibility due to their bright and evenly lit surface.
They reduce the risk of smudging ink or color, which is a common issue with traditional tracing methods.
Light boxes are reusable, making them a cost-effective option over time.
They are considered the best way to faithfully reproduce artworks, aiding in the learning process for artists.
You can use a lightbox for school projects, comic art, or even embroidery patterns. Try tracing photos, coloring pages, or your favorite designs. The lightbox makes every project easier and more fun. You will find yourself reaching for your lightbox again and again!
Backlit Paper Craft Ideas
Layered Paper Art
You can turn your lightbox into a stage for layered paper art. Start by cutting shapes or designs from colored paper. Stack these layers on top of each other. Place your creation inside the lightbox and switch it on. The lightbox shines through the cutouts and negative spaces. You will see a beautiful halo effect around the edges. This glow makes every detail stand out. The lightbox lets you show off the tiny cuts and patterns you worked hard to make.
The lightbox creates a soft background that highlights your art.
It brings out the depth in each layer.
You get a piece that looks more lively and interesting.
Try using different colors and shapes. Move the layers around until you find a look you love. The lightbox helps you see how each change affects your art.
Enhancing Colors
A lightbox does more than just light up your paper crafts. It makes your colors pop. When you use a lightbox, the light passes through the paper and makes every shade brighter. You will notice that reds, blues, and yellows look more vibrant. The interplay of light and shadow adds drama to your work. Your art feels more inviting and fun to look at.
Tip: Try using thin or translucent paper for even bolder colors. The lightbox will make them glow!
You can use your lightbox for school projects, home decor, or just for fun. Every time you turn on your lightbox, you give your paper art a new life.
Light Box Photography for X-Ray Viewing
Medical Film Display
You might think X-ray viewing only happens in hospitals, but you can use a photo LED light box at home or in a classroom. When you place an X-ray film on the bright, even surface of a light box, every detail pops out. You see bones, teeth, or even tiny cracks that you might miss with regular room light. This helps you study the images closely and learn more about the human body.
Doctors and radiologists use LED light boxes because they give the best lighting conditions. The bright and evenly spread light helps you spot small things like fractures or infections. Poor lighting can hide important details, but a light box makes everything clear. This means you can make better decisions and understand what you see.
Tip: If you want to show X-rays to a group, set the light box on a table and let everyone gather around. The clear view helps everyone learn together.
Organizing X-Rays
You can use a light box to sort and organize your X-ray films. Lay out several films at once and compare them side by side. This makes it easy to spot changes or patterns. You might want to label each film with sticky notes or use a simple table to keep track:
Patient Name | Date | Body Part | Notes |
|---|---|---|---|
Ali | 2024-03-10 | Hand | Small crack |
Sara | 2024-04-02 | Chest | Clear |
A light box helps you keep your X-rays neat and easy to find. You can use it for science projects, teaching, or even just to satisfy your curiosity about how things look inside the body.
Jewelry Design with LED Lightbox
Inspecting Details
When you make jewelry, you need to see small things. A led lightbox helps you look at every part closely. The diffusing leds spread light all over your work area. You will not get strong shadows or bright spots. This makes it easy to find scratches, dust, or tiny flaws. You can use the lightbox to look at jewelry up close. It is great for macro photography. The even light lets you check gemstones, clasps, and engravings without missing anything.
Here is a quick table that shows why a photo led lightbox is good for jewelry design:
Feature | Description |
|---|---|
Lighting Quality | Gives steady, soft led light so you see details clearly. |
Background Options | Lets you change backgrounds (white, black, beige) to show off jewelry. |
Portability | Many lightboxes fold up and are easy to carry anywhere. |
Size | Comes in many sizes for all jewelry and macro photos. |
Power Source | Works with wall plugs or batteries, so you can use it anywhere. |
Budget | There are choices for every budget, from cheap to fancy. |
Photographing Pieces
You want your jewelry photos to look really nice. A led lightbox gives you soft, even light. This makes gold, silver, and gems look bright. Macro photography is easier because the lightbox stops glare and keeps colors real. You can try different backgrounds and styles with the lightbox. Macro shots look sharp and clear when you use a led lightbox.
Here are some ways a led lightbox helps your jewelry photos:
Gives you steady light so there are less shadows and glare.
Makes macro photography easy and clear.
Keeps your photos looking the same for catalogs or online stores.
Lets you try new looks with diffusing leds.
Helps you show every sparkle and detail.
You can use your led lightbox for both making and taking pictures of jewelry. Try new angles, backgrounds, and macro settings. You will see your jewelry in a brand new way.
Slide and Negative Viewing Ideas
Sorting Slides
You probably have a box of old slides or negatives at home. A photo LED light box makes sorting them easy and fun. Just place your slides on the bright surface. You see every detail pop out. The even lighting helps you spot faded colors or scratches right away. You can quickly decide which slides you want to keep or scan.
Here’s why a photo LED light box works so well for viewing slides and negatives:
Feature | Description |
|---|---|
Even Lighting | Gives bright, uniform light across the whole surface. |
Energy Efficiency | Uses less power than old fluorescent lights. |
Longevity | Lasts much longer than other lighting options. |
Adjustable Brightness | Lets you control the light for the best view. |
Color Temperature Control | Helps you see true colors by adjusting the color temperature. |
Tip: Try sorting your slides by year or event. Use sticky notes to label groups. This makes it easier to find your favorite memories later.
Digitizing Negatives
You want to save your old film memories forever. A photo LED light box helps you digitize negatives with great results. The steady, predictable light gives you sharp scans every time. You get better contrast and clearer images than with regular lamps.
LED light boxes give you consistent lighting, which is key for high-quality scans.
The focused light from LEDs makes your scans sharper and colors more true.
Some LED light boxes use special red, green, and blue lights. These help bring out the best colors in your film.
You can use your phone or a scanner to capture the images. The light box makes the whole process simple and fun. You will love seeing your old photos come back to life!
Food Styling in Light Box Photography
Bright Food Images
You want your food to look fresh and delicious in every photo. A lightbox helps you do that. The bright, even light makes every color pop. You can shoot your food at any time. You do not need to wait for sunlight or worry about cloudy days. Light box photography gives you control over every shot. You can adjust the brightness and color to match the mood you want.
Here’s a quick look at how a lightbox improves your food photography:
Benefit | Description |
|---|---|
Adjustable lighting | You can change the brightness and color to make your dishes look their best. |
Consistent illumination | The light stays steady, so your food always looks fresh and tasty. |
Not limited by time/weather | You can take photos whenever you want, day or night. |
Versatility | You can use different backgrounds and props for creative effects. |
Durability | The lightbox stands up to spills and heat during food shoots. |
You will notice your food looks more appealing. The lightbox removes harsh shadows and brings out the details. Many people use light box photography for food blogs, menus, and social media. You can try new angles and styles without stress.
Tip: Move your plate around inside the lightbox. Find the angle that makes your dish look the most tempting.
Using Props
Props make your food photos stand out. You can add napkins, forks, or fresh herbs to your setup. The lightbox gives you space to play with different items. You can use colorful backgrounds or simple white ones. Light box photography lets you test what works best for your style.
Try these ideas to boost your food photography:
Place a wooden board or marble slab inside the lightbox for a rustic look.
Use small bowls or cups to add height and interest.
Sprinkle spices or seeds around the plate for texture.
Add a glass of juice or a cup of tea for a cozy feel.
You do not need fancy props. Simple items from your kitchen work well. The lightbox makes every detail clear. You can see how each prop changes the mood of your photo. Many people who start with product photography find that food photography is even more fun with a lightbox. You get to experiment and see instant results.
Remember: The best food photos tell a story. Use your lightbox to create scenes that make people hungry!
Science Experiments with Lightbox
Light Refraction
You can turn your photo LED light box into a mini science lab. Try a simple experiment with a clear plastic cup filled with water. Place it on the light box and shine a colored LED light through the side. Watch how the light bends as it passes through the water. This bending is called refraction. You can use mirrors or lenses from kits like the Light Blox or Tech Light Lab LED Optics Kit to see even more cool effects. Move the cup or mirror around and notice how the light path changes.
Here’s a quick look at some fun tools you can use:
Product Name | Description | Key Features |
|---|---|---|
Show refraction, reflection, and color mixing with easy-to-use light sticks. | Red, blue, and green LEDs. Create beams, mix colors, and test light paths. | |
Light Blox - LED color mixing educational kit | Explore optics and color mixing with bright classroom LEDs. | Safe LEDs in red, green, and blue. Includes lenses, mirrors, and activities. |
Tech Light Lab LED Optics Kit | Durable kit for teaching reflection, refraction, and color. | Mix primary colors of light to create white light. For Grades 2-8. |
Tip: Always check for safety marks like CSA or UL on your light box. Safe wiring and strong frames keep your experiments worry-free.
Color Mixing
You can explore color mixing with your light box and some colored transparent sheets. Place red, green, and blue sheets on the surface. Shine different colored LEDs through them. Watch as the colors blend to make new ones. Try overlapping the sheets to see what happens. You can use kits with colored LEDs or even try UV light for dramatic changes. Under UV, some objects look totally different—like oranges turning black!
Here’s how different LED colors affect what you see:
Wavelength (nm) | Color | Effect on Objects |
|---|---|---|
454 | Blue | Sharp peak from the LED itself |
493 | Blue-Green | Higher energy, changes how you see things |
525 | Green | Affects color perception |
567 | Yellow | Alters appearance of objects |
612 | Orange | Changes color perception under different lights |

You can try these experiments with friends or family. You will see science come alive right on your table!
Educational Activities with LED Lightbox
Interactive Learning
You can turn any classroom into a place for discovery with a photo LED light box. Kids love to explore how light works. You can use mirrors and shiny products to see how light bounces. This helps you understand reflection. Try using lenses to see how light bends. You will learn why your eyes, microscopes, and telescopes work the way they do. Color mixing is another fun activity. Place colored sheets on the white background and blend them to make new colors of light.
Here’s a table with some top ideas for interactive learning:
Educational Activity | Description |
|---|---|
Reflection | Explore how light bounces in reflection with mirrors and other shiny surfaces. |
Refraction | Learn why lenses bend light to form images in eyes, microscopes, and telescopes. |
Color Mixing | Blend your own color combinations to make new colors of light. |
A light box supports early literacy and sensory development. You can use it for open-ended projects that build problem-solving skills. The 3branch Lightbox Discovery Table is a great example. It encourages hands-on exploration and teamwork. You can design your own activities or try ready-made kits.
Fun Crafts
You can use a light box for so many diy ideas. Try making a shadow box with layers of paper or plastic. Shine the light through your design and watch the shapes come alive. You can use a white background for tracing or drawing. This makes your lines clear and easy to follow. Kids enjoy making their own products like bookmarks, cards, or window art.
Here are some fun diy projects you can try:
Create a shadow box with colored paper and see how the light changes your design.
Trace your favorite cartoon on a white background and color it in.
Make a diy sign for your room using bright markers and see it glow.
Build a simple shadow box with family photos and small products for a unique display.
You can use these ideas for school, home, or even as gifts. The light box makes every project more exciting. You will find new ways to design, create, and share your creative projects every day.
Illuminated Displays and Decor Ideas
Custom Lighted Signs
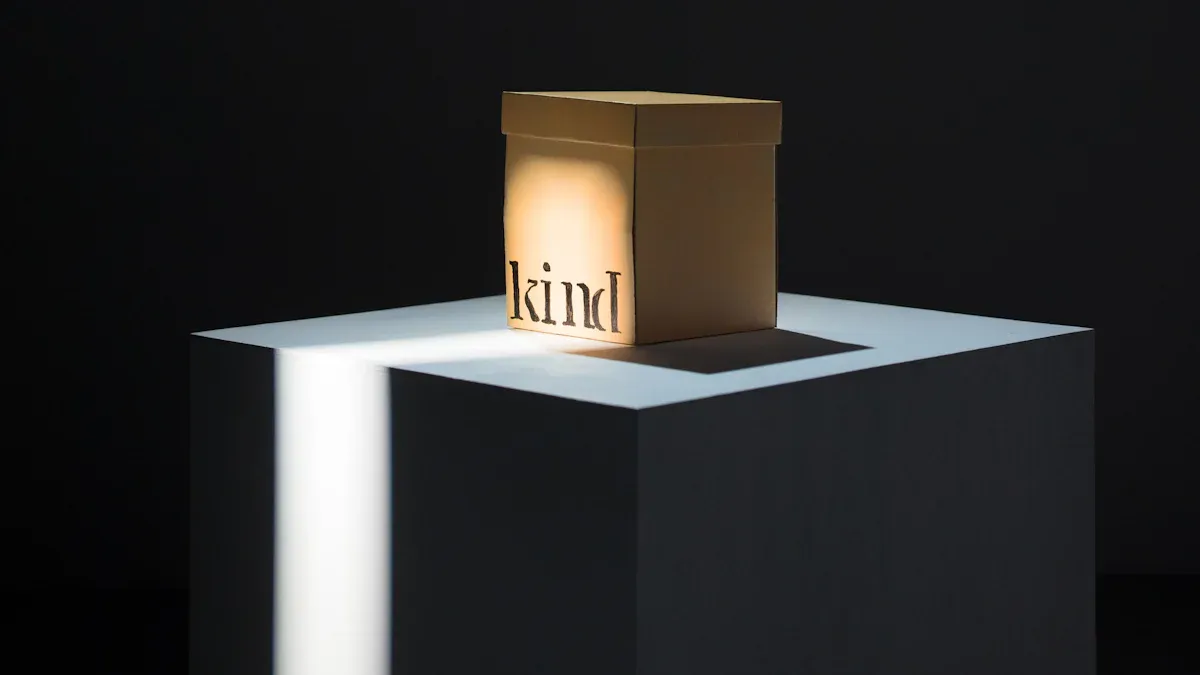
You can make your own custom signs with a diy light box. These signs look amazing at parties, weddings, or even in your bedroom. You just need a box, some soft LED strips, and a little creativity. The diffusion from the box spreads the lighting evenly, so your message stands out. Many people use these signs for trade shows, retail stores, or even menu boards in restaurants. You can change the graphics or letters whenever you want. This makes your sign perfect for any event or season.
A diy light box costs much less than buying a commercial display. Some people say they spent only $150 on their project, while store-bought frames can cost $300 or more. Even with high lumber prices, building your own box saves money. You get a bright, modern look without breaking the bank.
A study found that over half of shoppers skip stores with boring signs. A bright, modern light box can help you stand out.
Showcasing Art
You can use a diy light box to show off your favorite art or collectibles. The best light boxes use diffusion to create even lighting, which makes colors bold and true. You should avoid using halogen or incandescent bulbs. These can fade your art over time. Instead, use soft LED strips for safe, cool lighting. Protect your items with UV-protective sleeves and acid-free materials.
Try themed backgrounds for your display. You can switch them out for holidays or special collections. The box gives you a clean, modern look. It also keeps your art safe from heat and UV rays. Many people say LED light boxes give better color and no dark spots compared to traditional lighting. Your art will look its best every time you turn on the box.
Feature | LED Light Boxes | Traditional Lightboxes |
|---|---|---|
Brightness | Very bright and even | Less bright, uneven |
Color Accuracy | Bold, vibrant, true | Dull, less vibrant |
Lighting Consistency | No dark spots | Bright edges, dark centers |
Tip: Use diffusion sheets inside your box for the smoothest, even lighting.
A photo LED light box helps you be creative in many ways. You get steady light for your pictures. The box is easy to carry anywhere. Your photos look nice every time.
You can change the light for better pictures.
The light box stops strong shadows.
It does not cost a lot of money.
Feedback Type | Details |
|---|---|
Common Praises | People like that the light does not flicker. The box feels strong and safe. The daylight color helps you fix photos. |
Frequent Complaints | Some people wish the battery lasted longer. Others do not like when the light is not even. |
FAQ
Can I use a photo LED light box for drawing at night?
Yes! You can use your light box any time. The bright, even light helps you see details, even when it’s dark outside.
What paper works best with a light box?
You get the best results with tracing paper or thin printer paper. Thicker paper works too if you turn up the brightness.
Is a photo LED light box safe for kids?
Yes, most LED light boxes stay cool.
Always check for safety marks.
Supervise young kids during use.
See Also
10 Innovative Ideas for Acrylic LED Light Boxes in Retail
10 Unique Applications for Illuminated Acrylic Boxes in Design
Exploring Acrylic Photo Light Boxes: Uses and Advantages
