Backlit LED Sign Installation for Optimal Lighting Effects

When you install a Backlit LED Sign, you want it to shine bright and last long. You need the right voltage and a good power supply to keep your sign safe from overheating. Too much heat can dim your lights and make them wear out faster. Organizing your components and choosing efficient power helps your sign stay bright, look great, and save money on energy.
Key Takeaways
Pick good materials for your backlit LED sign. Use frosted acrylic or diffusing film for smooth light.
Installing your sign the right way is important. Make sure it is secure and not too close to the wall. This stops flickering and uneven light.
Choose the best LED type and spacing. LEDs that are close together stop bright spots. Wider spacing spreads light across the sign.
Take care of your sign often to keep it bright. Clean it and look for loose wires or damage. This helps your sign last longer.
Be safe when you install your sign. Always use a low voltage power supply. Ask a professional for help with hard setups.
Optimal Lighting Effects
What Is Optimal Lighting
When you look at a backlit LED sign, you want the light to spread out smoothly. You do not want bright spots or dark patches. That is what people call "optimal lighting." It means your sign glows evenly and looks professional from every angle.
Here is a quick look at what makes lighting optimal for backlit LED signs:
Aspect | Description |
|---|---|
Diffusion | You need to spread the light so you do not see any hot spots. This keeps the sign looking smooth. |
Light Source | LED lights shine from small points. You need to use diffusers to help the light cover the whole sign. |
Installation Depth | Sometimes you need a deeper box or extra diffusers to get the best lighting effect. |
You want your sign to stand out, so you need to think about a few key factors:
Brightness: The sign should be bright enough to see, but not so bright that it hurts your eyes.
Mounting Conditions: The distance between the LEDs and the sign face changes how the light spreads.
Type of Light Fixtures: Different LEDs can shine in different ways. Pick the right one for your sign.
Lighting Zones: Outdoor signs have rules about how bright they can be.
Material Reflectance Value: The color and texture of your sign change how the light looks.
Angle of Incidence: The way the light hits the sign can make a big difference.
💡 Tip: If you use the right materials and set up your LEDs well, your sign will look bright and even, day or night.
Why Installation Matters
You might think any installation will work, but the way you set up your sign changes everything. A good installation makes your sign pop and last longer.
A professional setup helps you mount the sign and connect the cables the right way.
If you want a cool halo effect, keep your sign about 10mm to 20mm (0.4” to 0.8”) away from the wall.
Careful installation stops problems like flickering lights or uneven brightness.
When you pay attention to these details, your sign will grab attention and stay bright for years. You get the best results when you combine smart planning with careful installation.
Backlit LED Sign Basics
Types of Backlit LED Signs
You have a lot of choices when it comes to picking the right backlit LED sign for your business. Each type gives a different look and works best in certain places. Here’s a quick table to help you see the options:
Type of Sign | Description | Application |
|---|---|---|
Front-Lit Channel Letter Signs | Lights shine from the front for bold colors. | Storefronts, indoor displays |
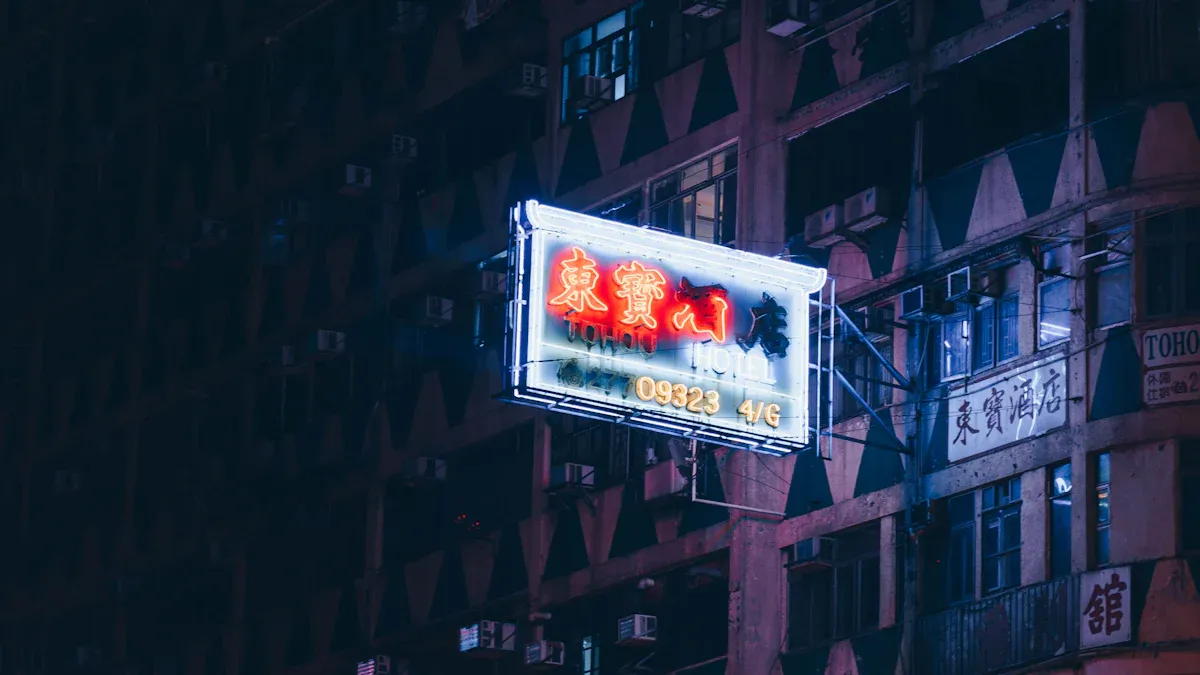
Backlit / Reverse-Lit Channel Signs | Light glows from behind for a modern style. | Modern branding, upscale businesses |
Lightbox | Uses LED lighting with graphics for extra visibility. | Outdoor ads, promotions |
Stencil-Cut | Etched graphics glow with backlighting. | Custom, artistic signs |
Face-Illuminated | Letters light up from inside, great for dark backgrounds. | Brand names, logos |
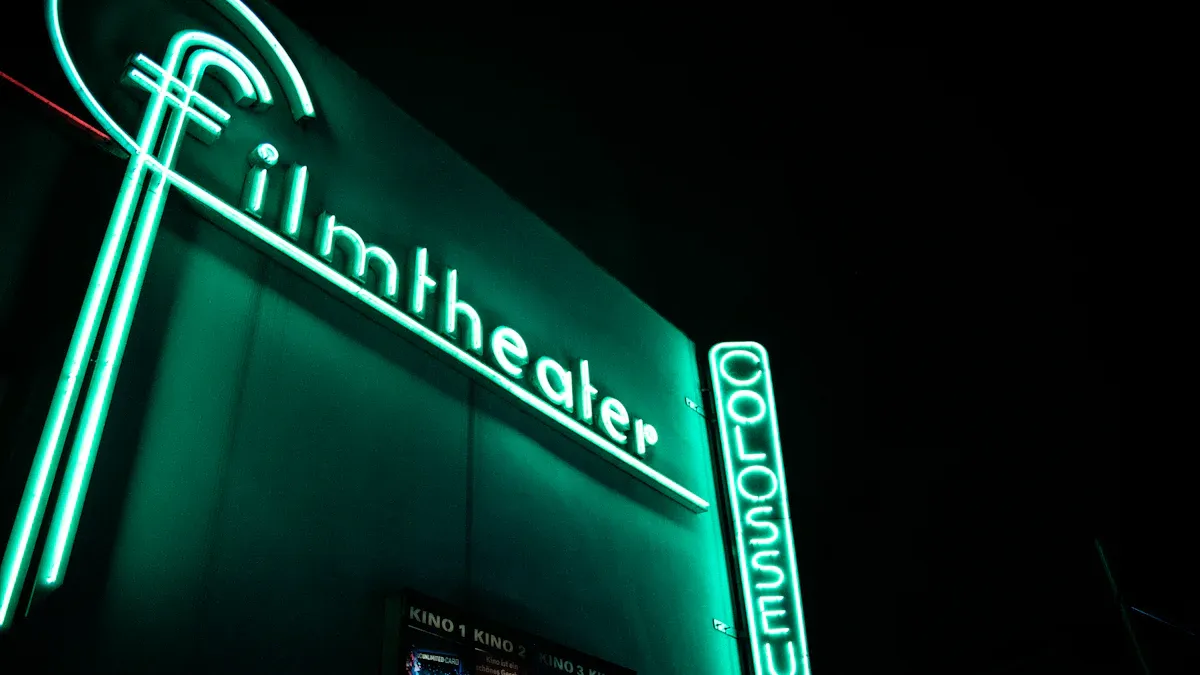
Halo | Creates a glowing halo effect around the sign. | Upscale branding, night visibility |
Neon | Bright colors from neon tubes, classic look. | Indoor signs, art displays |
📝 Note: You can mix styles to match your brand. For example, a halo sign with a lightbox can really stand out.
Benefits for Business
A backlit led sign does more than just show your name. It helps your business shine and brings in more customers. Here are some top reasons to use backlit signs:
Vibrant Brightness: Your sign stays bright and easy to see, even from far away.
Customizable Content: You can update your message for sales or events without much effort.
Energy Efficiency: Led lighting uses less power, so you save money on your electric bill.
Attention-Grabbing Displays: Bright colors and glowing effects make people stop and look.
Increased Foot Traffic: More people notice your business, so you get more visitors.
Long Lifespan: Backlit signs last longer and need fewer repairs than old-style signs.
The best part? You get all these benefits while keeping costs low over time. Led lighting is tough and uses less energy, so you spend less on repairs and bills. Your backlit sign keeps working hard for your business, day and night.
Planning Your Sign Setup
Choosing Materials
You want your backlit LED sign to look smooth and bright, so picking the right materials matters. Some materials spread light better than others. If you use frosted acrylic or plexiglass, you get soft, even light with less glare. Diffusing film or tape helps soften the glow and stops bright spots. Milk glass or opal glass gives your sign a fancy look and spreads the light well. You can even try a 3D printed diffuser for custom lighting effects. Here’s a quick table to help you compare lighting options:
Material | Description |
|---|---|
Frosted Acrylic or Plexiglass | Spreads light evenly and cuts down glare. |
Diffusing Film or Tape | Softens the light and stops hotspots. |
Milk Glass or Opal Glass | Makes the light look smooth and stylish. |
3D Printed Diffuser | Lets you create special effects for your LED strips. |
💡 Tip: Using the right diffuser helps your sign glow without harsh spots.
Location and Environment
Where you put your sign changes how people see it. If you place your backlit sign in a busy area, more customers will notice it. Signs in high-traffic spots grab attention and boost engagement. Outdoor signs need to shine brighter to stand out in sunlight. Indoor signs should pop against other lights. You want strong contrast so your message is easy to read. Think about the ambient lighting around your sign. Good placement makes your sign work harder for your business.
Backlit signs can make shopping more fun.
Signs in the right spot get more people interested.
Brightness matters outdoors, contrast matters indoors.
Tools and Components
Getting your tools and parts ready saves you time and trouble. You need brackets, adhesive mounts, or direct fasteners to hang your sign. Cut the frame and back panel to fit your design. Prep the acrylic sheet and graphics before you start. Use strong adhesive or tape to attach LED strips for even light. Connect your LEDs to a reliable power supply, like a 12V DC transformer. Make sure your wires are insulated and rated for outdoor use if needed. Organize your components so everything fits and works safely. Voltage alignment keeps your led lighting running smoothly and stops overheating.
🛠️ Note: Planning your setup and organizing your parts helps your backlit LED sign shine bright and last longer.
Preparing for Installation
Power and Safety
Before you start your installation, you need to think about power and safety. You want your backlit LED sign to work well and stay safe. Always use a low voltage 12V power source for your sign. Never connect your LED lighting directly to a 110V or higher AC power source. That can destroy your LEDs and create a dangerous situation. Use the provided 12V DC power supply, which works like a cell phone charger. This keeps your sign safe and bright.
Here’s a quick table to help you remember the right voltage and amperage:
Voltage | Amperage Range |
|---|---|
12V | 5 - 15 amps |
You should also follow these safety steps:
Hire a licensed electrician for your installation.
Make sure you follow local safety rules and electrical codes.
Only use the power supply that comes with your sign.
⚠️ Tip: Direct connection to AC power is very dangerous. Always double-check your power supply before you plug anything in.
Measurements and Checks
Good planning makes your installation easier and safer. Start by measuring the spot where you want to put your backlit sign. Check the size of your sign and make sure it fits the space. Look at the wall or surface to see if it is strong enough to hold your sign. Gather all your tools and parts before you begin. This helps you avoid mistakes and saves time.
Here are some steps to follow:
Measure the height and width of your sign area.
Check that your power source is close to your sign.
Make sure you have all the right lighting options and mounting hardware.
Confirm that your sign materials will spread the light evenly.
📝 Note: Careful checks before installation help you avoid problems later. You want your backlit sign to look great and last a long time.
Backlit LED Sign Installation
Getting your backlit LED sign up and running is an exciting step. You want your sign to look sharp, shine bright, and last a long time. Let’s walk through the main parts of the installation process so you can get the best results.
Mounting Techniques
You have a few solid mounting options for your sign. The right choice depends on your wall type, the weight of your sign, and how easy you want future maintenance to be. Here are the most common mounting methods:
Direct Mounting
Attach your sign straight to the wall using screws, bolts, or strong adhesive. This method gives your sign a clean, seamless look. It works well for flat surfaces and lighter signs.Raceway Mounting
Use a rectangular metal box (called a raceway) to hold all your wires and power parts. You mount the raceway to the wall, then attach your sign to the raceway. This makes installation and repairs much easier.Backplate Mounting
Secure your sign to a sturdy plate, then mount the plate to the wall. This method adds extra support and works great for larger or heavier signs.
🛠️ Tip: Always check that your mounting surface can handle the weight of your sign. Use anchors or extra support if you need it.
You can also use brackets or adhesive mounts for smaller signs. For outdoor signs, make sure your mounting hardware is weather-resistant.
LED Positioning
How you place your LED modules or strips changes how your sign lights up. You want even, smooth light with no bright spots or dark patches. The distance between your LEDs and the sign face matters a lot. Check out this table for the best spacing:
Distance Category | Recommended Pitch | Considerations |
|---|---|---|
Short Distance (1 to 2 inches) | 1 to 2 inches (2.5 to 5 cm) | Place LEDs close together to stop hotspots and get smooth light. |
Medium Distance (4 to 6 inches) | 2 to 3 inches (5 to 7.5 cm) | This setup blends light well and saves energy. |
Long Distance (6 to 10 inches) | 3 to 5 inches (7.5 to 12.5 cm) | Use wider spacing for better light diffusion across the sign. |
If you want dual illumination (front and back glow), use LED tape lights on both sides. Always test your lighting options before you secure everything. Move the LEDs around until you see even light across the whole sign.
💡 Try turning on your LEDs before you close up the sign. This way, you can spot and fix any uneven lighting right away.
Wiring and Power
Wiring your sign the right way keeps it safe and bright. You have a few ways to run your wires and connect your power supply:
Through-Wall Wiring: Run a cable through the wall to a regular outlet. Put the power supply junction box at either end of the wire.
In-Wall Wiring: Hide your power supply in an access panel. Run all your 12V wires inside the wall for a clean look.
Switch Options: Add a switch at the junction box or use a smart plug. This lets you turn your sign on and off easily.
When you connect your LEDs, you can use these wiring setups:
Single-Ended Power Feed
Connect one end of your LED string to the power supply. Cap off the other end.Parallel Wiring
Hook up several LED runs to the same power supply. This works well if you have a bigger power supply.Home Run Loop
Tie two long LED runs together at one end. Connect the other end to the power supply.
⚡ Note: Always use a 12V DC transformer for your sign. Never connect your LEDs straight to a wall outlet. For indoor signs, you can remove the waterproofing sleeve from your LED strips to make wiring easier.
Securing the Sign Face
Once your LEDs are in place and your wiring is set, you need to secure the sign face. This step keeps dust and moisture out and makes your sign look finished.
Line up the sign face with the frame or box.
Use screws, clips, or adhesive to hold the face in place.
Double-check that the face sits tight and even. No gaps should show.
For lightboxes, snap the face into the frame or use special locking strips.
🧼 Wipe the sign face clean before you finish. Dust or fingerprints can mess up your lighting effect.
If you follow these steps, your backlit LED sign will shine bright and look professional. Good mounting, smart LED positioning, safe wiring, and a secure sign face all work together for a top-notch installation.
Achieving Even Illumination
Light Placement
You want your sign to glow evenly from edge to edge. The way you place your lights makes a big difference. Try these tips to get the best results:
Use diffuse lighting. This spreads the light out and covers the whole sign, even if the surface reflects light in different ways.
Place your LED strips or modules close to the sign face. This helps keep the light strong and even.
Pick lights with a wide angle. A bigger angle means the light reaches more of your sign.
For big signs, measure the distance from your sign face to the back panel. Keep the space between your lights equal to or less than 1.5 times that distance. Place lights near the edges, about one third to one half of that space from the wall.
Bright, white LEDs (above 4000K) work well for signs in busy places like stores or offices. They help your sign stand out and look sharp.
Avoiding Hotspots
Hotspots are those bright dots or patches that make your sign look uneven. You can stop them with a few simple tricks:
Move your LEDs in front of any rods or supports to cut down on shadows.
Cover any LEDs behind rods with black electrical tape. This blocks extra light that causes shadows.
Use a frosted or milky white diffuser. This softens the light and spreads it out.
Space your LEDs evenly. If you put them too close together, you get bright spots. Too far apart, you get dark patches.
💡 Proper LED placement and the right diffuser help your sign glow smoothly, without harsh glare.
Adjusting Brightness
Sometimes your sign needs to shine brighter, like during the day. Other times, you want it softer, like at night. You can adjust the brightness of your LED sign to fit any setting. This keeps your sign easy to see and stops it from being too harsh or too dim.
Change the brightness to match the light around your sign.
Adjust the settings so your sign always looks its best.
With these steps, you make sure your backlit LED sign looks even, bright, and professional every time.
Tips and Common Mistakes
Expert Tips
Want your backlit LED sign to look like a pro did it? Try these expert tips. They help you get the best results and avoid headaches later.
Pick the right spot. Look at the lighting in the area before you choose where to put your sign.
Move lights closer to the graphic. This makes your sign brighter and more eye-catching.
Space your LEDs evenly. Even spacing keeps the brightness the same across the whole sign.
Choose the right LED color. Warm white gives a cozy feel. Cool white looks crisp and modern.
Think about the viewing angle. Place your sign where people can see it easily.
Use light boxes for soft light. These help you avoid harsh shadows.
Keep some space between the graphic and the lights. This stops bright spots from showing up.
Go wide in shallow cabinets. Use LEDs with a wide viewing angle if your sign is thin.
Check for even light. Look at your sign from different spots to make sure it glows the same everywhere.
Use the right power supply. The correct power keeps your LEDs safe and bright.
💡 Tip: Always test your sign before you finish the install. You can fix problems before they become big issues.
Troubleshooting
Mistakes happen, but you can avoid most of them if you know what to watch for. Here are some common problems and how to fix them:
Poor visibility: Make sure your text stands out from the background.
Too much going on: Simple designs are easier to read.
Wrong size: Pick a sign size that people can see from far away.
Uneven lighting: Double-check your LED spacing for smooth brightness.
Skipping permits: Always check local rules before you install.
Forgetting maintenance: Set a schedule to clean and check your sign.
Mixing up your brand: Use the same colors and logos every time.
Bad placement: Put your sign where lots of people will see it.
Wasting energy: Choose energy-saving LEDs.
Ignoring the surroundings: Think about other lights and building features nearby.
Hard to fix: Make sure you can reach your sign for repairs.
Cheap materials: Invest in good parts so your sign lasts longer.
🚩 Note: Planning ahead and checking your work saves you time and money. If you get stuck, ask a pro for help.
Sign Safety and Maintenance
Electrical Safety
You want your backlit LED sign to stay safe and work well for years. Following electrical safety rules is a must. These rules protect you, your property, and anyone near your sign. Here’s a quick look at some important safety standards you should follow:
Standard Reference | Requirement |
|---|---|
600.7(B)(1) | Bond all metal parts of your sign to the grounding conductor. |
600.7(A)(1) | Use a grounding conductor that meets code 250.118. |
600.9(A) | Mount your sign at least 14 feet above areas where vehicles can reach. |
600.9(C) | Keep at least 2 inches between your sign and anything that can catch fire. |
600.9(D) | If your sign is outside and can get wet, make sure it has drain holes. |
600.10(A) | Portable signs need a plug and strong support. |
600.21(A) | Make ballasts and transformers easy to reach and fasten them securely. |
⚡ Tip: Always check your local codes and ask a licensed electrician if you have questions. Safety comes first!
Cleaning and Inspection
Keeping your sign clean and checking it often helps it shine bright and last longer. Dust and dirt can make your sign look dull. Regular cleaning is especially important if your sign sits in a busy or dusty spot.
Turn off the power before you start cleaning.
Use a soft microfiber cloth or a soft-bristle brush to avoid scratches.
Pick a mild, non-abrasive cleaner. Stay away from harsh chemicals.
Try compressed air to blow away loose dirt before wiping.
Check for loose wires or damaged parts while you clean.
Make sure the sign is dry before you turn the power back on.
Clean your sign a few times a year to keep it looking its best.
🧽 Regular cleaning keeps your sign bright and easy to read. It also helps you spot problems early.
If you follow these steps and stick to the manufacturer’s guidelines, your backlit LED sign can last 5 to 10 years or even longer—some signs run for up to 100,000 hours! Taking care of your sign means it will keep working hard for your business.
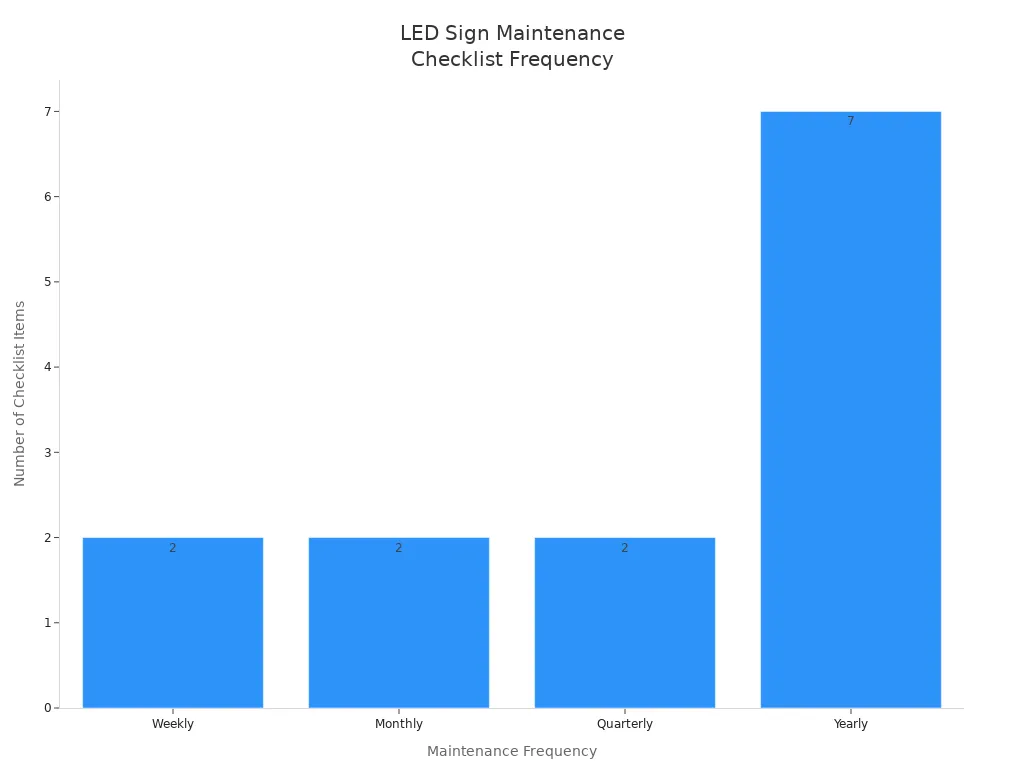
You can help your backlit LED sign glow by doing things the right way. Always check the voltage before you start. Plan how you will set up your sign. Make sure you think about safety first. Use a checklist to keep your sign working well:
Frequency | Checklist Item | Description |
|---|---|---|
Weekly | Regular Inspection | Check for damage or lights that look dim. |
Monthly | Cleaning and Dusting | Wipe the sign and clean off any dust. |
Yearly | Professional Inspection | Get an expert to look at the wiring and safety. |
If your project seems hard, ask a professional for help. Getting a pro to install your sign keeps it safe, works well, and looks good for a long time.
FAQ
How do you choose the right size for your sign?
You want your sign to stand out. Measure the space where you plan to hang your sign. Pick a size that fits well and is easy to read from a distance. A bigger sign grabs more attention.
Can you install a backlit sign outdoors?
Yes, you can install a backlit sign outdoors. Make sure your sign uses weatherproof materials. Use waterproof LED strips and a sealed power supply. Outdoor signs need extra protection from rain and sun.
What should you do if your sign looks dim?
If your sign looks dim, check the power supply first. Make sure your sign gets the right voltage. Clean the sign face to remove dust. Replace any old or broken LEDs. A bright sign helps your business shine.
How often should you clean your sign?
You should clean your sign every month. Use a soft cloth and gentle cleaner. Keeping your sign clean makes it look new and keeps the light bright. Regular cleaning also helps you spot problems early.
Do you need a professional to install your sign?
You can install a small sign yourself. For a large or complex sign, hire a professional. A pro knows how to wire the sign safely. This keeps your sign working well and looking great.
See Also
Selecting The Ideal LED Signage For Your Company Needs
Enhancing Brand Awareness With Acrylic Light Box Signage
Essential LED Sign Box Buying Guide: Specs, Setup, And Returns
Increasing Exposure Through Rotating LED Signs: Advantages And Insights
Finding The Best Acrylic LED Display Board For Business Signage
