Step-by-Step Guide to Acrylic Signs for Light Boxes


Acrylic signs are important in modern advertising. They are strong and look professional. These signs work great with lightboxes. Lightboxes make bright displays that grab attention and are easy to see. Businesses use them to show their brand clearly. This makes their ads more effective. More people are using this technology because it works well. For example, the lightbox market might grow from $5.3 billion in 2024 to $8.9 billion by 2033. That’s a growth rate of 6% each year. This shows how acrylic signs help brands by looking good and being useful.
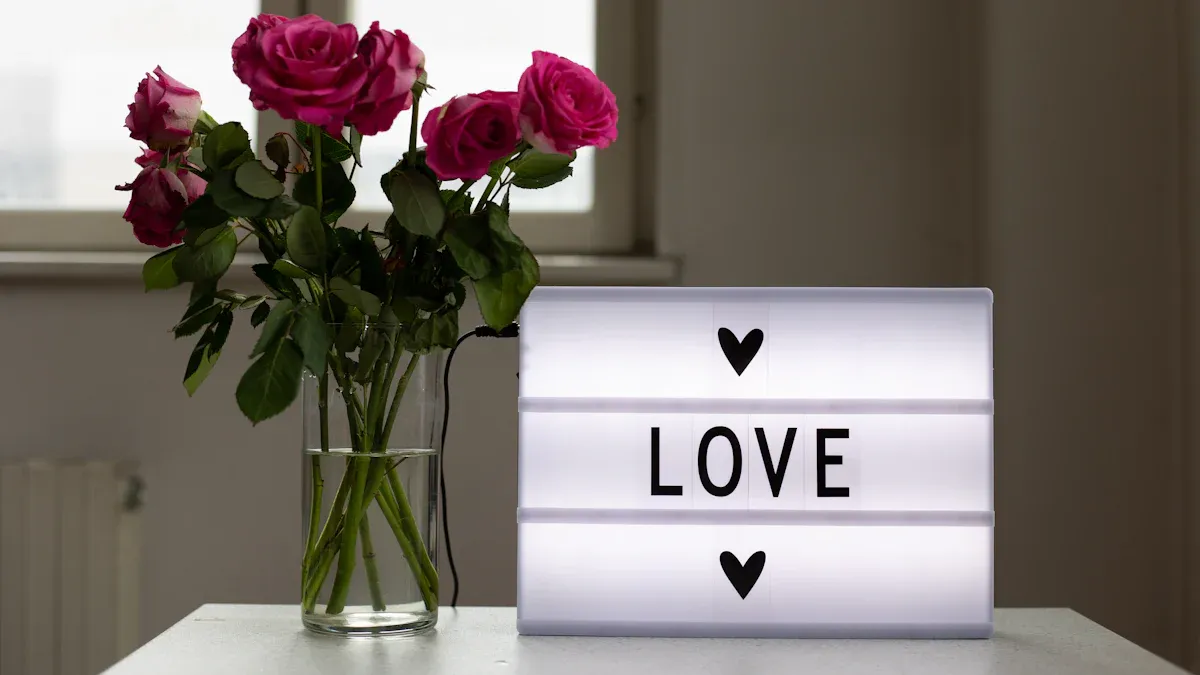
Key Takeaways
Acrylic signs are tough, light, and great for lightboxes. They are a favorite for modern ads.
Use clear letters, good pictures, and neat designs for your sign. This helps it stand out and look nice.
Pick colors and finishes that make your sign easy to see. Match them to your brand's look.
Clean your sign often and check for damage. This keeps it shiny and professional.
LED lights work best for lightboxes. They save energy and make your sign evenly bright.
Understanding Acrylic Signs for Light Boxes
What Are Acrylic Signs?
Acrylic signs are strong and flexible signs made from acrylic sheets. These sheets are light, don’t break easily, and have a shiny surface. Acrylic is often used instead of glass because it’s clear and tough. When used with lightboxes, these signs create bright displays that stand out. They work well both indoors and outdoors, making them a favorite for businesses.
Benefits of Acrylic Lightbox Signs
Acrylic lightbox signs have many benefits for businesses. Here’s a simple breakdown:
Benefit | Description |
|---|---|
Lower cost investment | Acrylic lightbox signs cost less than fancy advertising options. |
Easy to install and maintain | They are simple to set up and need little care. |
Good visual appeal | Bright, clear images from quality materials and lights grab attention. |
Applicability on occasions | Great for malls, hotels, and indoor spaces to boost sales. |
These signs are easy to see at night because they light up. They also make your business look professional and trustworthy. Since they are always visible, they are a budget-friendly way to advertise.
Applications of Lightbox Signs in Business
Lightbox signs are used in many industries to show messages and brands. Stores use them to show sales or their names. Restaurants use backlit signs to show menus or deals. Hotels and malls use them to improve their image and guide visitors.
LED lightbox signs are becoming more popular because LED technology saves energy and lasts longer. Businesses that care about the environment like these signs. A study by the OAAA found 88% of adults notice outdoor ads, and 80% take action. This makes lightbox signs great for getting customers and increasing sales.
Designing Acrylic Signs for Light Boxes
Key Design Elements: Fonts, Graphics, and Layout
When making a lightbox sign, focus on three things: fonts, graphics, and layout. Fonts should be simple and easy to read from far away. Bold and plain fonts work best because they are clear. Avoid fancy fonts that might confuse people.
Graphics help catch attention. Use high-quality images to make your sign look nice. UV-printing can create sharp and long-lasting pictures. Keep the design neat and avoid too much detail. A short message with few words is easier to understand.
The layout connects everything. Place text and pictures in smart spots to guide the viewer’s eyes. Important details should go at the top or center to stand out. Test your design by looking at it from different angles and distances to make sure it works well.
Choosing Colors and Finishes for Acrylic Signs
Colors and finishes are important for your lightbox sign. Pick colors that match your brand. Bright colors like red, blue, or yellow stand out when lit. Warm colors feel friendly, while cool colors like blue or green look professional. Make sure your colors match your brand style.
Finishes give your sign a special touch. Glossy finishes look shiny and modern, while matte finishes reduce glare and look smooth. To keep your sign looking good, add protective layers to stop fading. This keeps your sign bright and clear, even under strong lights.
Lighting makes your colors pop. LED lights save energy and shine evenly. They work great with acrylic signs, keeping colors bright all day and night. By choosing the right colors, finishes, and lights, your sign will look amazing.
Customizing Dimensions for Your Lightbox
Picking the right size for your lightbox is very important. Think about where your sign will go. Big signs with bold letters are better for busy areas. If space is small, choose a smaller sign that still shows your message clearly.
The way the lightbox is built also matters. Things like lamp placement and spacing affect how bright your sign looks. Edgelit designs spread light evenly, and closer lamps stop dark spots. These details make sure your sign shines the same everywhere.
Measure your space carefully before deciding on the size. A custom lightbox that fits perfectly will look better and work well. By focusing on these details, you can make a lightbox sign that is useful and eye-catching.
Materials and Tools for Acrylic Lightbox Signs

Types of Acrylic Sheets and Their Uses
Acrylic sheets are key for making lightbox signs. They let in 92% of light, making signs bright and clear. Acrylic is lighter and stronger than glass. It doesn’t break easily, so it’s great for indoor and outdoor use. Its smooth, shiny surface makes signs look professional and stylish.
There are different types of acrylic sheets for various uses. Clear acrylic is good for basic signs. Frosted acrylic spreads light softly, creating a gentle glow. Colored acrylic adds style and matches your brand’s look. Pick the type that fits your design and lighting needs best.
Essential Tools for Cutting and Shaping Acrylic
You need the right tools to cut acrylic sheets. Use a utility knife for thin sheets. For thicker sheets, use a fine-toothed saw like a jigsaw. Clamps hold the sheet steady while cutting, keeping it safe and accurate. Masking tape marks lines and protects the surface from scratches.
Lubricants like water or soap help blades move smoothly. They also keep blades cool while cutting. Work on a stable surface like a mat or plywood to protect your workspace. Always wear gloves and goggles to stay safe from sharp edges and flying pieces.
Adhesives and Fasteners for Assembly
Adhesives are important for putting signs together. Strong adhesives, like Loctite, make assembly faster and neater than screws. They also prevent rust, making signs last longer. Double-sided tape works for parts you might need to move later.
For extra support, use lightweight materials like aluminum with adhesives. This keeps the sign strong without making it heavy. By using the right adhesives and fasteners, you can build a durable and professional-looking lightbox sign.
Lighting Parts for Lightbox Signs
Lighting parts are key to making your lightbox sign shine. They keep your sign bright and easy to see, even at night. Picking the right lighting parts makes your sign look better and work well.
Kinds of Lighting Parts
LED modules are the top choice for lightbox signs. They last long, save energy, and are cost-friendly. These modules give steady brightness, making your sign look neat. Built-in LED spacers spread light evenly, so there are no dark spots.
Other choices include fluorescent bulbs and neon lights. Fluorescent bulbs are cheap but use more energy than LEDs. Neon lights give a vintage style but need more care. LEDs are the best for modern signs because they are strong and save power.
Important Features to Check
When picking lighting parts, check these features:
Feature | Details |
|---|---|
Brightness | 1700 lumens |
Efficiency | Saves energy and lasts long |
Safety Approval | UL-listed for safety and quality |
Module Design | LED spacers for even lighting |
These features make sure your sign is bright and safe. UL-listed parts follow strict safety rules, so you can trust them.
Tips for Setting Up
Setting up lighting parts needs careful planning. For big projects, hire an electrician to do it right. Always follow the maker’s instructions to avoid problems.
💡 Tip: Pick LED modules for bright and energy-saving lights. They make your sign stand out and cut power costs.
By using good lighting parts, your sign will grab attention and last a long time.
Preparing for Assembly
Cutting and Shaping Acrylic Sheets
To cut acrylic sheets, you need the right tools. First, mark your measurements with masking tape to avoid scratches. Use a utility knife to score thin sheets along the lines. For thicker sheets, use a fine-toothed saw or jigsaw. Always secure the sheet with clamps so it doesn’t move while cutting.
For detailed designs, try CNC acrylic cutting. This uses a computer to make exact cuts and engravings. Heat bending softens the acrylic for smooth curves. Thermoforming uses molds to shape the acrylic into unique forms. These methods give your sign a neat and professional look.
🛠️ Tip: Wear safety goggles and gloves to stay safe from sharp edges.
Applying Designs to Acrylic Panels
Adding designs makes your acrylic sign look better. Gather supplies like adhesive vinyl, application tape, and paint. Measure the panel and create a template to fit its size. You can paint the back of the panel to make the design stand out.
Place your design on the template and adjust it carefully. Cut the vinyl design, remove extra material, and stick it to the acrylic using application tape. Press firmly to make sure it sticks well. This process makes your sign look clean and attractive.
🎨 Note: Painting the back of the acrylic adds depth to your design.
Preparing the Lightbox Frame and Lighting
A strong frame keeps your sign steady and well-lit. Cut wood or aluminum to the size you need. Use 10mm plywood and strengthen the corners with angled cuts. Add grooves to hold the backboard and acrylic sheet in place.
Attach LED strips to the sides of the frame for even lighting. LED modules save energy and spread light evenly. Mark a two-inch border on the frame to guide where the lights go. Cover three sides with fabric to spread the light better. Place the light source above the box for the best brightness.
💡 Tip: Choose UL-listed LED strips for safe and bright lighting.
Step-by-Step Assembly and Installation
Attaching the Acrylic Sign to the Lightbox
To attach the acrylic sign, align it with the lightbox frame. Make sure it fits into the grooves or slots evenly. This keeps the panel flat and secure. If your lightbox has clips or brackets, fasten them tightly around the edges. These hold the acrylic in place and stop it from moving.
For adhesive setups, spread a thin layer of strong glue, like silicone, on the frame edges. Press the acrylic panel firmly onto the frame and hold it for a few seconds. Let the glue dry completely before moving on. This method gives the sign a smooth and polished look.
🛠️ Tip: Use a level to check if the panel is straight. This helps your sign look neat and professional.
Installing and Securing Lighting Components
Setting up the lighting parts is important for even brightness and safety. Look for tracks or mounting spots in the frame for LED strips or modules. Attach the lights securely and space them evenly to avoid dark areas.
Follow these steps for safe installation:
Test wires with a voltage tester to ensure no live current.
Wear rubber gloves to protect against electric shocks.
Use the right wire size to prevent overheating.
Mount LED strips on stable spots inside the frame.
Connect wires correctly, following the maker’s instructions.
⚡ Safety Note: Always check the power is off with a voltage tester before touching wires. This prevents accidents.
After installing the lights, test the setup to ensure it works. Use cable ties or clips to secure loose wires and keep the inside tidy.
Testing the Lightbox Illumination
Testing the lightbox is the last step before mounting it. Turn on the power and check the brightness. Look for dark spots or overly bright areas. Adjust the LED strips if needed to make the light even.
Check the light color too. Warm white feels cozy, while cool white looks modern. Make sure the light matches your sign’s design and improves its visibility.
💡 Pro Tip: Test the lightbox in both daylight and dim conditions. This ensures it looks good in all settings.
If everything looks right, your lightbox is ready to be mounted. This completes the process and prepares your sign to stand out and promote your brand.
Mounting the Lightbox Sign
Putting up your lightbox sign is the last step. A good setup keeps it safe and easy to see. Follow these simple steps to mount your sign the right way.
Step 1: Pick the Best Spot
Find a place where people will notice your sign. Busy areas like store entrances or walls are great. Make sure there’s a power outlet nearby for the lights. Measure the space to ensure the sign fits well.
💡 Tip: Place the sign at eye level or a bit higher for better visibility.
Step 2: Get the Surface Ready
Clean the area where you’ll mount the sign. Dirt or bumps can make the sign fall. Use a level to check if the surface is flat. Make sure the wall is strong enough to hold the sign’s weight.
Step 3: Mark Where to Mount
Hold the sign up to the wall and mark spots with a pencil. Use a tape measure to center and align it. Double-check your marks to avoid mistakes.
Step 4: Drill Holes and Add Hardware
Drill holes where you marked using a drill. For drywall or concrete, add wall anchors. Attach brackets or hardware to hold the sign securely.
🛠️ Safety Note: Wear goggles while drilling to protect your eyes from dust.
Step 5: Attach the Lightbox Sign
Lift the sign and line it up with the hardware. Use screws or bolts to secure it tightly. If it hangs, use strong chains or cables to hold it safely.
Step 6: Plug in the Power
Connect the sign to a power source. If it needs hardwiring, ask an electrician to help. Test the lights to make sure they work.
Step 7: Make Final Fixes
Check if the sign is straight using a level. Adjust it if needed to make it look perfect. Once it’s set, your lightbox sign is ready to shine.
⚡ Pro Tip: Check the hardware often to keep the sign secure over time.
By following these steps, you can safely install your lightbox sign. A well-mounted sign makes your brand stand out and lasts a long time.
Maintenance and Troubleshooting for Acrylic Lightbox Signs
Cleaning Acrylic Signs Safely
Clean acrylic signs to keep them bright and neat. Dust and dirt can make them look dull, especially on lit areas. Use a soft microfiber cloth to gently wipe the surface. Avoid rough materials that might scratch the acrylic. For tough stains, mix mild soap with water. Use a damp cloth to clean, then rinse with water. Dry the sign with a lint-free towel.
Do not use strong chemicals like ammonia or alcohol cleaners. These can harm the acrylic and make it less clear. Cleaning regularly keeps the sign looking good and lasting longer. Clean your lightbox signs every few weeks for the best results.
🧼 Tip: Test cleaning products on a small hidden spot first.
Replacing or Repairing Lighting Components
If your lightbox dims or stops working, check the lights. Follow these steps to fix or replace them safely:
Turn off the power to stay safe.
Open the lightbox and remove dust or dirt.
Take out old bulbs or LED modules carefully.
Put in new lighting parts and secure them well.
Check wires and connections for damage or looseness.
Test dimmers or timers to ensure they work.
Turn on the lights to check for even brightness.
Tighten all parts to keep them steady.
If problems continue, call a professional for help.
Replacing lights keeps your sign bright and working well. Regular checks help find and fix problems early, saving money.
⚡ Safety Note: Wear rubber gloves and use a voltage tester for safety.
Addressing Common Issues with Lightbox Signs
Lightbox signs may have problems like uneven light, flickering, or faded colors. Uneven light happens when LEDs are spaced wrong. Move them to fix the brightness. Flickering lights mean loose wires or bad connections. Tighten wires or replace broken ones to solve this.
Faded colors come from too much sunlight or bad materials. Use UV-protected acrylic and coatings to stop fading. Regular care and good materials keep your sign bright and professional.
💡 Pro Tip: Check your lightbox often to fix small issues early.
Tips to Make Acrylic Signs Last Longer
Taking care of your acrylic sign helps it last longer. Follow these easy tips to keep it looking good and working well.
Keep It Out of Direct Sunlight
Too much sunlight can fade or discolor your sign. Place it in shaded spots or add UV-protective coatings to block harmful rays. This is very important for outdoor signs.Clean Often and Carefully
Dust and dirt can make your sign look dull. Use a soft microfiber cloth to clean it every week. For tough stains, mix mild soap with water and gently wipe it. Don’t use rough materials or strong chemicals that might scratch the surface.Check for Damage Regularly
Look for cracks, chips, or loose parts on your sign. Fix small problems quickly to stop them from getting worse. Tighten loose screws and replace broken parts to keep it strong.Be Gentle During Installation
When putting up your sign, make sure it’s mounted securely. Use the right tools and follow the maker’s instructions to avoid cracks or misalignment.Avoid Extreme Weather
Very hot or cold temperatures can warp or crack acrylic. Keep your sign in a stable environment. If it’s outside, use weather-resistant materials to make it last longer.Upgrade Old Lights
If your sign has lights, switch old bulbs for LED ones. LEDs are brighter, save energy, and don’t overheat, which protects the acrylic.
By following these steps, your acrylic sign will stay in great shape and work well for a long time.
💡 Pro Tip: Check your sign often to find and fix small problems early. This keeps it looking its best.
Acrylic signs for lightboxes help make your brand noticeable. They are strong, look modern, and glow brightly, making them great for businesses. By designing carefully, using good materials, and installing them right, you can make a sign that grabs attention and lasts long. Follow this guide to create a lightbox sign that stands out and impresses people. Your hard work will result in a professional and attractive display.
FAQ
Why are acrylic signs better than glass for lightboxes?
Acrylic signs are lighter and tougher than glass. They don’t break easily and work well outdoors. Their shiny surface looks professional. Acrylic lets more light through, making lightboxes brighter and more useful.
💡 Tip: Pick acrylic for strength and better light spreading.
How do I pick the right size for my lightbox sign?
Measure the area where the sign will go. Use big signs with bold letters for busy spots. For smaller spaces, choose compact designs. Make sure the sign fits and is easy to see.
📏 Pro Tip: Try mockups of different sizes before deciding.
Can I set up a lightbox sign by myself?
Yes, you can install it if you follow instructions. Use proper tools, secure the frame, and connect lights correctly. For tricky wiring, hire an electrician to stay safe.
⚠️ Safety Note: Always turn off power before touching wires.
How often should I clean my acrylic lightbox sign?
Clean your sign every few weeks to keep it bright. Use a soft cloth and mild soap to remove dirt. Don’t use strong cleaners that might harm the acrylic.
🧼 Tip: Cleaning often keeps your sign looking great.
What should I do if my lightbox sign stops working?
Check the lights and wires first. Replace broken LEDs or fix loose wires. If it still doesn’t work, call a professional. Regular care helps avoid these problems.
⚡ Pro Tip: Keep extra LED lights for quick fixes.
See Also
Creating Acrylic Light Box Signs for Business Growth
The Complete Guide to Acrylic Light Box Signage Success
Personalized Acrylic Light Boxes: Design, Materials, and Setup
